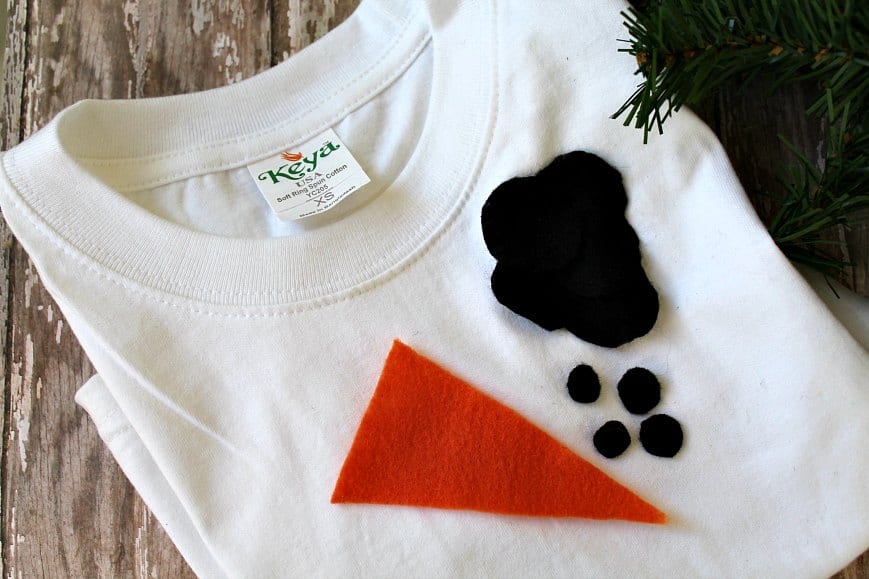
I have got the cutest DIY project for you today. It's festive, ridiculously easy to put together and the kids are sure to love it. A No Sew Snowman shirt! Look how amazing it is:
How fun would this shirt be to pull out of the Christmas boxes every year? I've got a shirt for my oldest, now I've got to make one for my youngest!
Here's how you can put together the No Sew Snowman Shirt:
1. Begin by ironing out your shirt as well as the felt sheets. This step is optional, but it may help you apply your snowman face. If you choose to iron, just use a low heat and no steam.
2. Cut out the shapes you will need to create the snowman face. I cut out a large triangle for a nose using the orange felt. Then, I cut out a few large circles from the black fabric to use as the eyes and buttons. For the mouth, I cut out smaller but uniform black circles.
3. Add a small dab of fabric glue (it will help the felt adhere better than hot glue, plus it will keep the pieces together in the washing machine) to the back of the felt pieces. Assemble the face of your snowman. Press the two large circles for eyes first, then the carrot nose, then the coal mouth. Finish by adding a few large buttons under the mouth.
4. Hold the felt pieces in place until secure. Try hanging your shirt on a hanger so it has plenty of space to dry and not be bothered.
5. Once dry, your shirt can be worn and enjoyed! Wash on a gentle cycle and never machine dry. Turn inside out before washing and your shirt should last for seasons to come!
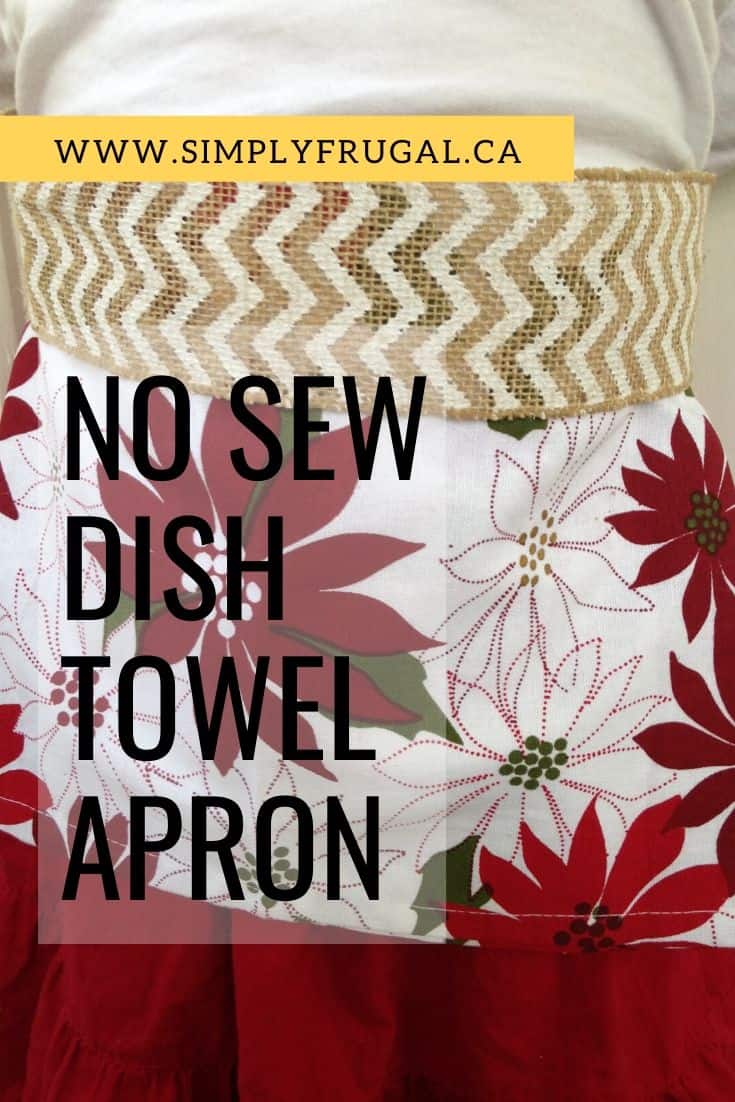
Today’s homemade gift idea can’t get much simpler. So, I happen to think it would make a perfect last-minute gift! Simply head to your nearest dollar store, pick up a fancy dish towel and some ribbon and get started!
Here’s how to create a No Sew Dish Towel Apron that any chef would love to receive:
Begin by folding your towel into the size of apron you want. You can fold it down to about 8 inches by 8 inches square for a child, or simply fold the towel in half for an adult. If you wish for a longer apron, manipulate the fabric to get the shape you wish. For the sample you see here, I folded the towel once in half, then folded each end in about 2 inches.
Apply a strip of iron on fabric tape OR fabric adhesive to the inside of your folded seams. Press and iron the towel if needed. The idea is to use the tape or adhesive to secure the shape of the towel.
Apply a length of adhesive tape or glue to the top of your towel. Press the length of ribbon into it. Press and iron if needed. The ribbon should now be adhered to the towel, leaving you two lengths on each side for tying.
Once your adhesive is dry or ironed in place, your towel can be used. Simply use the excess ribbon as ties, tying them behind your back to hold the apron in place.
I have got the cutest, last minute gift idea for you! Kids young and old will love this under the tree or in their stockings! Since I supply the printable tags for free, this will be a really budget friendly and quick idea to put together. Especially if you pick up your supplies at the dollar store!
Bath bombs are easy to make and are always well received as gifts. They’re made of ingredients that will make your bath water fizz and smell delicious by releasing essential oils. These Christmas Tree bath bombs can be made in just a few minutes, even by beginners! They’re also the perfect size for putting into organza bags to give as gifts over the holidays.
Add in the coconut oil and then the water a little bit at a time and combine to mix using your hands. You want it slightly dense but not soaked through.
Add in several drops of green food coloring and use your hand to thoroughly mix.
Spoon the mixture into the Christmas Tree mold filling each cavity about halfway. Use your fingers to press down.
Spoon the remaining mixture evenly into the cavities and continue to press down.
Set the Christmas Tree bath bombs in a cool/dry spot for 24 hours to allow them to set.
*Makes 6 Christmas Tree Bath Bombs
To use them, just drop a bath bomb into your warm bath water. Watch as it fizzes and dissolves before your eyes while releasing the essential oil.
This is such a simple gift idea that is inexpensive and a great way for kids to use their imaginations rather than grabbing for the electronics. Today I would love to share my Play Dough Gift idea…Candy Cane Play Dough!
You can make the Candy Cane Play Dough and give that as a gift… or you can fill a jar with the dry ingredients and let your recipients make the play dough themselves at home. Either way, I think it’s a fun and unique gift idea for kids.
Here’s how to make Candy Cane Play Dough:
INGREDIENTS
2 cups all purpose flour
1 cup salt
5-6 drops of peppermint essential oil (or 1/2 teaspoon peppermint extract)
1 Tablespoon vegetable oil
3/4 cup cold water
Red washable paint/watercolor
White glitter
DIRECTIONS
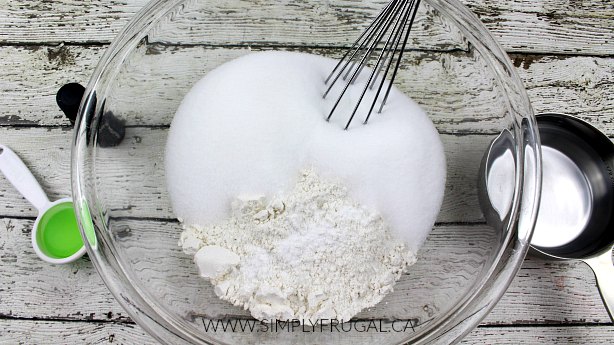
1. In a mixing bowl, whisk together the flour and salt.
2. Add the extract, oil and water and mix until well incorporated.
3. Remove dough from bowl and place on a flat, lightly floured surface. Knead until a soft play dough forms (this takes about 3-4 minutes).
4. Separate the play dough in half. Set aside one half and place the other in a medium mixing bowl.
5. Add the red paint/watercolor to the play dough in the bowl and mix until your desired color is achieved. I added about 2 Tablespoons of paint to get a rich red color.
6. Lay both colors of play dough out on your play surface and sprinkle with glitter. Enjoy making candy canes, peppermint “candies”, etc!
There you have it! A fun and frugal gift idea that kids are sure to enjoy! I’m excited to give it to my daughter, maybe we’ll get to enjoy drinking hot coffee on Christmas morning!
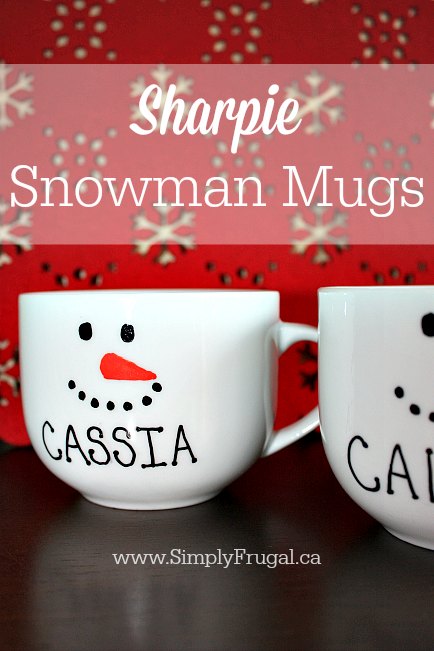
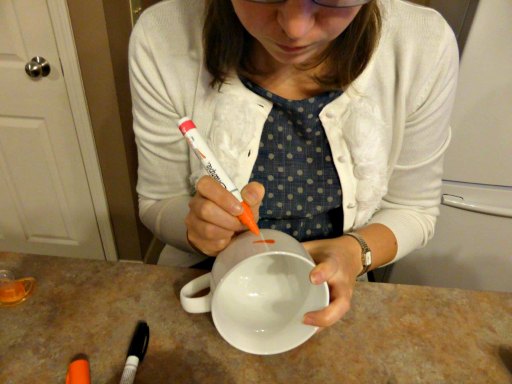
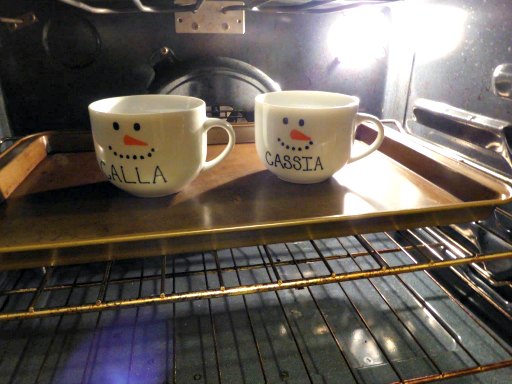
This year for Christmas, I wanted to create something personal and unique for our nieces. Especially since they have somewhat unique names themselves. I know what it’s like to have an unusual name and not be able to find my name personalized on anything in the stores!
This may not be a surprise to most of you, but I like easy projects. (Easy with a capital ‘E’.) If a craft project will take me longer than an hour to complete, I say forget about it. This Sharpie mug project is almost embarrassingly easy. Including the mug washing, drawing and baking, these mugs were finished in an hour. And the baking takes 45 minutes!
1. Head to your nearest dollar store and buy some plain white china mugs. Then hit up Michaels (use the 40% off coupon!) or a craft store that sells oil based paint pens. They must be oil based or the ink will rub off after use.
2. Wash the mugs in hot soapy water. Dry thoroughly. Clean the area you will be drawing on with rubbing alcohol.
3. Start drawing the snowman face. (Copy my finished pictures if you want.) If you make a mistake, the ink rubs off easily with rubbing alcohol and a cotton swab.
4. Once you’re satisfied with your drawings, place the mugs on a baking sheet. Then place the tray into a cool oven (placing a cool mug into a hot oven may crack your cup!), set the temperature for 350 degrees, and then bake for 45 minutes.
Note: Be sure to hand wash these mugs! Placing them in the dishwasher could result in the ink being removed.
There you go! World’s most simple, but fun craft project! One I’m sure someone on your gift list is sure to love!
Here are some other homemade gift ideas you may like: