Being generous doesn't have to break the bank. If you're on a tight budget, there are still some great ways to give to individuals or organizations. Here are some creative ways to give on a budget:
Purge for a cause
When you're purging your home of excess stuff, consider donating it to a local second hand store that uses the profits to give back to the community or an organization that you would love to support. We recently donated one of our couches to Gleaners who will then use the profits to help support their food and medical aid operations.
Give your time
Time is one thing most of us can find (at least a little bit of spare time) in our lives. Maybe you know of a family that is struggling. If they'll have it, spend a couple of hours cleaning their home so they have one less thing to worry about. Often the gift of time is more appreciated than monetary gifts.
Gather your friends
Don't have $100 to donate to that cause you'd love to support? Why not donate $10 then round up nine of your friends to donate $10 as well?
Donate stockpile items
I think I can safely assume that if you're a regular reader at Simply Frugal, you most likely have a stockpile that you've been building with coupons. Food banks and women's/men's shelters will gladly take your excess food and toiletries! Normally I only recommend taking advantage of the coupon deals that you will personally use (so you don't go over budget), but you may want to consider purchasing items with coupons with the intent of donating them. For example, you may not have any pets, but you know your local animal shelter would love the pet food you got for pennies using coupons.
Say Yes at the checkout
I'm sure you've run into this before. The cashier is scanning your groceries, then asks if you'd like to donate $1 to such and such charity. Next time you're asked, say yes! (If you feel as though you can support that particular charity.) You could make a point of doing so once a month. Local charities or fundraisers often place donation jars at the check out. Throw in your spare change, if may only be $0.50, but all that spare change can really add up.
What are your favorite ways to give on a limited budget?
So, you're running low on funds in your grocery budget for the month, but you still have a few meals that need to be made. You might be thinking that cooking a delicious meal on a budget might not be possible but, affordable family feasts are possible!
Here are 5 delicious budget friendly meals to help!
Roasted Chicken and Root Vegetables - While purchasing a whole chicken may be more costly upfront, the amount of meals you can get from one chicken can really help stretch your budget. The first night, you can enjoy slices of roasted chicken and delicious vegetables. The next night you could turn leftovers into a chicken pot pie. Finally, use the bones to create a tasty soup!
Refried Bean Quesadillas - Recommended by a reader over at the Simply Frugal Facebook page as a budget friendly meal, I found this tasty looking Refried Bean Quesadilla recipe that I'd love to try! Instead of using a whole bunch of cheese, which can get expensive, you can fill your quesadillas with beans! To make this meal even more budget friendly, here's a recipe for Homemade Refried Beans in the slow cooker!
Black Bean & Salsa Burritos - This is one of my personal made up recipes, but I happen to think it's a great budget saver and it's packed with protein!
Pulled Pork - This was another meal recommended by a Simply Frugal Facebook reader. She likes to buy cheap pork cuts when they go on sale for $1/lb. She roasts it then freezes it in bags in meal sized portions. The meals she enjoys creating with the pork are nachos and salad rolls with corn bread and coleslaw.
Pasta with White Bean Sauce - Pasta is cheap, especially if you stockpile it with coupons! I can't wait to try this recipe because not only does it sounds tasty, it also uses beans for protein instead of meat. Love that.
What are your favourite Budget Friendly Meals that come in handy when your grocery budget is running low?
Stephanie is looking for some advice! Can you help her out?
I’m looking for tips or advice please! Two jobs, shift work for both. I can’t seem to plan meals or find time to cook them, so I’m always eating in the go. I like to eat healthy, and try as much as I can, but that’s hard when you generally get 2 days off a month.
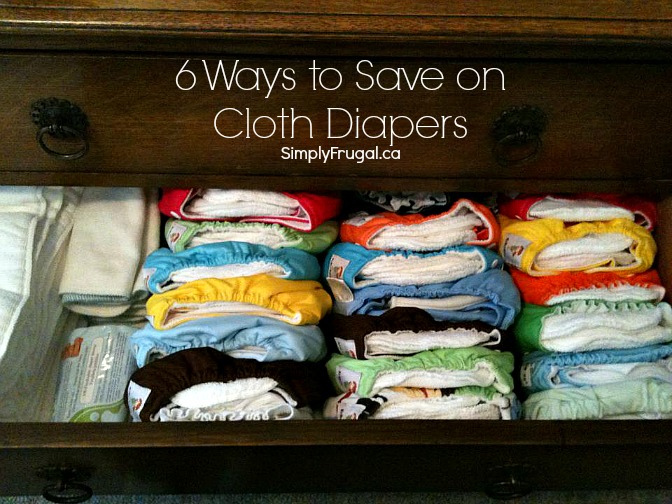
Building a cloth diaper stash can cost you a pretty penny, which makes it hard to consider using them in the first place. However, it is possible to build a great diaper collection on a budget! Here are some tips I learned while building our stash, that will help you to save big:
Buy used
Quite often, you’ll find someone selling their cloth diaper collection on sites like Kijiji and Craigslist. This is a great way to acquire an entire collection at a fraction of the cost.
Check those daily deal sites
I wanted to try a variety of different cloth diapers to see if I had any preference so I took advantage of a few deals on daily deal sites. I scored some AMP’s and a Baby Kicks diaper that I love. You might want to consider signing up for the email lists of sites like BabySteals and Sweet Baby Dealz so you know when cloth diapers are up for grabs!
Make your own
CheekyDiapers.com has a long list of great tutorials about making your own cloth diapers! Even if you have limited sewing skills, it could be quite easy to create your own stash! Sewing your own diapers seems to be becoming quite popular too, as I’ve noticed my local fabric store carries quite a good selection of cloth diaper fabrics.
Don’t buy name brands
If you want to save a bundle, stay away from the major brands such as Fuzzibunz, AMP, and bumGenius. The majority of my stash is made up of Kawaii diapers. Individually, Kawaii diapers cost about $7, compared to $20 or more for the brand name diapers. I even saved a bit more by purchasing a package deal (12 diapers)
Tell your friends and family
Make sure to mention to your friends and family that you’re going to be cloth diapering. A friend of mine gave me a couple of bumGenius diapers because she realized that cloth diapering wasn’t for her. I also received a wonderful cloth diapering “kit” (a diaper, bum cream, laundry detergent and a waterproof tote) from a friend as a baby gift because she knew I was intending on going this route.
Use prefolds/covers instead of AIO’s or One Size diapers
By going with the prefold and waterproof cover system over the All-in-One’s, you’ll save yourself a ton of money. But, I really recommend doing some research beforehand to determine the method that will suit your lifestyle best. I personally, wanted diaper changes to be as simple as possible so I knew prefolds and covers were not going to be for me. Though, now that I’m a bit more “experienced” prefolds and covers are more appealing!
Are you a cloth diaper user? What are your money saving tips when it comes to building a cloth diaper stash?
I love ice cream. So I especially think an Ice Cream Sundae party would be a pretty ideal way to have fun. You could even make it more frugal by asking guests to bring their favourite toppings!