Do you feel as though your grocery bill is starting to get out of control week after week?
Or maybe you have no idea how much you’re actually spending on groceries each week and you find yourself feeling really pinched by the end of the month?
In my opinion, the grocery bill is one of the easiest bills to manipulate. By simply taking the time to learn the money saving tactics that I have listed, you’ll be well on your way to lowering your grocery bill.
Read on to discover how to grocery shop like a money saving pro:
1. Learn the sneaky ways grocery stores get you to spend more.
Did you know that some of the “sales” you see from week to week are just sneaky tactics to get you to buy more?
From the sales, to the grocery cart size, to the layout of the store, grocery stores have learned the best ways to get their customers to spend more than they intended.
In this post, I’ve outlined in detail, several sneaky ways grocery stores get you to spend more.
2. You Need a Grocery Budget.
Having a grocery budget is crucial to lowering your grocery bill.
After all, if you don’t have a budget, you don’t know how much you’re spending or saving!
You need the guideline of a budget in order to help you improve your spending habits and to get you closer to your lifetime financial goals.
If you want to learn how to grocery shop like a money saving pro, meal planning is a must. Not only will it help you lower your grocery bill each week, you will regain so much sanity in your busy life.
By planning a weekly menu, you’ll be using what you already have on hand in your house, creating a specific grocery list and avoiding unnecessary trips to the grocery store.
Stockpiling, or the Buying Ahead Principle, or another way of terming it, “Buy lots when it’s on sale, so you never pay full price for the things you need”, is one of my favourite way to save grocery money in the long run.
Buying several of the same item when they’re on sale rather than buying one item not on sale, will save you heaps of money.
Another way to save money on your grocery bill is to use a variety of different brands.
When I need a certain product (tomato sauce for example) I always look at all the brands available and choose the one with the best value by taking into account the price and size.
I’ll admit though, sometimes brand does matter to our family. It’s Heinz ketchup or nothing at all!
6. Shop at More Than One Store.
By shopping at a couple of different stores, you have the potential to drastically reduce your grocery bill each week.
If you’re shopping at only one store, you’re most likely paying full price for many items that could very well be on sale at the store just down the road.
Say for example, you need some cheddar cheese. If you bought it from the one grocery store that you always shop at, you’re paying $7.99. But if you drove 2 minutes to Shoppers Drug Mart they have it on sale for $2.99. You just saved yourself $5.00 for two minutes of your time.
7. Look for Markdowns.
Grocery stores mark down items they want to sell quickly.
Sometimes the food is about to hit its best before date. One of the places I’ll always look for markdowns, is the meat department. Any markdowns are about to expire, but I know I can use it that night or freeze it for a later date!
Other times they are discontinuing a particular product and just want to move them to make room on the shelves for something else.
8. Buy in Season.
Buying fruits and vegetables in season, or when they’re at their prime and grown closer to home, can cut a big chunk off your grocery bill each week.
When you buy fruits and vegetables in season, you tend to get the best taste too!
I’m a firm believer that coupons can save you quite a bit of money on your grocery bill each week.
I know many of you already use coupons so you know the benefits.
But perhaps others of you aren’t sure how to use coupons effectively, don’t see the benefit in using them or don’t know where to find them. Here’s a series I wrote about How to Coupon in Canada that should be beneficial!
One thing I’ve been implementing more these days, is using cash-back apps like Checkout 51, Eclipsa and Caddle. These work well for a busy life.
10. Price Match to Save Money and Time.
Try price matching to find a really effective way on how to grocery shop like a money saving pro!
Many stores in Canada offer a price match guarantee. They’ll match the advertised sale price of any competitive retailer as long as it is the exact same item and in the current sale period.
They’ll even accept coupons on top! 🙂
If you’ve been wondering how to grocery shop like a money saving pro, I hope that this post gave you hope and a starting point! By implementing the tips provided, you should start to make headway with saving on your grocery bill.
There’s nothing more satisfying than saving money on something that you have to buy on a regular basis, especially when it can be a large percentage of your monthly income!
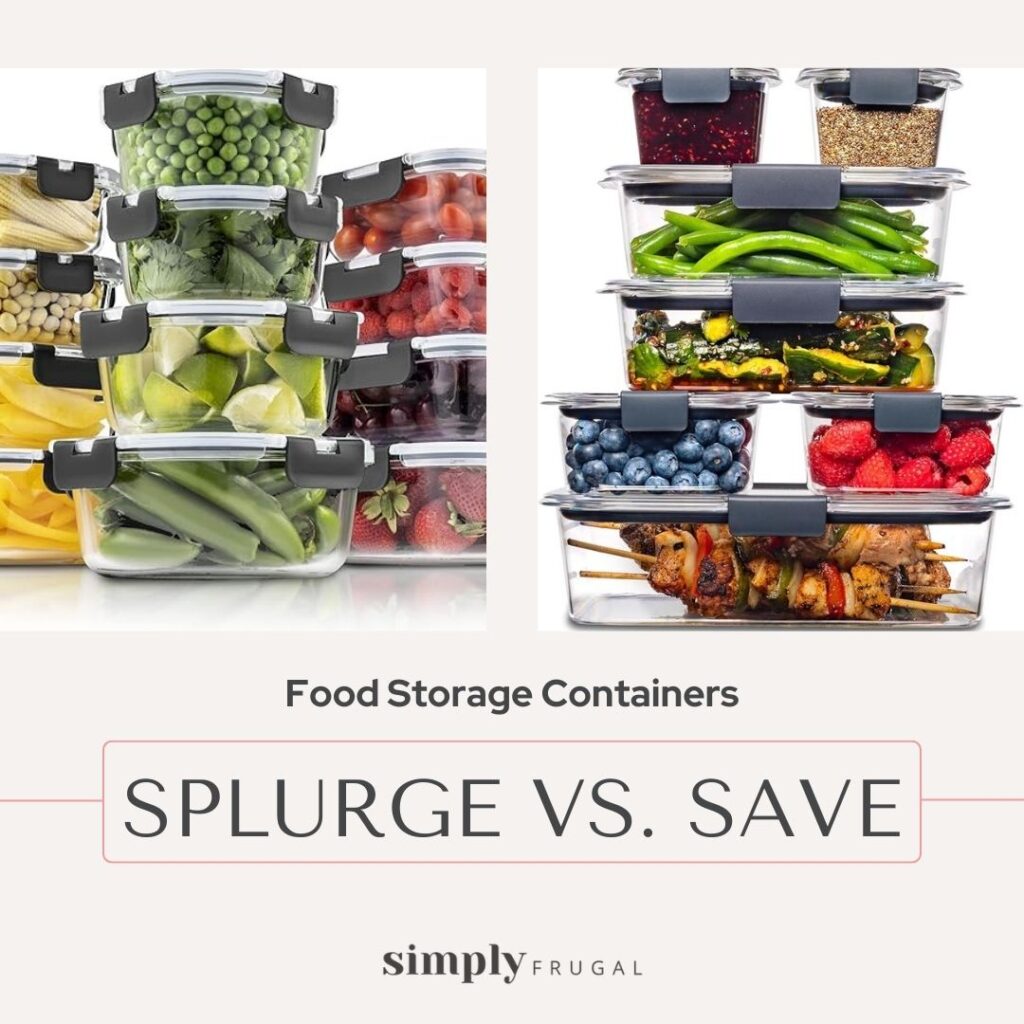
Are you ready for another round of Splurge vs. Save? Like last time, I’ll feature two similar products with good reviews, but one is the ‘splurge’ version and the other is the ‘save’ version.
Let’s get on with it shall we? This week is food storage containers. One is a familiar name brand, while the other may not be as familiar. Before reading further, can you guess which is which?
If you guessed that the ‘save’ version is on the left and the ‘splurge’ version is on the right, then you are correct!
Here are the links to shop them both if you are interested:
Organizing your home on a limited budget? These inexpensive organizers and storage solutions are sure to help.
These 12 Cheap Organizers Are Very Useful
In a world where clutter feels like it’s taking over and chaos is always knocking at the door, staying organized is key. But let’s be real, a lot of the fancy organizing stuff out there can cost a pretty penny. That’s where cheap organizers swoop in and save the day!
They might not break the bank, but they sure know how to tackle clutter in clever ways. Whether you’re living in a small apartment, a bustling family home, going for budget-friendly organization can be a game-changer for everyday life.
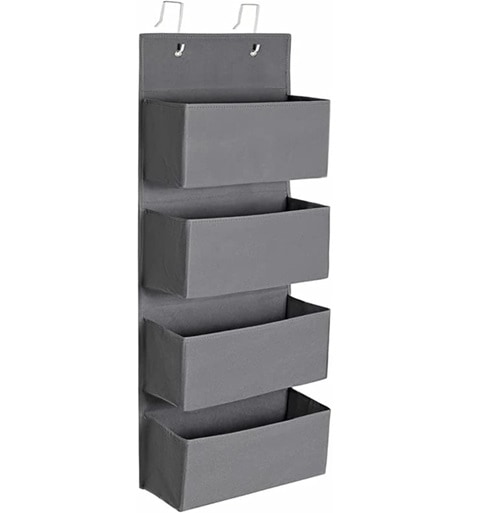
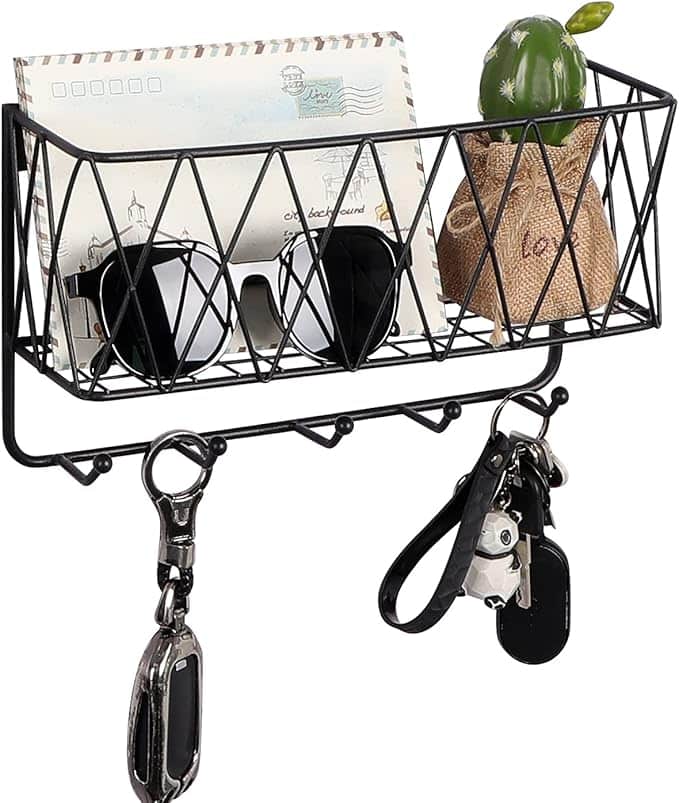
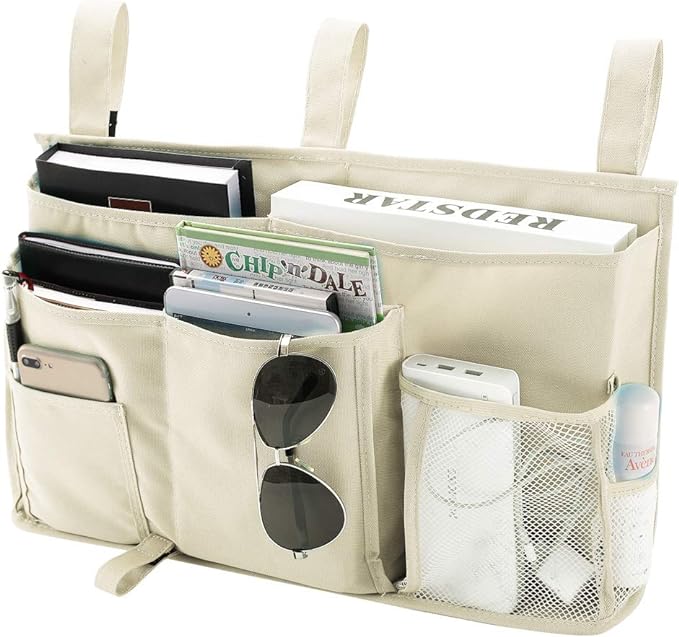
So, let’s dive into the world of cheap organizers, where practical meets affordable. Below, you’ll find a list of 12 cheap organizers on Amazon you can get for $25 or less.
I think one of these over the door organizers would be perfect for those kids who love knick knacks! Or for holding baby supplies. The option are endless, really. See it on Amazon.
We have something like this in our garage to wrangle the mop and brooms and I love it! This one from Amazon looks even better than what we have. I like that it has small hooks for hanging other small things! See it on Amazon.
If you have tea drinkers in your home, this tea bag organizer is going to be so nice to have! Say goodbye to stacking boxes that you have to individually move to get to the flavour you really want! See it on Amazon.
If you are short on space in your closets, these pant hangers could free up a lot of space for you! There are ones especially for skirts too. See it on Amazon.
This is advertised as a shoe organizer, but I think this you could store so many different things in one of these! May hair care, toys, gift wrapping supplies, office supplies and so much more! See it on Amazon.
This organizer would make a great addition to any entryway or kitchen. Use the hooks to keep track of car keys, spare keys, and other small items, and use the main compartment to keep track of your mail. See it on Amazon.
I have these all over our house! I’ve got them in our bathroom drawers, kitchen, the girls’ craft desk… they are so good! These are interlocking and I find they slide around less than ones that aren’t interlocking. See it on Amazon.
This is the first time I have seen one of these, but instantly I knew it could be very useful! My youngest has a bunk bed in her room and I like that she could have a place to put her water bottle, books and knick knacks. See it on Amazon.
I have a couple of these in our fridge. One holds yogurt cups and the other holds apples/oranges. I love that these ones have removable dividers, making them great for organizing snacks in the pantry. See it on Amazon.
These 2 tier under sink organizers are brilliant! I have one under our kitchen sink and one in each of the bathrooms! Highly recommend! This is a two pack on sale! See it on Amazon.
How amazing would these be for easy access of all the water bottles and travel mugs? No need to take everything out just to get the bottle you’re wanting. See it on Amazon.
Want to see more of my organization picks from Amazon? Visit my Amazon storefront to see more than 50 recommendations! (Not every item is under $25 though.)
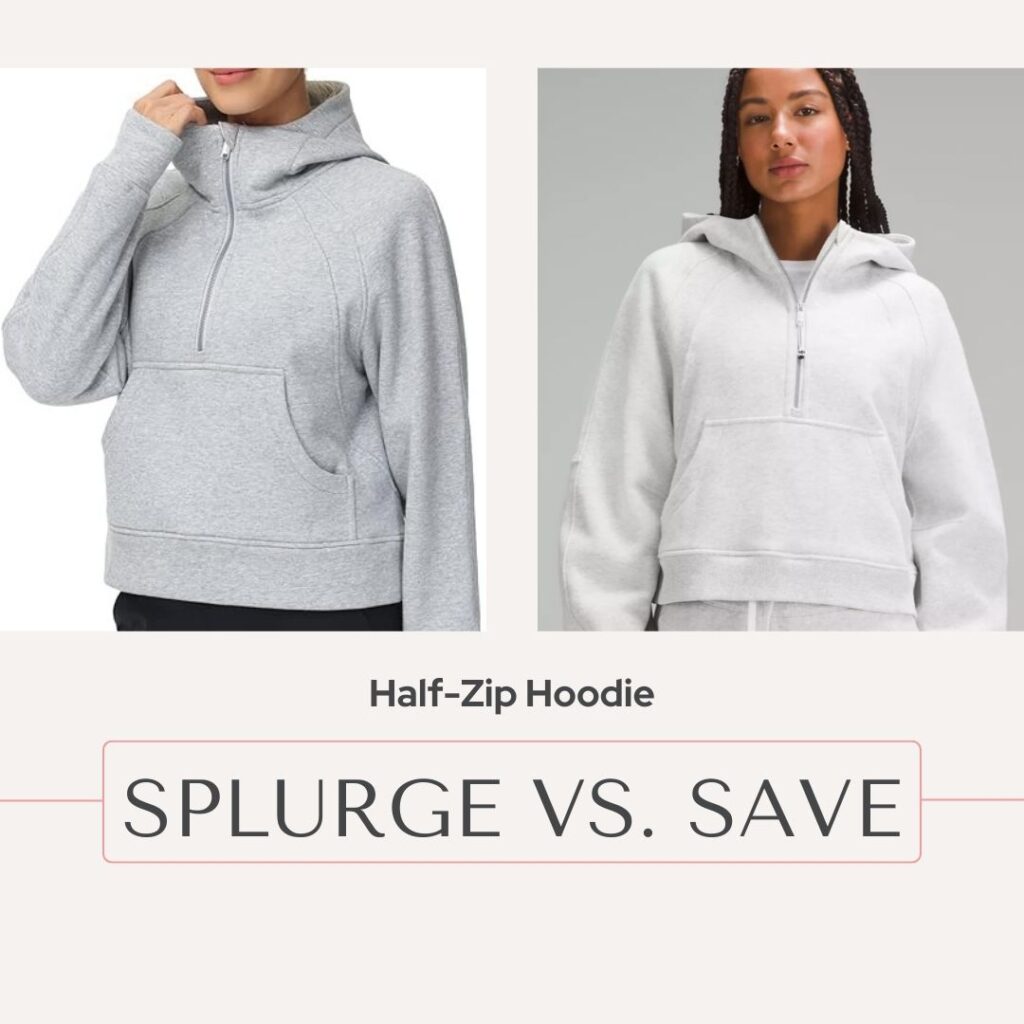
I thought this would be a fun new feature to introduce to Simply Frugal! The idea is that each time, I’ll feature two similar products, but one is the ‘splurge’ version and the other is the ‘save’ version.
First up, is the popular Lululemon Scuba hoodie and an alternative from Amazon.ca. Before reading further, can you guess which is which?
If you guessed that the ‘save’ version is on the left and the ‘splurge’ version is on the right, then you are correct!
Here are the links to shop them both if you are interested:
You know planning a menu is a good thing, but sometimes it only feels like another chore to cross off the to-do list. Well, end that once and for all by creating a rotating menu plan!Put your menu plan on autopilot!
How to put menu planning on autopilot:
I have not been feeling the love for menu planning for quite some time now. That makes me sad because without a menu plan, our meal time is definitely not what it should be. I’ve been resorting to quick prep meals (think frozen pizza, pasta with a jar of sauce poured over top and grilled cheese & tomato soup…) Not good! Between picky palates and no desire to cook, menu planning took a real nosedive in the last year or so. On the other hand, the grocery stores were probably quite happy, because I was spending more since I had no plan. 🙂
That brings me to today. I’m pleased to say, I’ve found a system that works for me! Actually, I’ve put menu planning on autopilot! It initially took a little bit of work upfront (still only 4 steps!), but now we’re smooth sailing and enjoying meals we love.
Step 1: Brainstorm
This part took me the longest. I sat down one afternoon and wrote down all the meals we like to eat. Our family favourites. My goal was 60 meals, but I quickly realized that was a lofty goal. In the end, I came up with 40 meals. Enough for 8 weeks of eating when I allot 5 meals a week. I like to leave 2 days free for last minute events, trying out a new recipe and Sunday dinner at my parent’s house.
Here are the meals that made the rotation. Keep in mind that they must be simple, enjoyed by all family members and not require any weird ingredients:
Most of these meals can be made with pantry staples, which are easy to stock up on when they’re on sale.
Step 2: Write all recipes on index cards
Now, once I picked all 40 meals, I wrote each meal down on an index card. Sometimes I wrote the entire recipe (if it was not found online or in a cookbook). Other times I wrote the name of the meal and where the recipe could be found (Pinterest, page 3 in a cookbook…etc.) I also wrote down side suggestions and any adjustments I like to make to the recipe.
Step 3: Place them all in a recipe box/binder
Next, I placed all of the index cards in an empty recipe box that I had, in no particular order. You could place the index cards in a binder with protective sheets instead, but I liked the idea of a recipe box.
Step 4: Pull out a week’s worth of meals and place in front
Here’s where the autopilot comes into play. Since I’m only choosing 5 meals a week, I pulled out 5 random index cards and placed them in the front of the box. I put a divider card behind the five recipes so I know when I’m done for the week. Once all 5 meals are made, I rotate those index cards to the very back of the recipe box.
Step 5: Repeat Step 4 over and over!
On Sunday, when I pull out the 5 meals for the week, I also create my grocery list. I write down everything I don’t already have in the pantry/fridge/freezer.
Now, you could take this a step further and look at your store flyers first to determine which index cards you should pull out for the week according to what’s on sale. For example, I may not want to make the Balsamic Beef Roast this week because I don’t have one in the freezer and I don’t see a sale at any of my local stores. However, pork chops are on sale so I’ll make the slow cooker BBQ Sauce pork chops instead.
Does that all make sense? This system has been life changing for me! I hope it might work for you as well if you’ve been struggling with menu planning.
Have you found a menu planning system that works for you?
We go through quite a few tortillas in our home. Between quesadillas, burritos, tacos, cream cheese & meat rollups and even pizzas, it feels like I’m always buying a pack of tortilla shells. That can really add up when a package costs $3 or more!
I knew it was possible to make homemade flour tortillas so I thought I’d try. Let me tell you, they are so easy to make and delicious! (Especially when you eat them when they’re still fresh and warm.)
Making homemade flour tortillas at home is really inexpensive and you most likely have everything in your pantry already. Flour, oil, baking powder and some salt. It will take a bit of time to cook your tortillas but it is still easy. If you think you will be making homemade flour tortillas regularly, you may want to consider purchasing a tortilla pressto make the process easier.
INGREDIENTS
3 cups Flour
1 tsp Salt
1 tsp Baking Powder
1/2 cup Vegetable Oil
1 cup Warm Water
DIRECTIONS
Step 1: Using a stand mixer, whisk dry ingredients until combined. Add water and oil and mix, scraping down the sides as needed until ball forms. Mix for two more minutes until dough is smooth.
Step 2: Turn out onto floured work surface and divide into 16 pieces and roll each into a ball. Allow to rest for 10 minutes. Preheat skillet over medium heat.
Step 3: Roll out each ball into a 6″ circle.
Step 4: Cook each tortilla on first side for about a minute, until brown spots form, then flip and cook other side for about 20 seconds. (Or use a tortilla press.)
Stack cooked tortillas and wrap in a clean towel to cool.
If not being used immediately, store in a zip lock bag.
These homemade tortillas were so easy and so much better than store bought. I’ll be making these on a regular basis over here. They’re perfect for snacks and for meals. What do you use tortillas for in your house?