Groupon has a maxi skirt Deal of the Day today! I love the maxi skirts I own because they’re comfortable like yoga pants, but make me look 100% more dressed up! 🙂
For only $19.99 you get your choice of maxi skirt in black, dark grey, grey, ruby, light grey, taupe and purple. These Maxi Skirts have:
Limit 1 per person. Ships within Canada only. Most orders are delivered within 12 business days from the purchase date. Ships from US. Price includes all duty and excise taxes. Applicable GST/HST tax added at checkout.
Are you ready to get your Spring Clean on? I am! For the next three weeks, I’m setting aside some time to complete one task a day to be on my way to a cleaner home. I’d love for you to join me!
As I go along, I’ll be purging items that I see we don’t need or use anymore. I’ll either put them in a donation box or try selling them on a local Facebook Buy & Sell site.
Get your FREE printable checklist
I’ve put together a printable checklist for you to reference over the next three weeks. If you’re interested in getting this free printable, sign up here for the Spring Cleaning email list! Along with the printable, you’ll receive an email each day with that day’s task and my end of the day update. There will also be useful articles for Spring Cleaning thrown in. At the end of the challenge, I’ll also be putting together an ebook that you will be able to get access to if you’re signed up for the Spring Cleaning email list!
Will you be joining me today? If so, leave a comment below!
I was actually excited to write this post because my laptop? It was filthy. As in, it sounds much quieter now that I cleaned the fan area. I’m also a much happier person now that my fingers aren’t flying over dust particles and my eyes see the actual screen rather that the finger marks from Sienna. 🙂
It’s actually not that difficult to get your electronics clean and germ-free. Once you’ve done it a few times, it becomes a task that takes only a minute or two to finish.
To clean your laptop, you’ll want to take it outside with a can of compressed air. Give the keyboard, the ports, the air vents and anywhere else dust is hiding, a few good blasts of air.
Next, you’ll want to take a pipe cleaner or a Q-tip and run it along each and every crack and through your ports to pick up any lingering dust. I have better luck using a pipe cleaner with the way my keyboard is set up.
Finally, take an electronic cleaning wipe and wipe down each surface. The keyboard, the trackpad and even the screen can be cleaned with an electronic cleaning wipe. (I’ve even used Windex on occasion.)
Now you should have a pretty clean laptop! Desktop computers can be cleaned the same way.
TABLETS AND CELL PHONES
We don’t own a tablet, but if your cell phone is anything like ours, you probably have plenty of smears and fingerprints! These devices are easy to clean. Take your can of compressed air, blast the ports then use and electronic cleaning wipe to clean the screens. If you have a case to go with your devices, make sure you clean those too! (I put our phone case in a sink of soapy water and let it dry before I put it back on.)
There you go! Not too hard right? How often do you clean your gadgets?
I sort of fell off the bandwagon today. 🙁 However I did get a couple of cupboards cleaned in the kitchen! You get to see my somewhat gross photos to prove it!
The before of where I keep my spices:
The after of where I keep my spices:
I threw out a few very expired spices, refilled my containers and added some spices to my grocery list. I also bought this spice rack because I’m really tired of shuffling around my spices to get to the one I need! I hope it does the trick!
This is the before picture of where I keep my oils and vinegars. Gross! There’s no after, but all the bottles are wiped down and put back in an orderly manner.
I even had a helper who was doing a wonderful job:
She was doing wonderfully, until she decided the oregano would be better on the floor. I guess she knew when mama was distracted 😛
I didn’t even get to the “pantry”section of the kitchen or the pots & pans section. Oh well, I did what I could!
How did you do with today’s task? Let us know in the comments!
Are you looking for a super easy, but really cute cake to make for Easter? Or an upcoming birthday? You've got to try this Peeps Sunflower Cake!
I've been seeing Peeps everywhere I shop lately, so I thought a cake made to look like a sunflower using Peeps would be really cute! To others, this cake may look like you spent a long time creating it, but it's actually really, really easy!
Are you ready to get your Spring Clean on? I am! For the next three weeks, I’m setting aside some time to complete one task a day to be on my way to a cleaner home. I’d love for you to join me!
Task 13
Clean/organize kitchen cupboards. Empty each shelf and wipe clean. Throw out any expired/stale food items. Purge unnecessary items. Clean the tops of the cupboards too.
As I go along, I’ll be purging items that I see we don’t need or use anymore. I’ll either put them in a donation box or try selling them on a local Facebook Buy & Sell site.
Get your FREE printable checklist
I’ve put together a printable checklist for you to reference over the next three weeks. If you’re interested in getting this free printable, sign up here for the Spring Cleaning email list! Along with the printable, you’ll receive an email each day with that day’s task and my end of the day update. There will also be useful articles for Spring Cleaning thrown in. At the end of the challenge, I’ll also be putting together an ebook that you will be able to get access to if you’re signed up for the Spring Cleaning email list!
Will you be joining me today? If so, leave a comment below!
As I mentioned earlier, we only have three drawers in our kitchen. While it’s not a good thing for storage space, the lack of drawers is excellent when it’s time to clean!
Here are the before and afters:
Sienna did a good job of messing up the utensil drawer when she was “helping” me cook the other day.
The cutlery drawer basically looks the same, only less crumbs.
Finally, the drawer where I store the plastic wrap, tin foil and freezer/sandwich bags. I use the clothes pins for closing up bags once we’ve opened the to help keep the food fresher.
How did you do with today’s task? Let us know in the comments! How many drawers did you have to clean out?
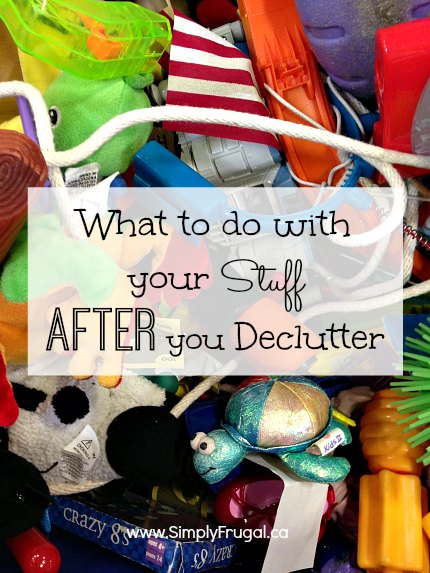
We live in a townhouse that is less than 1,000 square feet so it doesn’t take long before I’m feeling overrun by stuff. Especially with a toddler in the house. I usually have no problem adding items we no longer need to a pile in our room, it’s the getting it out of the house for good part that I’m not good at. Okay, I’m just lazy actually 😛 But once I get off my behind and do something with the stuff, I’m happy with the extra cash I can get from most items!
This post is for those of you who need help knowing what to do with your stuff after you declutter.
Facebook Buy & Sell groups
This is my current favourite method for getting rid of stuff. It takes less effort then some of the other options. I simply take a picture, upload it to the Facebook group, add a good description and my price. I usually have someone interested pretty quickly. Often times I have the buyer come to our home, but other times I meet them in town if I’m doing an errand anyways.
There are several Facebook buy & sell sites for our city, which I found by seeing friends that joined these groups. You may also have success in finding a group by doing a search within Facebook using the terms “your city” Buy & Sell, or some variation on those words.
Consignment
Consignment stores are another way I like to make some extra cash with my unwanted stuff. Consignment stores take your things and sell them for you and offer you a percentage of the purchase price, can’t get easier than that! So far I’ve only brought in clothes and shoes, but I’ve enjoyed stopping in at the store occasionally to pick up my cash! At the store I bring my clothing to, I earn 50% of the purchase price. I also have the option to pick up the clothes that never sold or allow the store to donate the items to a local thrift store. I opted for them to donate my stuff, because frankly, I don’t want to have to deal with my clothes again!
Our city has a twice yearly kid and baby stuff swap, which I’m sure happens in most cities around Canada. Individuals have the opportunity to rent a table for a small fee in hopes of selling all their unwanted baby/kids clothing, gear, and toys. Since I’m not ready to part with our baby things yet, I haven’t actually taken part in one of these. Though, I did shop at one when Sienna was a baby.
Our city also has an annual sporting goods swap that I’m sure other cities also do. These swaps are a great way to get rid of any old ski/snowboard equipment!
Kijiji/Craigslist
Because I’ve had great success with our local Facebook buy & sell sites, I haven’t ever used Kijiji or Craigslist to sell anything. But, these sites are still a great way to get rid of stuff and make some spending money! Sites like Kijiji and Craigslist are great because there are never fees to list your items.
The traditional garage sale is also a fun option to consider when it comes to selling your things. While they do take quite a bit of work, garage sales are a great way to sell things, especially if you have a large quantity of stuff. Every couple of years, my mom and I team up to host a garage sale with all our things. It’s fun because we spend the day together and help each other out!
Quite a bit of our stuff goes to thrift stores, especially when I don’t want to take the time to sell everything. Just drop off a box or two and I’m done with it! I like to take our things to a thrift store that directly benefits our community. So if this is important to you, make sure you research your local thrift stores to see what their community involvement is.
Trash/Recycle
Finally, if I’ve exhausted all other options, the final resting place for our things is the trash or recycling. But, this is only the case if the stuff in question is actually trash (not useable) or recyclable.
What is your favourite way to get rid of your unwanted stuff?
Are you ready to get your Spring Clean on? I am! For the next three weeks, I’m setting aside some time to complete one task a day to be on my way to a cleaner home. I’d love for you to join me!
Task 12
Clean kitchen drawers. Empty each drawer, throw out the garbage and purge any unnecessary items. Wipe out each drawer. Replace items in an orderly fashion.
Never have I appreciated our small home as much. I only have three kitchen drawers to clean! 🙂
As I go along, I’ll be purging items that I see we don’t need or use anymore. I’ll either put them in a donation box or try selling them on a local Facebook Buy & Sell site.
Get your FREE printable checklist
I’ve put together a printable checklist for you to reference over the next three weeks. If you’re interested in getting this free printable, sign up here for the Spring Cleaning email list! Along with the printable, you’ll receive an email each day with that day’s task and my end of the day update. There will also be useful articles for Spring Cleaning thrown in. At the end of the challenge, I’ll also be putting together an ebook that you will be able to get access to if you’re signed up for the Spring Cleaning email list!
Will you be joining me today? If so, leave a comment below!
Today I managed to clean the microwave, stovetop and oven quite easily! The oven didn’t need a super duty clean because I recently did it. All I did on the stove top was take off the knobs to clean behind them. I threw the knobs into a sink full of soapy water.