While you may be tempted to use plain old garden soil for filling your containers, garden soil is actually not ideal (on its own) for container gardening. It's not ideal because having proper drainage for your container vegetables is necessary to the success of your plants. See, garden soil is much more dense than soil made specifically for containers. so, if you use only garden soil, water can pool around the roots of your plants, which causes them to drown because they're lacking oxygen. So having a lighter mix of peat moss, compost and vermiculite will allow water to drain properly, giving the roots proper oxygen.
Along with proper drainage, the main functions of a potting mix are:
To hold moisture and nutrients around your plant roots.
To allow enough oxygen for roots to be able to breath and not rot.
To provide proper support for your plants, protecting them from the elements. You don't want them to blow over from the wind!
If you want an easy way to give your plants the highest chance at success, you can simply head to your local garden shop and buy a bag or two of potting soil. But if you're looking for something that you can customize yourself, here's a basic potting soil recipe:
Basic Potting Soil
1 part peat moss 1 part compost 1 part vermiculite
Simply mix all the ingredients together in a large bucket, wheelbarrow or tarp. Just so you don't inhale too much dirt and dust, you should wear a mask during the mixing process.
You also might want to add some fertilizer based on the type of plants you want to grow in the pots, which is available at your local garden store. Speak to one of the helpful employees and they'll be sure to recommend something that will suit your needs.
Making your own marinara sauce for lasagna using fresh herbs and vegetables straight from the garden is a staple of authentic Italian cooking. The secret to a rich, flavourful red sauce is using ingredients picked at their peak ripeness. A “Lasagna Garden” in a container is a smart way to make the most of your space, letting you grow everything you need, even without a large backyard!
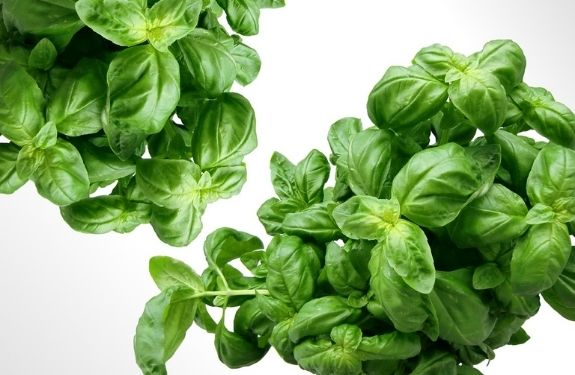
The star ingredient, the Roma tomato, thrives in container gardens. Known for its thick flesh and bold flavour, it cooks down beautifully into a rich sauce. Classic marinara also relies on fresh herbs like basil, thyme, oregano, parsley, along with garlic to bring everything together.
Use a large container
Plant your tomato in the center of a large container. The bigger, the better. Aim for a pot that’s at least 18 inches wide or holds a minimum of 10 gallons, since both tomatoes and basil grow quite large and need plenty of nutrients. Place thyme and oregano around the edges, where they can trail over the sides without taking up too much root space. Parsley benefits from a bit more room, so plant it between the thyme and oregano to give it space to grow.
Use quality potting soil
The secret to a thriving lasagna garden starts with high-quality potting soil and the right added nutrients. Mix in a fertilizer, such as Miracle-Gro, to give your plants the boost they need to grow strong and healthy. Reapply the fertilizer about every three weeks by adding it to your watering can.
When you first plant your garden, water deeply until you see it draining from the bottom of the container. To make sure the moisture is reaching the roots, insert a stick into the soil and check how far down it’s wet. You’ll want the moisture to reach at least 6 inches deep. If it doesn’t, keep watering until it does.
Plant garlic chives
Growing garlic can be a bit tricky, especially depending on your climate. If it doesn’t thrive in your area, garlic chives are a great alternative. They offer a mild garlic flavour and their bright green stems add a fresh pop of colour to your sauce. Even better, they grow easily along the edges of a container.
Find sunlight
Make sure your lasagna garden gets at least six hours of sunlight each day. During especially hot summers, you may need to move your container into partial shade. Using planter wheels can make this easy, allowing you to shift your garden around to follow (or avoid) the sun as needed.
Enjoy your lasagna garden and happy container gardening!
I’m back with another video! This time it’s all about how to harvest basil. The way I show in the video will allow your plant to grow bushier, which means you should have plenty of basil leaves to enjoy all season long!
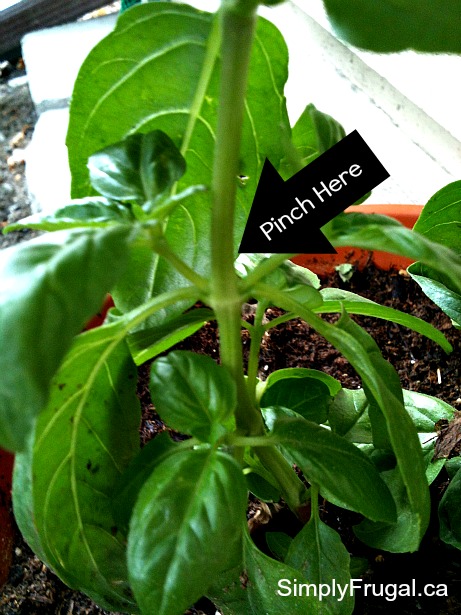
When harvesting basil, it’s best to pinch off a piece of the stem rather than just snipping off a leaf or two. Before you make your pinch, take a close look at your basil plant. Basil leaves grow in sets of two and the leaves are positioned opposite from each other on the stem. If you look at the point where the leaves meet the stem, you should see two sets of tiny leaves growing out of the junction. When you’re harvesting, it’s important to make your pinch directly above a set of leaves. By pinching off the main stem, you’re sending a signal to the leaves that it’s time for them to grow into branches, in turn, creating a bushier plant.
If you want to keep your basil fresh, place your freshly harvested stems in a glass of water rather than sticking it in the fridge. The basil will stay fresh in the water for a week or more. In fact, if you leave the stems in water they will eventually root and you can replant them in a pot or out in the garden!
Did you know you can grow potatoes in a container? It’s true! You can grow potatoes in a container and I’m going to attempt to show you how to do it with the video below. Growing potatoes in a container is ideal if you have limited gardening space like me!
Before you watch the video, I feel as though I should warn you about the lack of “greatness” to the video. I winged it the other night after Sienna had gone to bed. In other words, it’s not scripted, I didn’t fix my hair or get the leftover lasagna off my sleeve :P. And I gave some incorrect details in the video that I’ll write out correctly below the video. 🙂
There are a variety of containers you can use to grow potatoes, but I really like using a big plastic garbage can because it holds a lot. These potato grow bags also look amazing!
Here are the 10 steps to growing potatoes in a container:
Poke or drill several holes in the bottom of the garbage can.
Place your container in a spot that will get a lot of sun throughout the day.
Fill the bottom of the container with about 3 inches of soil.
Place 4 – 5 whole seed potatoes into the soil, making sure they’re evenly spaced.
Make sure the potatoes are completely covered by about two inches of soil.
Water the potatoes thoroughly.
Once the plants have grown to 7-8 inches in height, pour more soil into the container. The soil level should be about three inches from the top of the plants.
Water the plants as needed. (Everyday, unless the rain gets them good)
Each time the plants reach 7-8 inches above the soil level, pour more soil into the container, maintaining the soil at three inches from the top of the plants.
At the end of the season, dump out the contents of your container and dig all around the soil to get your potatoes!
Have you ever tried growing potatoes in a container?
Spring is here! And we’ve even got the nice weather to prove it! Gardening is a big passion of mine. I’ve got flower beds and containers all over the place. My job at a local golf course even has me working on flower beds 8 hours a day! Since we don’t have a house to call our own yet, my Mom lets me help her plant and weed their vegetable garden in return for some delicious veggies.
Here are some tips for gardening on a budget that I’ve learned over the years:
Grow a container garden. I like to grow tomatoes and herbs in containers. Also, planting a group of containers with annuals creates a great effect!
Use perennials. These are more expensive initially, but you do not have to replace them every year, thus saving money in the long run. I started to do this with my flower gardens a couple of years ago. I need to buy a couple more plants to fill it in, but in the mean time I will add some annuals for color.
Start your own plants with seeds. Save a bunch by buying a pack of seeds rather than small plants. My mom only uses seeds to plant her carrots, green beans…etc.
Before filling a large container full of dirt, add a plastic shopping bag full of foam packing material to the bottom. You will need less dirt, provides a great draining system, and the container will be easier to lift! We do this at the golf course where I work. In my containers at home, I use either rocks (for the really small containers) or the plastic containers that my annuals come in.
Put up a pin wheel or two in your strawberries to keep the birds and chipmunks at bay. You can find inexpensive ones at your local dollar store.
Make your own compost. A great free way to nourish your plants. Here’s a great link showing you how to make your own compost bin: DIY Compost Bin
Utilize the weather. If I know it’s going to rain, I pull out my flower containers that are covered so that the rain will water them for me!
Ask neighbors for a part of their perennial. Since most perennials spread, I’m sure a neighbor won’t mind digging up a portion of their plant. My mom has received numerous plants this way. I’ve also received some from the golf course that were just going to be thrown out!
Use the library. If I’m needing any information on plants or I want to look at a specific book, I hop on over to my local library!