Jun 21 | Household Tips, Organization
How to Organize Paper Clutter
Nothing can make a room look messier than piles of paper. Somehow dining room tables, desks, kitchen counter tops, and dressers become magnets to all things paper in a family’s home! Bills, magazines, children’s artwork, and product manuals just pile up, creating “organized confusion” even for those of us who swear we have a system. It’s not only messy-looking; paper collects dust and can attract bugs. It’s not exactly environmentally friendly, either. So what’s the solution? Here are a few tips for how to organize paper clutter.

Create paper-free zones.
Regardless of what fantastic method you put into place, you’re bound to drop a piece of paper somewhere when you’re in a hurry. Tell yourself right off the bat that there are certain areas this is simply not allowed to happen. In the past, my dining room table often became a drop zone, making my otherwise (semi) clean home look disheveled. My new rule is no paper clutter on the table or in the living room. At least this way, I always feel ready for company and always have room to eat and play with my kids.
Deal with it right away.
Put paper clutter in its proper place as soon as it enters your home. Open the mail, recycle what you can, shred what you can’t, and file bills, receipts and children’s paperwork away immediately. Rip out the articles or recipes from magazines you are saving and put them into plastic sleeves in a binder. Drop your collection of magazines and catalogues off at the hair salon, gym, doctor’s office or schools. Whether you hang it on the fridge, utilize an inbox, or stick it in your planner, get into the habit of sorting incoming paper right away.
Go digital.
Opt for e-billing statements and invoices when you can. Minimize the flow of paper that comes in to begin with by opting out of all mailings you have control over. Save documents as PDF’s instead of printing them. Take digital photos of your children’s two-dimensional art projects, and recycle the originals. (Admit it: not everything is worth saving, and no, they will not want it when they’re adults…unless it’s hilarious!)
Make a filing box or cabinet your best friend.
For the remaining paper you absolutely have to keep, purchase a filing cabinet or box, depending on how much you have. A single person can often get away with a simple, file box. These days, you can find a lot of Pinterest tutorials on how to give the larger, metal, filing cabinets some personality. You can even get colorful folders for inside. (Do whatever you have to do to encourage yourself to use this thing once you’ve got it!) Create specific categories for the folders, such as yearly tax folders versus a single folder, overflowing with general tax documents. Designate a folder for each child and pet in your home. Separate everyone’s medical records and school papers. Don’t forget to go through periodically and shred outdated documents. Toss product warranties and instruction manuals for items you no longer have.
I’d love to know, how do you keep your paper clutter under control? Let us know in the comments below!
Related organization articles:
Jun 7 | Household Tips, Gardening
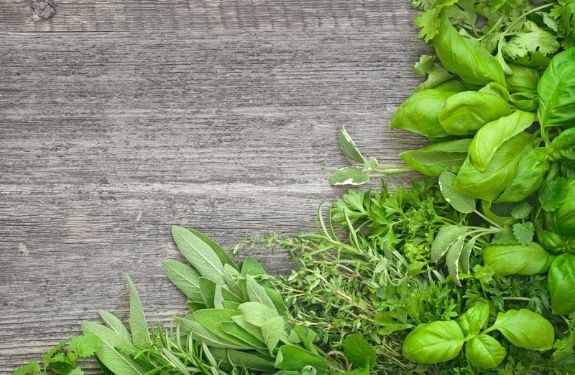
Best tips for drying and storing herbs
Garden season is off to a strong start! If you planted any herbs this year, you may already be seeing an abundance of the tasty things since they can grow with a vengeance. Wondering what you can do with all the herbs you have without letting them go to waste? This post should definitely help you decide what to do with them!
Using herbs in your home is a wonderful way to incorporate not only the beauty they provide but the health benefits. You can use them for so many things. From making potpourri and sachets to making herbal remedies and of course cooking.
If you are new to using them and need a little help, here are 10 tips to help you dry and store herbs that will make it easier on you and help prevent you from ending up with non-usable product.
Getting herbs ready for drying
But first, here’s the two step process to get your herbs ready for drying:
Step 1: Gather your herbs. The best time to do this, is in the morning before the sun is shining on them. It’s also best to pick the herbs before the plants start to flower.
Step 2: Wash your herbs and pat them dry with a towel. Or, if your herbs look pretty clean, you can just shake them gently to get rid of any dust or dirt. At this point, you can also pick off any leaves that are yellowed, spotted, or discolored.
Now on to the drying and storing tips:
1. Find a nice, dark place to dry them.
They will need good ventilation and air, but if they are exposed to too much light, they will dry out too quickly and can become too brittle and fall apart too fast on you. You can use a fan on a low setting or put them near the air conditioning vent for the ventilation, but just not in a window. Another suggestion for location is to place them in an attic type space if you have it. The top of the refrigerator works too, if you are limited on space and just drying a few. Or on the top of a water heater. Those closets make a good ventilated place most of the time.
2. If possible, use drying screens to lay them on.
The drying screens will catch the smaller, loose pieces if they lose any and they get good air flow from both sides this way, which is ideal. Using the screens for thicker herbs, like rosemary that are more woody in nature, is perfect.
3. Hang them upside down, in bunches
Hanging them upside down, in bunches is another alternative to the flat screens. Use a rubber band around the stems and keep the bunches fairly small. The thicker they are, the longer they will take to totally dry. The ones in the center can still be damp, even when the ones on the outside look fully dried. Thicker herbs, like lavender for example, can take a couple of weeks to totally dry.

4. Using an oven to dry them will speed the process.
Put them on a baking sheet and set the temperature as low as your oven will go. You will need to move them and turn them every so often to keep them drying evenly, so the best way is to set the timer for about 30-40 minutes and then flip them when it goes off. Repeat until you feel they are dry enough, which may take up to 6 hours, but could be done in 3.
5. Use a food dehydrator.
A food dehydrator is especially beneficial if you tend to grow a lot of herbs. It’s even great for drying other produce like tomatoes, apples, pears, bananas and so much more. Dehydrators are great because the trays allow for great airflow that results in an even drying without overheating ensuring the perfect long-lasting dried herbs.
6. When storing them, avoid letting them get dusty.
One way to do this is to use a paper bag hanging over them, when they are in bunches, with the stems poking out of one end. Or if they are loose, use a thinner weight cardboard box, and punch holes in it. Cut flaps in the sides to help air flow and ventilation but folded in enough to cover and keep off the dust particles.
7. Use airtight containers.
For storing your herbs, you can use airtight containers, like glass jars with seals, similar to a mason jar or ones that have the locking lid and rubber seals. Make sure the containers are very clean and sterile. Any other chemical residue can contaminate the herbs and affect their scent and health benefits.
8. Freeze them.
You can also freeze herbs as an option for storage instead of glass jars. Use Ziploc bags that have a tight seal, and be sure to push out all the air before sealing them tight.
9. Storing for culinary use.
For herbs that are for cooking and culinary uses, crush the herbs well before storing. For herbs that will be used for teas, use the whole leaf and any blooms and do not crush them.
10. Create flavored oils
Another great option for storing herbs is to create flavored oils for cooking! Place your desired herbs in a glass jar that has a good seal, cover them completely with olive oil and keep them stored in a dark place. The herbs will infuse the oil with delicious flavors, creating a perfect addition to your dish.
I’m pretty certain that these tips will help you use up your abundance of herbs that you will see this year! I’d love to know how you use the herbs that you grow. Let me know in the comments!
Related herb articles: