Water bath canning is sometimes referred to as boiling water canning. This is a very simple method of canning that allows you to eliminate harmful bacteria by submerging foods in a pot of boiling water.
Water bath canning is used to preserve high acid foods, such as tomatoes, fruits, and pickles. The bacteria in these foods can be killed at 212°F, or the boiling point of water.
While you can purchase a water bath canner, which is a large graniteware pot, you can also use a large stockpot with a lid, as long as it’s deep enough to leave 2”-3” of water over the top of the jars. The canner or pot needs to be fitted with a rack (available to purchase at many hardware and discount stores) to keep the jars from touching the pan directly.
Select a recipe from a trusted source, such as the Ball Canning Book or Bernardin Complete Book of Home Preserving. When selecting your recipe, try to select one that features seasonal produce. You should always can with fresh produce that’s free of blemishes, as it harbors less bacteria than older, damaged produce.
When selecting your recipe, read through the directions and make sure it states that it is for boiling water or water bath canning, not pressure canning. Pressure canning is a different method that is not interchangeable with water bath canning.
Before preparing your recipe, you should inspect and clean your jars. Look them over and if you see any nicks, scratches, or chips, don’t use them. Wash them in warm, soapy water. If there is a whitish film on the jars, soak in a mixture of 1 part vinegar and 10 parts water, then wash. You can also wash with hot water in the dishwasher.
You should ALWAYS use new lids each time you can. You may reuse rings, but the sealing compound adhered to the lids is only safe for one use. Wash each with warm soapy water and place the lids in a pot of simmering water (180°F) until ready to use.
Jars must also be heated before filling. If you’ve washed them in the dishwasher, leave the door closed and the steam will keep them heated until you’re ready to use them. If you have washed by hand, they will need to be placed in a pot of simmering water for no less than 10 minutes before use. The food must be packed into hot jars, so do not allow them to cool before using.
Prepare the recipe as directed, making NO substitutions or variations. Each recipe is fully tested for safety and deviation may cause spoilage.
When the jars are filled, wipe the rims with a clean cloth. Place the lids and rings on filled jars and tighten the rings. Use a jar lifter to place the jars into the canner, place the lid on top, and process for the amount of time specified in the recipe. When they are done, remove from water and place on a towel. Allow to cool for 8-12 hours and check to make sure the lid has sealed. Simply press on the center of each lid and if it doesn’t give, it’s sealed. If it has some give to it and makes a slight popping sound, reprocess. You can only reprocess within 24 hours of the initial processing. Once your jars have cooled, store in a cool, dry place.
Water bath canning is a very simple and inexpensive way to get started canning. By learning the proper process, you can enjoy fresh produce all year long without worry.
Canning is swiftly regaining popularity among home gardeners and those who wish to feed their families preservative free, fresh foods all year long.
The sheer number of canning supplies available can be overwhelming to a beginner, and many are not essential to safe canning, but may make the job a bit easier. I hope this guide will help take some of the confusion out of purchasing supplies!
Water Bath (Boiling Water) Canner: A water bath canner is a large, covered stockpot fitted with a wire rack to keep the jars from touching the edges. You may use a large, covered stockpot, or purchase a Graniteware water bath canner with rack (around $30 in stores). This is used to can high acid foods, such as tomatoes, pickles, and fruits.
Pressure Canner: A pressure canner is a heavy gauge, stainless, locking pot that is fitted with a pressure gauge. These retail for $70-$200, but are often handed down from generation to generation. Many that are still in use are 50 years old. You can have them tested at many hardware stores. There are two types, one is fitted with a dial gauge, the other is a weighted gauge (only shows 5, 10, and 15 psi). If you have a dial gauge canner, it must be tested annually to ensure accuracy.
Jars: You can only use jars that are approved for canning, such as Mason, Ball, Kerr, and Golden Harvest. New jars will cost between $7 and $15 per dozen, depending on size and brand. Jars can be used for many, many years, so go ahead and use those family heirlooms! You should never use non-approved jars, such as those that held store bought mayonnaise, etc. Check your jars before each use for chips, scratches, or residue buildup. If there are chips or scratches, do not use for canning. If there is residue buildup, soak in a mixture of 1 part vinegar to 10 parts water, then wipe with a soft cloth.
Lids and Rings: These are often referred to as two piece caps. The lid is the flat lid that sits on top of a jar. The ring screws onto the top and holds the flat lid in place. You may reuse rings until they are damaged or corroded, but lids must be replaced with every use. The food grade sealing compound that lines the edges is not safe for multiple uses.
Jar Lifter: A jar lifter is essentially a pair of tongs that are molded to pick up a jar. These are not essential, but very helpful, especially because they are under $5 at most stores and will last for years to come.
Wide Plastic Funnel: This funnel sits in the top of a jar and allows you to pour your prepared recipe in without mess. This isn’t required, but will help prevent messes and burns, and are priced under $2 in most stores.
Bubble Remover and Head Space Tool: This small tool is a 6” piece of flat plastic, but is well worth it’s $1 price tag. You will use one end to run around the inside of your jars to remove air bubbles and the other end measures headspace (each recipe requires a different height of space at the top).
Magnetic Lid Lifter: This tool is used to lift the lids from a pot of simmering water. It’s non essential, but make the job much easier. It is priced at $1 in many stores.
Pectin: Pectin is a substance used to thicken jams and jellies. It comes in many brands and variations, such as classic, instant, and freezer.
Clear Jel: This is a thickening compound used for pie fillings. It cannot be substituted for Pectin.
Citric Acid: Citric Acid prevents fruits from darkening. Lemon juice is an acceptable substitute.
These are the most common supplies used in canning. There are many others, but they are not necessary for the average home canner.
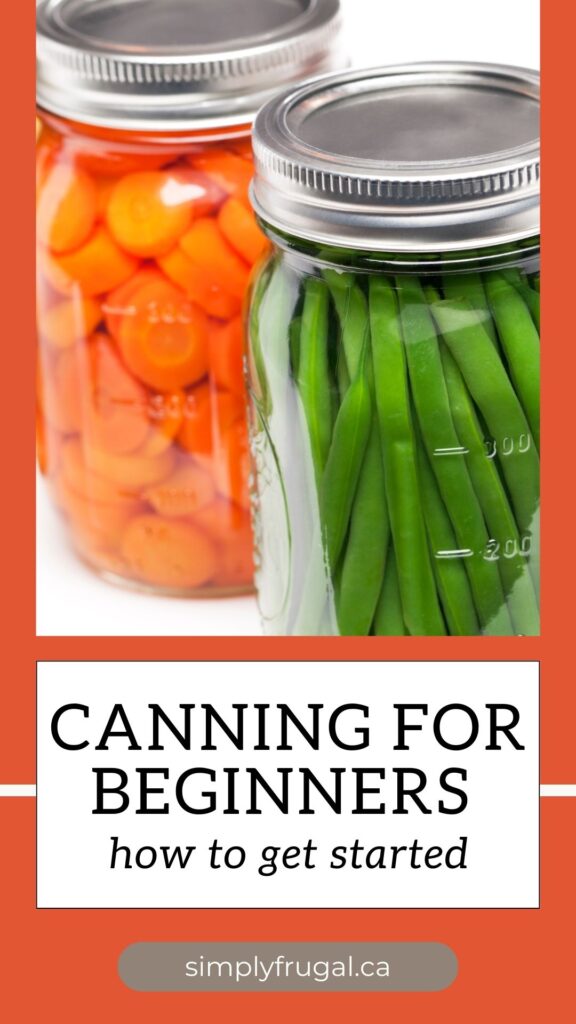
Canning for Beginners: How to Get Started with Canning
Home canning is a fun and healthy way to preserve the summer harvest. Although canning was first discovered in the 1700's, it wasn’t made popular until the late 1850's when John Mason invented a jar with a screw top lid. Interest steadily grew until the 1950's, when supermarkets became widespread.
In recent years, canning has started making a comeback. Gardening is fast becoming a popular hobby, and farmer’s markets are plentiful. Families are more mindful about the chemicals in food and preservation, and home canning makes it simple to know exactly what your family is eating.
Home canning can seem overwhelming to a beginner, but there are recipes and techniques for all skill levels. You won’t need many supplies and they can be inexpensive. Here are the answers to frequently asked questions that will make canning for beginners less intimidating. What canning supplies you need, where to find recipes and how to get started with canning!
Canning Supplies
Large Stock Pot or Water Bath Canner with Rack (for water bath canning only)
Water bath canning, sometimes called boiling water canning, is the easiest and least time consuming method. This method applies to high acid foods, such as fruit, tomato based, and pickled recipes.
A pressure canner is used to can low acid foods, such as corn, green beans, and soups. It maintains a higher internal temperature which is required to destroy the bacteria that more acidic fruits and vegetables destroy on their own.
When making your selection, consider skill level, seasonal produce and additional ingredients. Although jams and jellies are relatively easy to make, they can be expensive and delicate. So when it comes to canning for beginners, tomatoes, pickles and fruit like peaches or cherries are typically the best.
Preparing your Supplies for Canning
Once you’ve selected a recipe, you will need to prepare your supplies. A water bath canner should be inspected thoroughly for corrosion, dents, and pinholes. Any of these can affect the distribution of heat, resulting in an unsafe can.
Wash the rings and lids with warm soapy water. Allow the rings to dry thoroughly and place the lids in a pot of simmering water. They must maintain a temperature of 180°F. Although you can reuse rings until they begin to rust, you should never reuse the lid. The food safe compound seal is only good for one use.
Inspect your jars thoroughly for any cracks, chips, or scrapes. Wash with warm soapy water and rinse. If there is a film or residue on the jars, soak them in a mixture of 1 part vinegar to 10 parts water. Wash with a soft cloth and rinse.
Place jars in a pot of simmering water for no less than 10 minutes. Jars must be hot when filled.
Alternatively, you can skip the handwashing and boiling the jars by running them through the dishwasher. As soon as it’s finished, you can begin removing the jars one by one to fill. Make sure to keep the dishwasher closed between fillings to keep the jars warm.
Keeping Canning Safe
If possible, always use a funnel to fill your jars. You can pick up a canning funnel for less than $2 in stores and it will help prevent burns and messes. This also keeps food from the rims of the jars, which will result in a bad seal. If you spill food on the edge, wipe the edges with a warm, damp towel.
You may be lucky enough to have had a pressure canner gifted to you or handed down from a family member or friend. Before using, take the canner to a hardware store and have it tested. The seals can deteriorate over time and the pressure gauge can malfunction, so annual testing is recommended.
Canning for beginners should never be feared. If you follow the proper techniques and keep your supplies clean, you will provide your family with healthy, delicious produce for years to come.
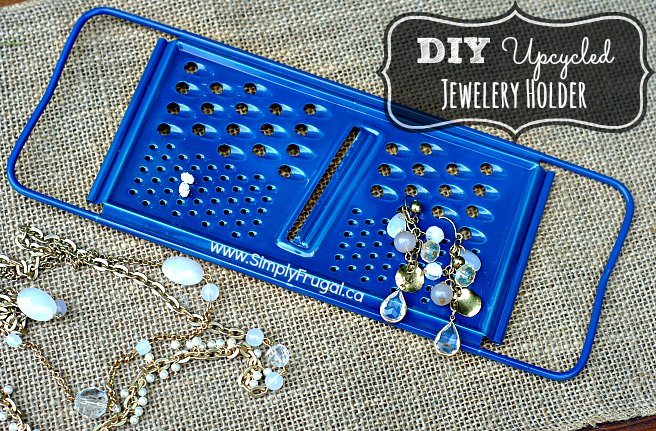
If you're looking for a really easy and cheap upcycling project, look no further than this one! Create a unique jewelry holder in a day! I love this project because it solves some jewelry organization issues without spending a lot of money. In fact, I spent just $0.25 on the old cheese grater and used a can of spray paint that I already had on hand. I'm going to hang it on the wall so I can hang some necklaces from the bottom too.
Here's how to make this DIY Upcycled Jewelry Holder:
Materials
Old cheese grater, cleaned – I found mine at the local thrift store for only $0.25!
Spray paint in the color of your choice. I highly recommend Rust-o-leum because it typically contains a primer and colour so it's all-in-one and super easy to use. A can is about $4-$5 at major retailers and there are a ton of fun colors to choose from.
Directions:
1. Lay down some old newspaper or an old sheet in a well ventilated area such as a garage. Evenly spray your paint over one side of the cheese grater evenly coating it with paint. (see photo)
2. Allow to dry several hours.
3. Spray the paint over it evenly again giving it a second coat. Allow to dry completely – even overnight if you have the time. I'm always picky about my projects and like giving them ample time to dry because if they chip or smudge it's very frustrating.
4. Once you've painted the front of your grater repeat with the back side evenly coating it and then allowing it to completely dry before giving it another coat.
That's it! Super easy and a really quick DIY gift or a great organization project for yourself! Have you finished any neat upcycling projects lately?
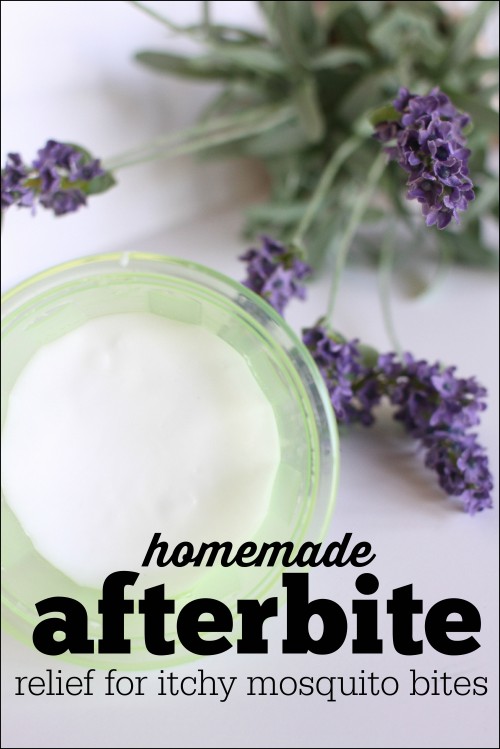
The other day, Sienna got a huge mosquito bite on her cheek that bothered her a bit. So when I came across this homemade Afterbite recipe on I Can Teach My Child, I whipped some up. Bonus points because I had all three ingredients on hand!
I have a really fun project for you today! This simple and quick monster sock puppet tutorial is sure to kick some summer boredom to the curb. At least for a little while! 😉 Heck, it keeps me entertained for a while! Sienna thinks he’s pretty cool too, even though she can’t quite figure out how to open and close the mouth. This craft is perfect if you’re on a budget. I found everything at the dollar store!
Here’s how to make a Monster Sock Puppet:
SUPPLIES
1 pair of fuzzy socks
Hot glue gun and glue sticks
Googly eyes
Pom Pom balls
Felt
Cardboard
DIRECTIONS
Cut a cardboard circle that will fit in your sock for the mouth and then fold in half.
Trace the circle twice onto your piece of felt, cut out, and glue to both sides of the cardboard.
Cut the toe off the end of your sock, roll the edges around the felt covered cardboard, and hot glue in place to make your mouth.
Hot glue googly eyes to 2 pom pom balls and glue above mouth for eyes.
For back spines, cut two long strips of felt and hot glue half of it together, leaving two flaps.
Separate flaps and hot glue to back of the sock.
Decorate as you desire, we added extra pom pom balls and a felt bow tie.
And here’s the finished product! Feel free to customize this guy however you like!