40 Ways to Re-Use Cardboard Boxes to Entertain Kids
Hang on to all your cardboard! Ikatbag has 40 ways you can re-use cardboard boxes to entertain kids!
Hang on to all your cardboard! Ikatbag has 40 ways you can re-use cardboard boxes to entertain kids!
Sun Hats and Wellie Boots has created some great spray paint that is especially wonderful for toddlers. She even turned the art work her daughter made into gift wrap!
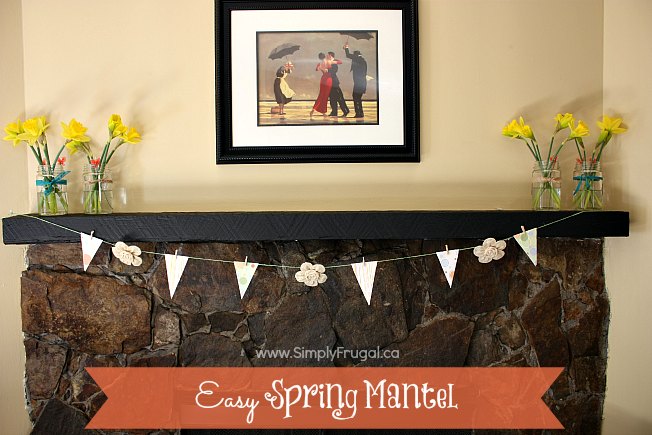
I’ve been meaning to show you how I decorated our fireplace mantel for spring this year. Not because I think it’s wonderful, but because I actually spent a little bit of time into making our home feel more homey. You see, I’ve been struggling with a bit of discontentment when it comes to our current living situation. So, aside from Christmas time, I haven’t decorated the mantle in quite a few years. I figured, why decorate something I don’t love? Why show this small, cramped, old place, that we call home, any love when I don’t feel the love for it?
Well, wouldn’t you know it, but I had a bit of an “ah ha” moment when I realized that this is the place we call home and we do make memories here. This is also the first place my daughter has known as her home. My home doesn’t dictate who I am as a person so when I succumb to discontentment in my circumstances, I’m creating an unhappy person on the inside.
This mantel project will hold a place in my heart forever as the project that “kicked some sense” into me. I have nothing for want. My needs are well taken care of. So each time I look at the banner, I will be reminded of all that I have to be happy for. And remember that I’m a work in progress and that one day (or starting today), my circumstances won’t decide who I am as a person. So I will welcome friends and family into my home without feeling ashamed.
Friends, please tell my you have the same sort of struggles?
Now, in case you”re still with me to find out how I made the paper banner, I’ll tell you how!
First of all I chose a few pieces of scrapbook paper that coordinated and were spring-like in colour. Next, I folded the papers in half and free-handed with a pair of scissors a pendant shape. this is so I could drape the paper pieces over a piece of twine.
Finally, I added mini clothes pins to each paper and added some burlap flowers I picked up at Michaels in the dollar bins. Simple, right? The jars holding the daffodils are from Target and the ribbons tied around the jars are also from Michaels.
How have you shown love to your home lately?


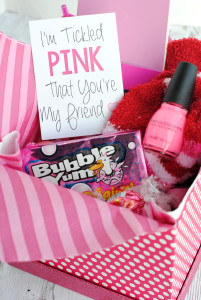
Mother’s Day is quickly approaching, and I’m still not sure what I’m going to get for my own mom to show my love and appreciation. Sheesh! However, I did find quite a few Homemade Mother’s Day gift ideas that my mom and all the mom’s of the world would love to receive. I really like the idea of creating something from scratch for gift giving, makes it seem that much more thoughtful!
I hope you enjoy these 10 Homemade Gifts for Mother’s Day:


Dishes with children’s drawings


Mother’s Day Herb & Tomato Gift


Check out this quick, simple beginner soap making tutorial for Clementine Poppy Seed soap (great way to exfoliate!) from The Pickled Herring. Kathryn made hers in a mini-horse baking pan, but you could easily make soaps in a mini-muffin tin as well!
Have you got a frugal DIY idea that you’d love to share with others? Submit your idea here!

I have discovered an activity that will keep Sienna occupied for at least a half hour. That is money in my books! It allows me to do the dishes, get supper started or anything else I fancy at the moment! Sometimes, I’ll even get down on the floor with her and we can play for an hour.
This bean activity is super cheap and uses things you probably already have on hand:
What I do, is throw down a blanket onto the floor (sometimes I don’t, and clean up is still okay). Next I fill up a big mixing bowl with the dried beans and place the bowl on the blanket with the measuring cups and other containers. Sienna will scoop and pour contentedly for quite a while. At the moment, her favourite thing to do is to bury the plastic animals in the bowl of beans, and then “hunt” for them by scooping the beans into the other containers.
I hope this activity will be just as entertaining at your home as it is ours! I have plans to highlight a few more activities that are fun over the next while.
What sort of activities keep your toddlers entertained?
