We had a birthday party over the weekend for our new two year old which was a blast! I tried my hand at making another cake from scratch and a batch of gluten-free cupcakes. Time consuming, but they tasted great!
Along with the cake and cupcakes, I made some little Oreo Frogs. Aren’t they adorable? They were such a hit with our guests! They’re even quite easy to make. That’s always a win in my book. End up with something cute with only a little effort? Check.
Here’s what you need to make some Oreo Frogs:
Mini pretzels
Oreo cookies
Candy eyes
Red Starburst candy
Green chocolate candy melts, melted
Directions:
1. Dip two pretzels into melted chocolate and place them on a baking sheet lined with parchment paper so that they are side by side.
2. Coat Oreo cookie with melted chocolate and place centered onto the two pretzels.
3. Allow chocolate to set for 5 minutes then place candy eyes on the top of the Oreo so that they are standing on their sides.
4. To form the tongue, take a small piece of red Starburst candy and warm it in between fingers. Create a small snake with a slight point at the end and place it where the filling of the cookie would be.
5. Allow to set for 15 minutes or until candy is hardened.
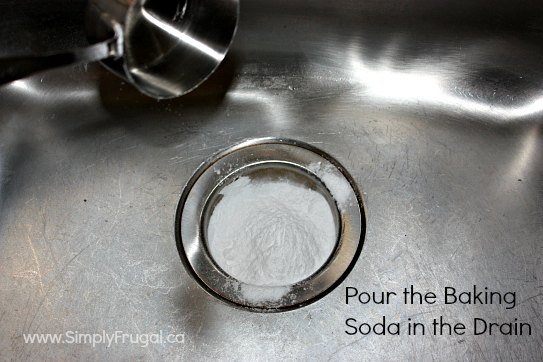
Every few months I like to freshen up the drains around the house because they can get a little yucky over time. My recipe for DIY natural drain cleaner is so easy and I’m fairly certain that I can guarantee you already have the ingredients on hand. Baking soda, white vinegar and water. That’s it!
DIY Natural Drain Cleaner
Grab the kids for this cleaning activity! I assure you, they’ll think it’s neat 🙂
Here’s what you need to make your natural drain cleaner:
1/2 cup baking soda
1/2 cup white vinegar
a kettle full of boiling water
Here’s how you put the ingredients to use in picture form:
(Supervise the kids well or do this step with the boiling water yourself.)
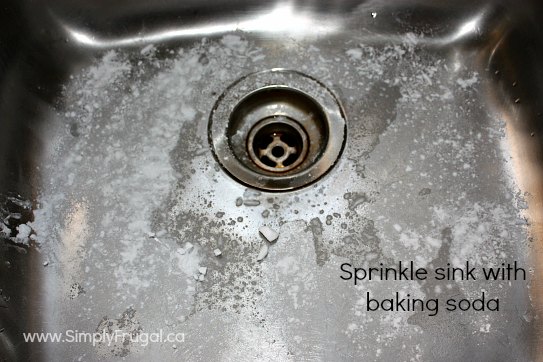
Sprinkle the entire sink with baking soda and scrub using a scrub pad. Rinse and dry.
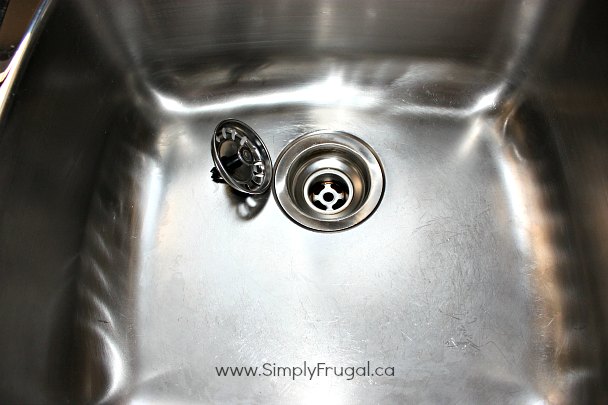
Ta da! A clean and shiny sink! This recipe can also be used to unclog small clogs by simply pouring the baking soda, then the vinegar and stuffing a cloth to plug the drain. Let it sit for about 1/2 an hour, then pour the kettle of boiling water down.
Let me know how you like my DIY natural drain cleaner!
We’re kicking off the 3 Weeks to a Spring Clean Home challenge today, so I wanted to give a rundown of the cleaning tools and products that I use for cleaning my home naturally! While I admit I’m not 100% natural when it comes to cleaning, it’s still important to me to be as natural as possible. You will find Windex, store-bought laundry detergent and leather furniture wipes in my cupboards, but that works for me right now and I’m okay with that! However, I am working up the nerve to try homemade laundry detergent and I’d like to find a recipe for leather wipes. Windex will always be around because my husband likes it for the cars.
I have quite a few products that have become my favourites over the years and I want to give you an up close and personal look!
First up, the tools:
Bucket. I use an empty ice cream bucket to fill with water and castile soap for cleaning the floors and walls.
Gloves. Any pair of rubber gloves works for me.
Cleaning cloths. I am in love with the Mabu cloths from Well.ca. They have lasted me a long time and never stink!
Paper towel. I don’t use it a lot, but I like to use paper towel for cleaning the patio door windows and our cars.
Scrub brush. I bought mine from the dollar store and it works great for cleaning our stone fireplace.
Window wiper. This works great for cleaning the windows and patio doors outside. No streaks!
Dusting mitt. This is a Norwex dusting mitt that my mom gifted me that I love, but I’ve also been known to use a damp cloth to dust.
Mirror cloth. Also a Norwex cloth, but I simply use water and this cloth to clean all the mirrors. I’m sure you could use any old cloth.
Lastly, here are the ingredients I use, along with some recipes, for DIY cleaning:
Washing soda. Available in the laundry aisle at grocery stores.
White vinegar. I buy the club size because I use it for everything.
Baking soda. Again, I buy a big box because I use it for a ton of stuff.
Borax. Available in the laundry aisle at grocery stores.
Spray bottles. While any spray bottle from the store will work, my bottles are from PlanetForward.ca, which no longer has an online store.
Homemade Soft Scrub – This is the recipe I like to use to clean soap scum, sinks, and the stove top:
3/4 cup baking soda (a bit heaped)
1/4 cup liquid Castile soap (I buy it from Well.ca)
1 Tbsp water
1 Tbsp vinegar
Mix the baking soda, Castile soap and water in a bowl or container. Stir. Add the vinegar last, once the other ingredients are mixed. The mixture will fizz a little. Stir to make a nice soft, paste-like, consistency. (It’s important to add the vinegar last if you want a creamy paste and not sludge.) Make this in small batches as it can dry out when stored. The recipes makes enough for 2-4 uses.
All-Purpose Cleaner – I use this to clean most surfaces. Toilets, bathtub, counters.
2 tsp Borax natural detergent – Find this at your local grocery store in the laundry aisle
3 Tbsp Dr. Bronner’s Liquid Castile Soap – I’m using ones I picked up from Well.ca.
4 Tbsp White Vinegar – a natural disinfectant! I always buy the club size because I like to have it on hand for its many uses.
Distilled Water (or boiled water)
Mix the borax, white vinegar and a little bit of hot water. (Must be hot water to incorporate the borax.) Add the castile soap, then swirl the bottle to incorporate. Once it’s all mixed, add the rest of the water to fill up to 16oz. It will be slightly white and opaque.
Sprinkle some baking soda all over the bottom of the oven. Then pour a bit of vinegar over top. (Not too much.) Let it sit for a couple of hours, or overnight. Finally, after using a bit of elbow grease and a steel scrubby, you should have a pretty clean oven!
a small spray bottle from the travel-size section of any store
2 Tbsp baking soda
1 Tbsp fabric softener
warm water
10 drops of essential oil (I used lavender)
Add the baking soda and the fabric softener to the bottle using a funnel. Add enough warm water to fill the bottle nearly to the top. Water must be warm to dissolve the baking soda. Add essential oil. Close the bottle, shake it up, then get your home smelling good!
Place your rags into your jar. Pour 1 cup of white vinegar and 20 drops of essential oil over top the rags. Put the lid on the jar and shake it up! Each time you put a load of laundry into the dryer, take a rag out of the jar and put it in with the laundry. Dry as you would normally.
Place the peels of any citrus fruit into a jar. Once your jar is full, pour white vinegar over top to cover the peels completely. Let it sit for about 5 days before you use it. You could pour it over to a spray bottle, but I just poured it straight from the jar.
Will you be giving any of these recipes a try? Do you have any DIY natural cleaning recipes to share?
Next time you have dinner guests (or tea time guests) why not whip up these adorably simple napkin folds? They’re so easy to do and will make your table setting that much sweeter. I used paper napkins, but large fabric napkins would be wonderful as well! You’ll just want to make sure they’re a good large size.
I’m going to attempt to show you two simple napkin folding techniques that are sure to impress. The Bow napkin and the Pocket napkin.
Watch the animated pictures to learn these simple napkin folding techniques:
For the bow fold:
Starting with the napkin face down, fold the top and bottom edges in to meet at the middle.
Then fold the top and bottom edges in again to meet at the middle.
Next, fold one side of the napkin into the middle, then the other side into the middle so they overlap and create a small rectangle.
Turn the napkin over and tie a ribbon, string, or twist tie around the middle, pulling it tight to create the bow.
Fold and fluff as needed.
For the pocket fold:
Starting with the napkin face up, fold the bottom edge up to the top edge
Fold the side you just folded up back down to meet the bottom edge of your first fold
Turn the entire napkin over but be careful not to undo your folds
Fold the two sides in to meet at the middle
Repeat step 4 with the sides again
Turn the napkin over, and you’ll have a little pocket!
I hope you enjoyed learning how to fold some cute napkins! Now, go impress those guests!
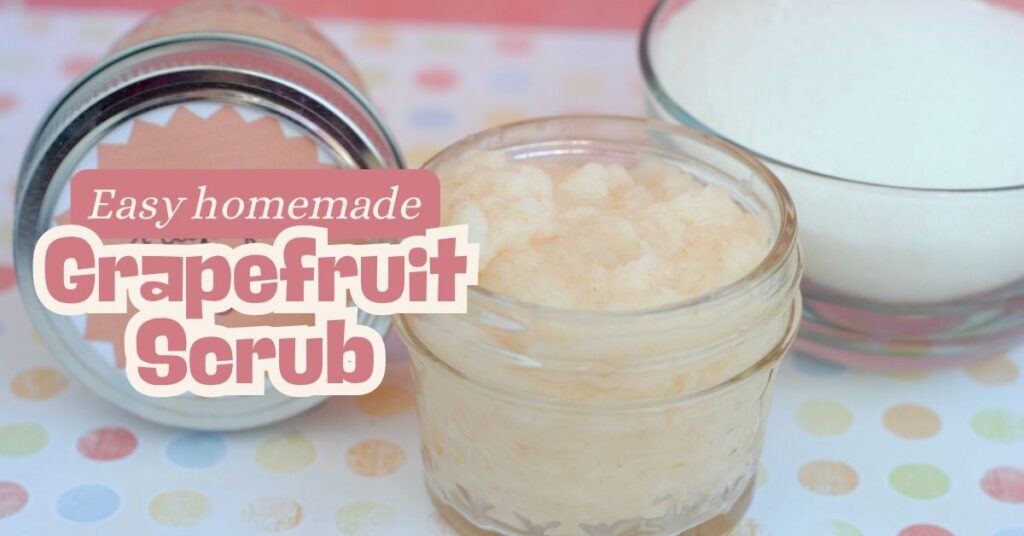
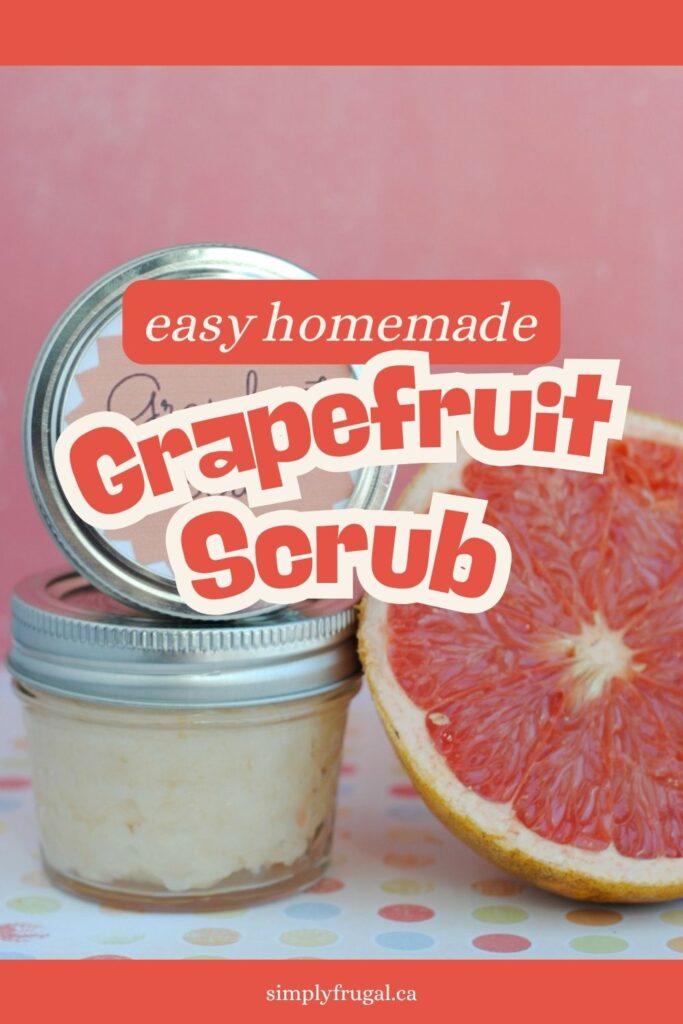
You've got to try this Homemade Grapefruit Scrub! It's deliciously scented and leaves your skin silky smooth and moisturized.
Easy Homemade Grapefruit Scrub
Throughout the year, and especially though winter, I like to use a sugar body scrub for an invigorating way to get rid of dull skin. I've used both store-bought and homemade sugar scrubs and can tell you that the homemade version works just as well and costs much less! You also can't beat the smell! Mmmm!
This winter, I made up a batch of Homemade Grapefruit Scrub. Grapefruit, because it just smells so fresh and delicious!
Are you ready to learn how easy it is to make a batch of homemade grapefruit scrub? Here we go:
Using a grater, grate 3 tbsp of grapefruit zest (I found it easier to grate prior to juicing.)
Once you have your grapefruit zest, cut the grapefruit in half and juice it for 3-4 tbsp of grapefruit juice.
Next, in a medium size bowl, combine the coconut oil, sugar, grapefruit juice and zest and mix well.
Add the scrub to your 4 oz. Jelly jars.
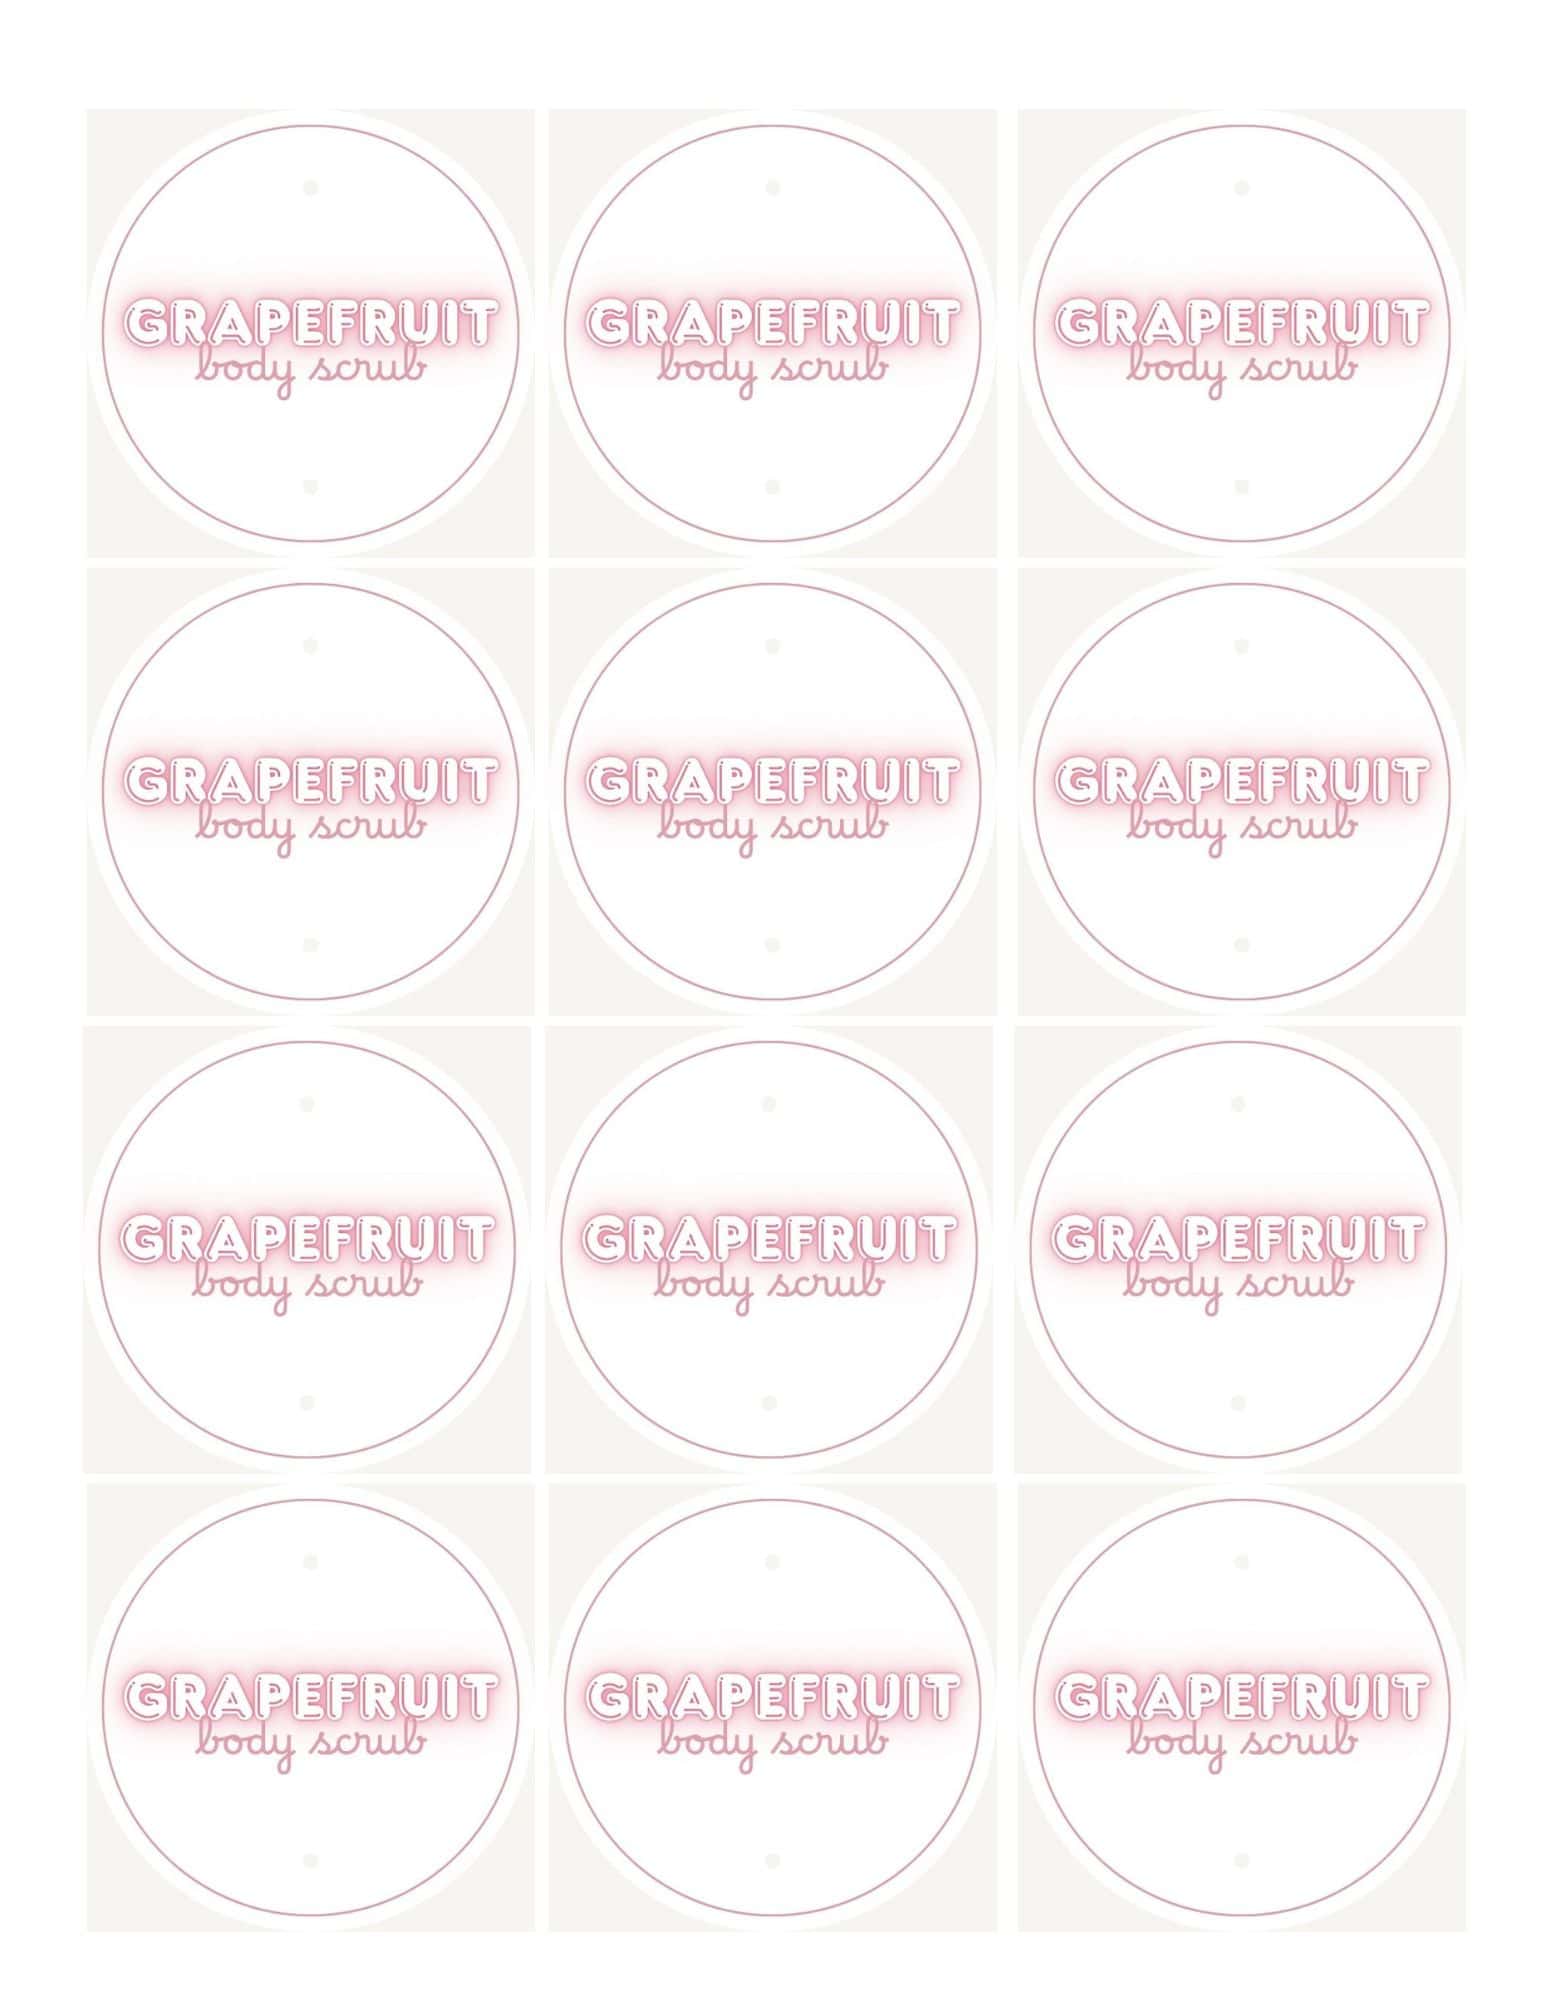
Print and cut out the labels and place on the lid; the metal ring will hold the label in place. **For a different look, you could use a hole punch to punch a hole in the top of the label; hook through with twine and tie around the lid.
Makes 4-5 4 oz. Jelly jars. The recipe can also be made smaller or larger depending on how much you would like to make. Stored in an airtight container, scrubs will last for about 6 months. If there is any separation simply stir the mixture.
Click on the image below to print these labels to use for your jars:
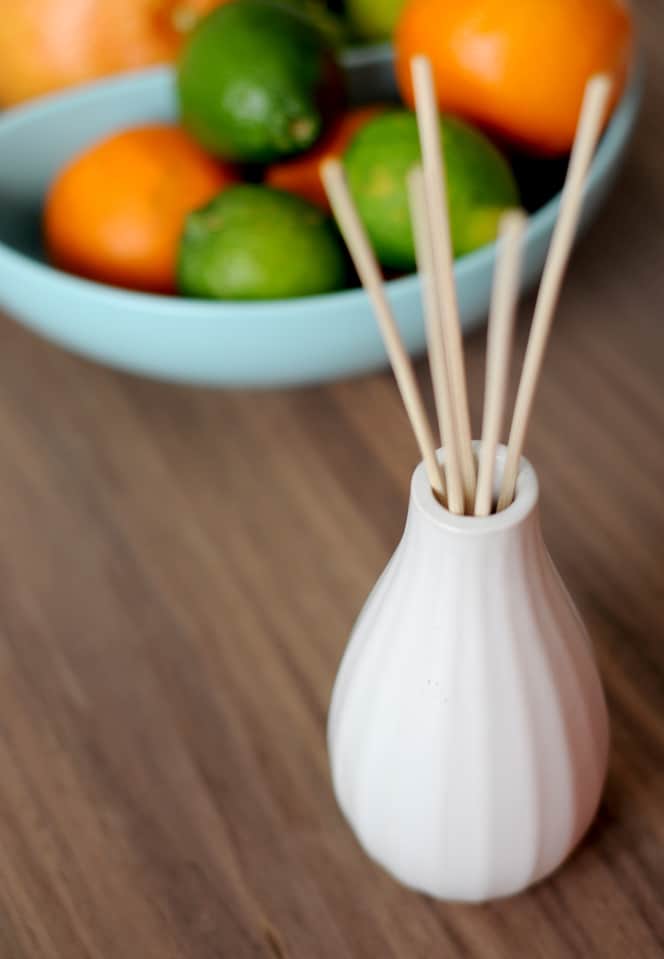
Since I’ve got hospitalityon my brain these days, (with no new updates since I haven’t had a chance to invite anyone over yet!) I thought making a couple of inexpensive DIY reed diffusers would be great to stick in the bathrooms! Make it a bit more pleasant for guests by adding a fresh scent!