I don’t think I’ve ever bought oven cleaner from the store. That’s because I love my two ingredient homemade oven cleaner!
My oven, while I don’t let it get to the point of being seriously disgusting, comes quite clean with these two ingredients:
Baking Soda
White Vinegar
I also make use of a steel scrubby:
The steps are simple. Sprinkle some baking soda all over the bottom of the oven. Then pour a bit of vinegar over top. (Not too much.) Let it sit for a couple of hours, or overnight like I did!
Finally, after using a bit of elbow grease and a steel scrubby, you should have a pretty clean oven!
Before and After.
Not bad, right? Will you be giving this two ingredient homemade oven cleaner a try?
Valentine’s Day is right around the corner! If you like to celebrate by giving little gifts, here are a bunch of Easy, Cheap, Last Minute DIY Valentine’s Day Gift ideas!
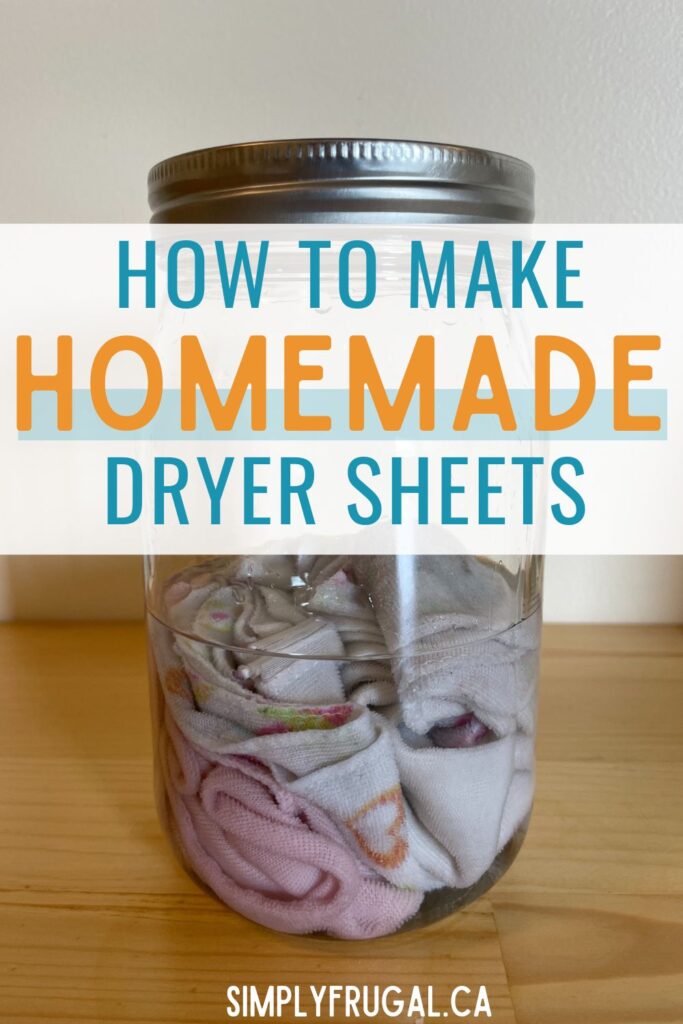
Homemade dryer sheets have answered one of my laundry conundrums. For the longest time I was using plain white vinegar as a fabric softener in the wash, but I started to miss having that fresh smell that store bought fabric softeners provided. So, I thought I'd try my hand at creating my own homemade dryer sheets! The bonus in my mind, is that I'm still not using harsh chemicals to scent my laundry which is perfect for my family!
Here's how to make homemade dryer sheets:
WHAT YOU'LL NEED:
a jar with a lid
1 cup white vinegar
20 drops of essential oil
several "rags" (ripped up t-shirts, baby cloths)
INSTRUCTIONS:
Place your rags into your jar.
Pour 1 cup of white vinegar and 20 drops of essential oil over top the rags.
Put the lid on the jar and shake it up!
Each time you put a load of laundry into the dryer, take a rag out of the jar and put it in with the laundry.
Dry as you would normally.
For my homemade dryer sheets, I've been using old baby cloths and a few rags that I cut from stained baby clothing. I also used lavender essential oil, but next time I make a batch I'll add 10 drops of vanilla and 10 drops of lavender!
Are you tired of figuring out how to display your Christmas cards year after year? They seem to fall down when you tape them up, and the store bought displays can be quite pricey and don’t provide much room. This year, why don’t you make your own instead? In about an hour, and with some common materials, you can make your own Christmas card display that looks like something sold at a specialty boutique. Take a peek at how easy it is!
I was able to find a large frame at a local thrift store for just a few dollars. Any large wooden frame will do, and since you don’t need the glass, the condition of the glass and frame backing do not matter. Clothesline or twine like the kind I used in the sample picture above can be found at your local dollar store, as can regular sized clothespins. If you want the mini pins, check your local craft store when you go shopping for your spray paint.
Directions:
Begin by cleaning your frame well. Apply a coat of spray paint so the frame is covered. Allow it to dry before adding a second coat, if needed. I chose a fun minty color, but you pick a color that suits you!
When the frame is dry, flip it over so the back is exposed. Cut lengths of clothesline that are about 4 inches longer than the width of the frame.
Use your staple gun to secure the clothesline into horizontal strips across the frame. Pull the clothesline tightly before stapling so it is not sagging. Repeat until you have 3 to 4 (more if your frame is larger and allows it) rows for hanging.
That’s all there is to it! Now take your clothespins and start securing those Christmas cards as they arrive in the mail. When the season is over, you can still use this frame to hang photos, birthday cards, recipe cards, or any paper items of your choosing. It is a great way to showcase your cards and photos in a way that really makes them look like a piece of art.
So gather your supplies and give this simple DIY Christmas Card Display a try. It’s a project you’re sure to enjoy, since it’s festive, frugal, AND functional!
It’s Christmas decorating week here in the Simply Frugal household! I thought it would be fun to do a round-up of some amazing frugal Christmas decorating ideas! Each of the links feature simple, but neat DIY projects from other fantastic sites! Enjoy!
Do you seem to accumulate a nice stash of beautiful Christmas cards every year? This year, I’ll be saving all our cards because I’ve found 15 ways to reuse Christmas cards!