If you love to go camping, or even if you have never been camping before, here are 12 camping hacks that are definitely worth a try!
These camping hacks can make your camping experience an easier one, and even help you to be a little more comfortable while you are out enjoying the beautiful outdoors.
Take a look at these 12 camping hacks for every camper and see if they will be helpful on your next camp out!
1. Pack the big plastic baggies.
Take a package of big plastic baggies on your next camping trip to see how helpful they can be. You can mix ingredients in them while cooking, you can use them to keep toilet paper dry, and you can even store wet bathing suits and other damp items in them.
2. Make your own fire starters.
One of the easiest fire starters to make is to use empty toilet paper rolls filled with dryer lint. Then all you need to do is set them on top of some kindling and light them. Your fire will take off in no time. When waiting to use your fire starters just store them in a plastic baggie as mentioned above.
3. Try some lavender.
Lavender oil when dabbed in the skin can repel bugs. You can even burn fresh lavender on your fire to keep bugs at bay. Add a drop or two to your skin lotion for all over protection that smells great.
4. Make tin foil meals.
Place some chopped carrots, potatoes, and raw hamburger on a piece of tin foil. Add a little butter and salt and pepper. Wrap the foil up around the food tightly and grill for 15-20 minutes or until cooked through. When you open it up you will have a ready to eat feast.
5. Get creative with dessert.
Try the same concept above but instead add sweets to the inside of a waffle cone. Try chocolate chips, peanuts, marshmallows, and other sweet treats. Wrap the cone in tin foil and bake on the flames for just a few minutes. When you unwrap it you will have a tasty mess!
6. Try pool inflatables.
Your basic pool inflatables can make sleeping a little more cozy. Kids especially will enjoy sleeping on pool mat as opposed to the hard floor. This is also a more budget friendly option as opposed to buying a blow up mattress.
7. Pre-make French toast at home
Make up a loaf of French toast and place it in freezer bags in the freezer. When you're ready to leave for your camping trip, pop them into your cooler. All you have to do to enjoy a delicious breakfast is heat the French toast on a stove or campfire!
8. Freeze gallon jugs or water bottles and place them in your cooler
They will keep your food cold, and you will have plenty of water to drink for later!
9. Mason jar matchbox
Keep your matches dry and ready to use at a moments notice by creating a simple DIY mason jar matchbox!
10. Store scrambled eggs in a bottle
Try this if you are only making scrambled eggs on your camping trip! Avoid the mess of cracked eggs by prepping the eggs at home and storing the egg mixture in a lidded plastic bottle. Use a permanent marker to label the bottle to show the number of eggs in hash marks.
11. Make face cloth soap holders
How smart is this idea? Make face cloth soap holders for each member of your family to make washing up a breeze! All you need is a bar of soap, a face cloth and basic sewing skills!
12. Don’t forget the microfiber cloths.
Microfiber cloths are awesome for cleaning up picnic tables, drying hair after a swim, and even for washing dishes. They can literally do any job and wear well, even in the rugged outdoors.
Are you ready to give these camping hacks a try? Keep these hacks in mind for your next camping trip and see how much easier they can make things for your entire family.
Do you have any tried & true camping hacks? Please share in the comments!
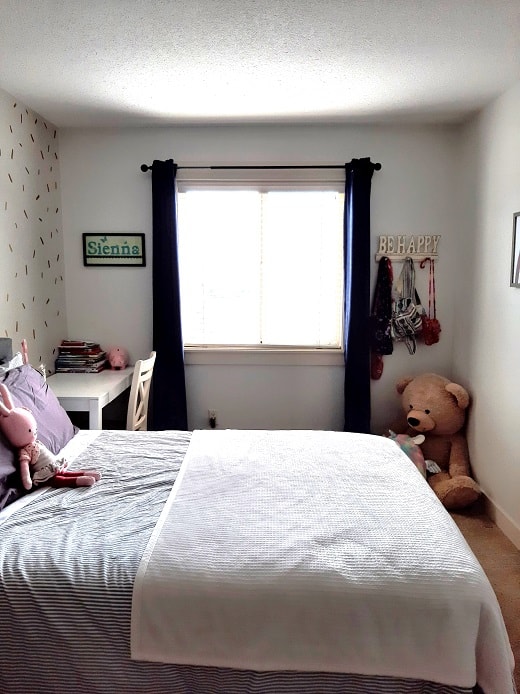
My daughter tuned 10 (!!!) this year and really wanted a more grown up bedroom. One where she could just hang out on her own or with friends comfortably.
BeforeAfter
It was a project that took so long just to get started, but once we actually did start, it only took about a week to finish.
She knew she wanted to change her pink walls to gray walls. Her favourite colour is purple so I suggested doing her back wall a deep purple of some sort, but she was adamant that all her walls had to be gray.
So I headed to Pinterest to find inspiration. I was trying to find a warm gray that she loved and we finally settled on Classic Gray by Benjamin Moore. Her back wall is actually a darker gray, Revere Pewter by Benjamin Moore.
While I used colours from Benjamin Moore, I always buy any paint for a project from The Home Depot. I like their paint and I find it less expensive than Benjamin Moore paint.
I sort of wish the back wall was darker, but she loves it. Especially with the sprinkle decals that we bought.
Originally, I thought doing that feature wall in a fun peel and stick wallpaper would be a great way to add character to her room. But then I priced it out... Going that route was not in the budget. LOL. So I eventually thought to check out Etsy for wall decals. I found the fun sprinkle decals that she loved in gold. Waaay more budget friendly. (I'll give links and cost below for everything.)
The most expensive part of her room was her new bed. Everything is new there. The frame, mattress and bedding. We felt it was important to give her something that could last her for a very long time. (But I still got the deals!)
As for the other furniture, her dresser is a family antique that we've had forever. Her desk was a present for her birthday from her Oma and Grandpa, as was the nightstand.
I wanted to replace her curtains with some deep purple ones, but apparently she has an attachment to her navy ones. Haha. I'm, okay with that! This is a room made for her and not the design books!
In between the artwork, I am going to hang her ukulele once I get a hook.
Cost Breakdown and Sources:
Paint: $100 for 2 gallons from The Home Depot Paint colours: Benjamin Moore Classic Grey and Revere Pewter Gold Sprinkle Decals: $25 for 279 decals Desk: Ikea desk bought second hand for $50 Desk chair: Free, it's one we had around the house already Nightstand: Made by a family member years ago, but gold knob was added. (It was a gift for my daughter so I'm not sure how much the knob was.) Bed Frame: $303.31 for full size. (Not on sale anymore, but this is a solid bed!) Mattress: $289.99 Duvet Cover Set: $64.99 Purple Pillow Cases: $16.99 Sheets: $24.99 for full size white sheets Mattress Protector: $27.99 Art work: All bought years ago from Homesense so I can't link it unfortunately.
Grand total: $903.26I still need to buy her a lamp and maybe something for over her bed, but that will happen one day.
I love decluttering. There’s just something about clearing out the things you no longer use that makes a home feel lighter, calmer, and easier to live in.
But decluttering also gives me a little wake-up call when it comes to my spending habits.
Every time I find something I bought because I thought I would use it, only to discover that it has been sitting untouched for months (or years!), I’m reminded that spending less isn’t just about finding a good deal. It’s also about buying fewer things that don't add value to my life in the first place.
That’s one of the biggest lessons decluttering has taught me: a bargain isn't a bargain if you don't actually use it.
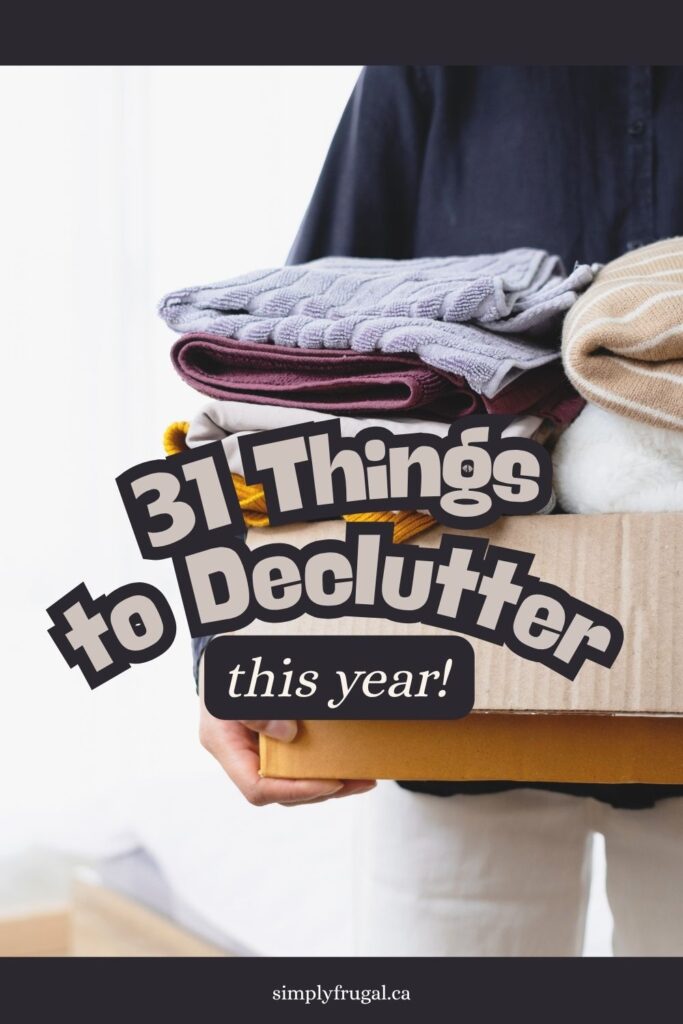
If you want a more peaceful home and a reminder to be more intentional about what you buy, this list of 31 things to declutter is a great place to start.
You don't have to tackle everything at once. Pick five things and spend 15 minutes getting rid of them. Or challenge yourself to work through the entire list over the course of a month.
And don't be surprised if you find even more things to declutter once you get going. One cleared out drawer has a funny way of making you notice the next one!
31 things to declutter:
1. Expired or Unused Makeup
Go through your makeup bag and get rid of products that are old, dried out, or that you simply never use. If you haven't reached for that eyeshadow in years, you're probably not suddenly going to start wearing it.
2. Old VHS Tapes, DVDs and Other Media
If you have a collection of movies or shows you never watch anymore, ask yourself whether you really need to keep them. Some may be worth digitizing (like old photos) or passing along, while others can simply go.
3. Old Cell Phones and Electronics
That drawer full of old phones, chargers and outdated gadgets doesn't need to stay there forever. Look into your local electronics recycling program to dispose of unwanted electronics responsibly.
4. Expired or Very Old Spices
Open your spice cupboard and check what you actually use. If you have three jars of the same spice, or one that has been sitting there for years, it's time for a little clean up. Here's an article with details about how long spices last.
5. Broken Electronics
Have you been keeping a broken DVD player, stereo, appliance or gadget because you might fix it someday?
If "someday" has been several years, it's probably time to let it go. Recycle electronics according to your local guidelines.
6. Worn Out Bras and Underwear
Some things simply reach the end of their useful life. If they're stretched out, damaged or uncomfortable, they don't need to take up valuable drawer space.
7. Excess Reusable Bags
Reusable shopping bags are handy, but have you noticed how easy it is to accumulate far more than you need? Keep the number you realistically use and pass along the extras where possible.
8. Ragged Towels and Washcloths
Keep a few old towels for cleaning, pets or messy jobs, but you probably don't need a giant stash. Cut up what can be used as cleaning rags and let the rest go.
9. Clothes That Don't Fit
Your closet doesn't need to be a storage unit for every size you've ever worn. If something no longer fits and you don't realistically plan to wear it, consider donating or selling it.
Six wooden spoons? Three can openers? A kitchen gadget you bought for one recipe and haven't touched since?
Pull everything out of the drawer and keep the things you actually use.
11. Books You Won't Read Again
Books can be difficult to declutter, especially when we feel like we're supposed to keep them forever.
If you've read it and know you won't read it again, or you didn't enjoy it in the first place, consider passing it along to someone who will.
12. Single Earrings
If you've been holding onto one lonely earring for years, waiting for its missing partner to magically appear, it's probably safe to let it go.
13. Single Socks
Check your odd-sock collection. Match up what you can and give yourself permission to get rid of the socks whose partners have mysteriously disappeared.
14. Unloved Toys
Kids don't need to keep every toy they've ever owned. Broken, outgrown and forgotten toys can be donated, recycled or discarded as appropriate. It's time to let other kids enjoy them now!
15. Unused Sports Equipment
Sports equipment can take up a lot of space. If your child has outgrown their skates, hockey gear or soccer equipment, or you've discovered that a particular sport wasn't for them, sell or donate what you no longer need. Same goes for any sports equipment you won't use anymore.
16. Things That Belong to Someone Else
Do you have a pile of borrowed books, casserole dishes, containers or other items that belong to friends and family?
Return them! You'll clear out your home and make someone happy to have their items back all at the same time.
17. Old Paperwork
Go through your filing cabinet, desk drawers and paper piles. Shred documents you no longer need and recycle unnecessary junk mail and paper clutter.
Just be sure to check current document retention recommendations before getting rid of anything important.
18. Mismatched Food Storage Containers
You know the cupboard: containers without lids, lids without containers and approximately 47 tiny containers you never use.
Match everything up and get rid of the orphans. It's also time to donate the containers you never use.
19. Old or Unused Linens
Sheets that don't fit any of your beds, worn out pillowcases and too many blankets can quietly take over a linen closet.
Keep what you actually use and let the rest go.
20. Blurry or Duplicate Photos
If you have boxes of printed photos, go through them and remove the blurry, badly exposed or duplicate pictures.
You don't need five nearly identical photos of the same birthday cake.
21. Empty Ink Cartridges
If you've been saving empty ink cartridges with the intention of recycling them, now is a good time to finally deal with the pile. Check local recycling programs or retailers that accept them.
22. Freezer Food You Won't Eat
Take a look inside your freezer. If something is freezer-burned, unappealing, spoiled or has been sitting there so long that nobody remembers what it is, it's time to clean it out.
A less crowded freezer also makes it much easier to see what you already have.
23. Dried Out Pens
Grab a piece of scrap paper and test your pens. Toss the ones that don't work, leak or just don't write nicely.
You'll be amazed at how satisfying a tidy pen cup can be.
24. Manuals You Can Easily Find Online
You probably don't need a drawer stuffed with instruction manuals anymore. For many products, the manufacturer's website has the manual available online.
Keep anything important that isn't easily replaceable, but consider recycling the rest.
25. Spare Change
Check the couch cushions, junk drawers, laundry room and that random dish where everyone dumps their coins.
Gather it all together and put it toward something useful. Your savings, a specific goal or even a little treat.
26. Craft Supplies You Aren't Going to Use
Craft supplies add up quickly! Go through your stash and be honest about what you're actually going to use.
If you've been saving something for a project you've been "meaning to do" for five years, it may be time to pass it along to someone who will enjoy it.
27. Leftover Paint
Do you have cans of paint sitting in the garage from projects you finished years ago?
Keep a small, clearly labelled amount for necessary touch-ups if appropriate, but get rid of old or unwanted paint through your local household hazardous waste or paint recycling program. I've also had great success giving away paint I won't use in my local Buy Nothing Facebook Group!
28. Unused Personal Care Products
Check your bathroom cabinets for old lotions, perfumes, hair products and toiletries you don't like or never use.
If you've been avoiding it for months because you don't actually like the product, that's a pretty good sign that you don't need to keep it.
29. Loyalty and Rewards Cards
Clean out your wallet and phone. Remove expired loyalty cards, empty gift cards and memberships you no longer use.
If a store has moved its rewards program to an app, you may be able to get rid of the physical card entirely.
30. Old or Unused Pet Toys
Your pets probably have favourites too! Toss toys that are damaged or unsafe and donate or pass along anything that's in good condition but never gets played with.
31. Boxes
If you're keeping a giant pile of boxes "just in case," take a good look at how many you actually need.
Keep a reasonable number of useful shipping or moving boxes and recycle the rest. You'll be surprised how much space this can free up.
A Little Decluttering Can Make a Big Difference
You don't need to declutter your entire house in one weekend to make a difference.
Start with one drawer. One shelf. One cupboard. Pick a few things to declutter and see how much lighter the space feels afterward.
And here's the part I love most: decluttering can change the way you shop.
When you see how many things you bought that you didn't use, love or need, it becomes a lot easier to pause before buying something new.
Instead of asking, "Is this a good deal?" you might start asking, "Do I actually need this?"
That little question can save you a surprising amount of money over time.
What things to declutter would you add to this list? And what's the first thing you're going to tackle?
Back to School Tips: A Simple Plan for Saving Money, Meals & Mornings
If your summer has looked anything like ours with late nights, slow mornings and days with absolutely no schedule, then the thought of school starting again might bring up two very different feelings.
Excitement... and a tiny bit of panic.
Going from lazy summer mornings to lunches, backpacks, homework and somewhere you need to be by 8am can be a bit of an adjustment. And honestly, I've always found the transition back to school a little difficult myself.
Over the years, I've learned that the best way to make the transition easier is to do a little planning before the first day arrives.
My back to school plan focuses on three things:
Shopping
Meals
Organization
Taking care of these three areas ahead of time means fewer frantic mornings, fewer unnecessary purchases and a whole lot less “Where is my...?” once school gets underway.
So, let's get ready for back to school!
Back to School Shopping Tips
One of my favourite back to school traditions started when my oldest first began school. We would have a special date together to shop for her school things.
I loved having that one-on-one time with her, and it turned something that could have felt like a chore into something we both looked forward to.
But there is one rule I always try to follow: We shop with a plan.
It is incredibly easy to walk into a store and start grabbing things because they're cute, on sale or look like something your child might need.
And before you know it, you've spent a small fortune on clothes and supplies that weren't actually necessary.
Here's what works for us:
Take a clothing inventory
This sounds like a big job, but it took us less than 10 minutes.
I pulled out everything in my daughter's closet and dresser, including socks and underwear, and we went through it one item at a time.
Her job was simply to say yes or no.
Anything she said no to was either donated or put aside for her younger sister.
Once we knew what she actually liked and would wear, I could see what she was missing.
And do you know what she actually needed that year?
An indoor pair of shoes and a sweater.
That's it!
I also like to buy one special outfit for the first day of school and sometimes a fun accessory. It's a little tradition that makes the first day feel special without turning back to school shopping into a whole brand new wardrobe.
Shop your home before you shop the store
Before buying school supplies, take a look around your house.
You may already have notebooks, pencils, pencil crayons, lunch containers, water bottles, backpacks or other supplies that can be used again.
This is one of my favourite frugal habits: use what you already have before buying something new.
Once you've figured out what you already own, make a list of what's actually needed. Then shop that list, and only that list.
Compare prices on school supplies
School supplies can add up quickly, especially when you're buying for multiple children.
Depending on what you need, check places like the dollar store, Walmart, Staples and Amazon before you buy.
Don't assume the cheapest looking store will always have the best price. (ahem, I'm looking at you Dollarama.) A quick comparison can sometimes save you more than you expect.
And if saving time is more important to you than shopping in person, online shopping can be a great option. You can get everything on your list in one order and have it delivered to your door or arrange for store pickup.
The goal isn't necessarily to find the cheapest possible version of everything.
It's to avoid spending money on things you don't actually need.
Back to School Meal Planning Tips
Meals are probably one of my biggest sources of stress during the school year. (If I'm being honest, all year long actually!)
What's for breakfast?
What am I putting in lunches?
What's for dinner?
So, rather than trying to figure everything out every morning, I like to create a simple plan ahead of time.
Create a breakfast menu
My kids have never been particularly good at answering the question, “What do you want for breakfast?”
So instead of asking, I decide.
I create a simple weekly breakfast menu that stays the same from week to week.
For example:
Monday: Muffins and fruit
Tuesday: Pancakes or waffles
Wednesday: Toast and fruit
Thursday: Eggs and toast
Friday: Cereal and fruit
It doesn't have to be fancy. In fact, the simpler the better.
Having a predictable breakfast menu means I know what groceries to buy, the kids know what to expect and I don't have to come up with five different breakfast ideas before I've even had my coffee.
Make lunches easier
I also like to think ahead about school lunches.
You don't necessarily need to prepare five completely different lunches every week. Create a list of foods your kids will actually eat and rotate them.
Having a few reliable lunch options on hand makes those mornings much easier.
And if you have older kids, get them involved. Even if they're only responsible for putting their lunch into their backpack, that's one less thing for you to remember.
Back to School Organization Tips
A little organization before the first day can make a surprisingly big difference once school starts.
Create a simple morning routine
Rushed, hectic mornings are definitely not my favourite.
Unfortunately, they happen more often than I'd like to admit.
I've found that both of my kids do much better when they have a simple morning routine written down. Instead of constantly asking, “Did you do this?” or “Are you ready yet?”, they can simply work their way through the list.
Our routine looks like this:
Get up
Get dressed
Eat breakfast
Pack lunch
Brush teeth and hair
Put on backpack and shoes
Head out the door
A visual routine can be especially helpful for kids who have trouble remembering what comes next.
Choose outfits ahead of time
One thing that worked incredibly well for us was setting aside outfits for the entire week.
I would put together five or seven complete outfits so there was no morning debate about what to wear.
This was especially helpful for my child who tends to shut down when faced with too many choices.
It also made mornings faster because we weren't standing in front of the closet trying to put together an outfit at 7:30 in the morning.
Now that my kids are older, they pick what they're wearing the next day, the night before at bedtime.
Label school belongings
With the amount of money we spend on school supplies, clothing, lunch containers and other things, losing something is frustrating.
Labels can make it much easier for lost items to find their way home.
We have used Mabel's Labels for years and have always found them helpful. I put labels on everything from clothing to water bottles and lunch containers.
It's a small step that can potentially save you from replacing things that simply 'wandered off'.
Do a little now to make September easier
You don't have to completely transform your home or spend weeks preparing for the school year.
A little planning goes a long way.
Take a quick inventory of clothing. Make a list before you shop. Use what you already have. Create a simple breakfast menu. Write down the morning routine. Pick out outfits ahead of time.
None of these things are particularly complicated, but together they can make the transition from summer to school feel much smoother.
And perhaps my favourite part? A little planning can save both time and money.
That's a pretty good way to start a new school year.
I'd love to hear from you! What are your favourite back to school tips and tricks? Leave them in the comments!
We’ve got another birthday in the house!! Today my oldest turns 9 years old! I honestly don’t know where the time has gone. As a parent, I’m feeling so proud of her and I have moments of actually feeling excited for her teenage years. (Those feelings come and go though…LOL!)
Here are the interesting links I came across on my travels around the web this week! Enjoy and have a great weekend!
Happy Spring! We are super excited for Spring in our household. We’ve even been experiencing some warm spring-like weather! How’s the weather in your part of the world?
One thing I’ve been thankful for this week, is emergency savings. Our hot water tank decided it had enough and sprung a leak. So I spent all morning yesterday, calling local plumbers to get quotes and to see how quickly they could help us. Turns out word of mouth works the best! My husband found a soccer teammate that owns a plumbing business that could fit us in! He says it was a good thing he came right away, because our tank actually had a hole in the bottom, so it might not have made it through the weekend without a big flood! So thankful.
Here are the interesting links I came across on my travels around the web this week! Enjoy and have a great weekend!