Time for another container garden update! I have some successes and some “failures” to share this time.
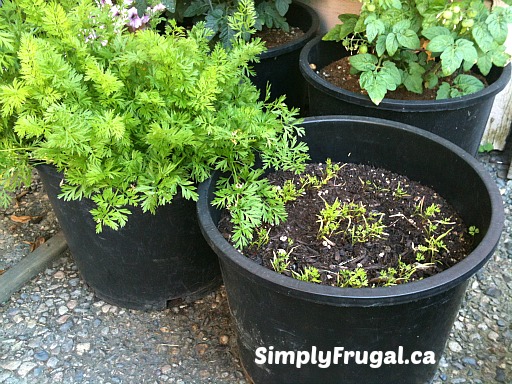
Half success and half failure are my carrots. One container is doing wonderfully, while the other has looked this way since the beginning. I’m not quite sure what to do. Should I pull them or wait it out? Maybe I’ll replant, but I’m not sure there’s enough growing season left.
Both tomato plants are doing really well! Lots of little green tomatoes and one red one waiting to be picked!
My potatoes are growing like crazy! Just after I took this picture, I added some much needed soil. I’m so curious to know what’s going on under the soil. Will I see potatoes when I harvest??
The beans are doing well and look sort of pretty with the orange flowers! But, unfortunately, I had to pull the peas that were sharing the container. They just weren’t doing well at all. Most likely because I neglected watering them for a couple of days. I should really take my own advice that I shared in this post: 5 Container Gardening Mistakes to Avoid.
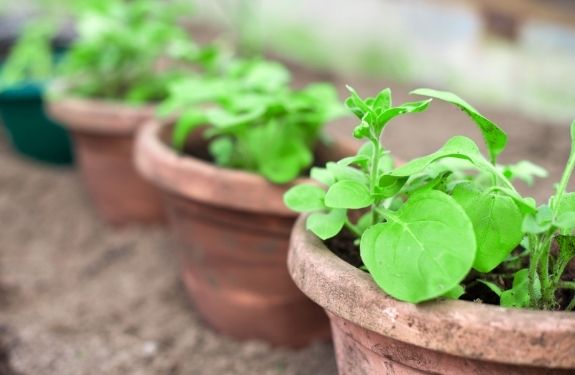
Uh yeah, my lettuce looks pretty sad doesn’t it? I let the lettuce grow too much before I picked them so I decided to cut it all down with my kitchen shears to get them to grow again. We’ll see!
How is your garden growing? What are your successes and failures?
If you’ve been wanting to learn how to harvest lettuce, this new video should help you out! Lettuce is one of my favourite things to grow in a container. Not only does it grow fast, it’s virtually fool-proof too! After learning the first year I tried to grow lettuce that it doesn’t like being in the hot sun for too long, I’ve been on a roll and have a couple containers every year.
Watch the video to see how I harvest spring mix lettuce leaves:
Lettuce also happens to be very easy to harvest. Here’s how to do it:
The best time of day to harvest is in the morning, before the heat of the day wilts the leaves.
Pinch the leaves off about an inch above the soil.
Wash your leaves
Enjoy a delicious salad!
By pinching off the leaves (instead of pulling the roots out of the soil) you’re allowing your lettuce to keep growing throughout the season.
I’m back with another video! This time it’s all about how to harvest basil. The way I show in the video will allow your plant to grow bushier, which means you should have plenty of basil leaves to enjoy all season long!
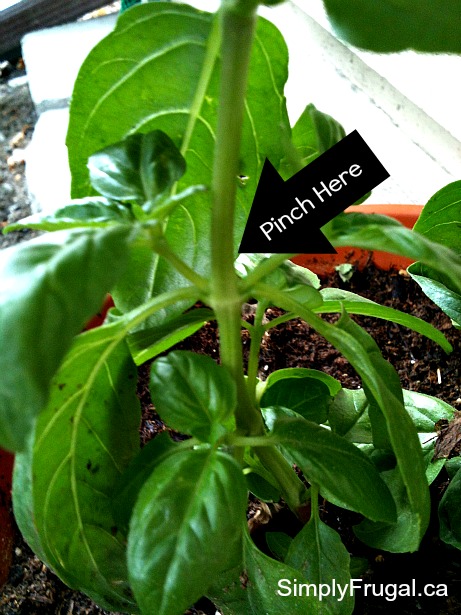
When harvesting basil, it’s best to pinch off a piece of the stem rather than just snipping off a leaf or two. Before you make your pinch, take a close look at your basil plant. Basil leaves grow in sets of two and the leaves are positioned opposite from each other on the stem. If you look at the point where the leaves meet the stem, you should see two sets of tiny leaves growing out of the junction. When you’re harvesting, it’s important to make your pinch directly above a set of leaves. By pinching off the main stem, you’re sending a signal to the leaves that it’s time for them to grow into branches, in turn, creating a bushier plant.
If you want to keep your basil fresh, place your freshly harvested stems in a glass of water rather than sticking it in the fridge. The basil will stay fresh in the water for a week or more. In fact, if you leave the stems in water they will eventually root and you can replant them in a pot or out in the garden!
In the short time that I’ve had a container garden, I’ve learned a few things about what not to do when it comes to planting a successful garden.
In no particular order, here are 5 container gardening mistakes to avoid:
Don’t fill a big container in the wrong place
Have you ever tried to lift a big container filled with dirt and plants? I have, and it’s not fun. When using a large container, make sure to place your pot where it will stay, and then fill it. You’ll save yourself a lot of sore muscles!
Also, if you’re planting a vegetable with shallow roots in a large container, you can fill the bottom third with empty plastic containers or Styrofoam. This will make your container much lighter, provide good drainage and make it cheaper to fill since you’ll need less soil.
Don’t over-water your plants
To avoid over-watering your plants, make sure to use containers that have drainage holes. Also, be sure to read the moisture requirements for the plants you chose and then follow what the labels say. A good habit to get yourself into before you water, is to check if the soil is moist. To do this, put your finger into the soil about two inches deep. If the soil at your fingertip feels dry, water.
A sign of over-watering is yellow leaves or limp plants. If you notice either of these signs, your soil is too wet. Move the containers to a dry spot or stop watering until they dry out.
Don’t under-water your plants
Most container gardens need watering at least once a day in the summer. Sometimes small containers and hanging baskets, need watering more often because there is less soil to hold the water. When you water, make sure to really soak your plants. If you only give them a tiny bit, the water will only wet the top layer of soil. which won’t reach the roots. I like to water until I can see it coming out the bottom of the pot.
Related tip: Make sure you have your containers in a convenient spot for watering. One year I decided to put some containers on our bedroom deck which meant I had to traipse through the house with a dripping watering can about four times a day because there was no hose. It was a real pain!
Don’t buy sick plants
If you’re purchasing starter plants rather than seeds, make sure to buy healthy plants. Buying at a local nursery is a great place to start since the staff is usually full of valuable advice. They’ll even help you pick out healthy, pest and disease free plants!
Don’t have unrealistic expectations
Before you jump into container gardening, take a look at your life. Will you be away a lot during the summer? Do you have dreams of a more relaxed summer with less to-do’s? If so, you may want to reconsider having a container garden. My first year of container gardening, I was really excited to start planting. I think I bought every type of plant that was suitable for containers. As the season went on, I lost my interest since watering the plants daily felt like one more to-do I didn’t want to do. After that initial foray into container gardening, I have since learned to either cut back on the amount of plants or forget about it completely, to make it work with my life each year.
While it may seem there are a lot of don’ts when it comes to container gardening, it’s really not that difficult to grow delicious vegetables at home! Quite often I’m surprised at how “tough” plants can be! So be sure to keep these container gardening mistakes to avoid at the front of your mind!