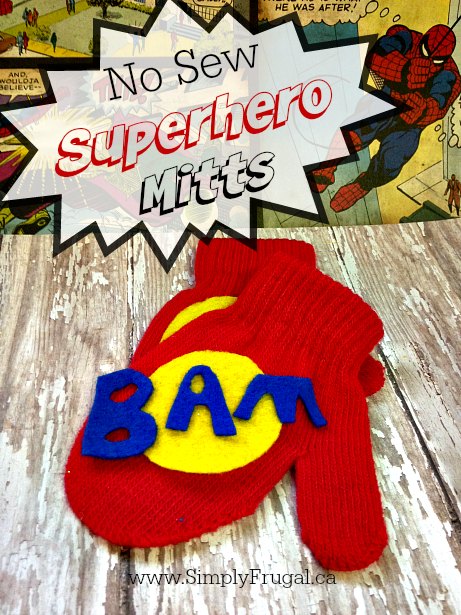
Do you have a Superhero wannabe in your house? Then you’ve got to check out today’s homemade Christmas gift idea! Create super cool, no sew superhero mitts!
No Sew Superhero Mitts
So, I love these mitts. I actually want to keep a pair for myself, but fortunately for my nieces, they get to have them for Christmas! (Their Dad is going to be jealous…) This project was so fun to do, mostly because it was so easy! Quick and easy crafts are just my style 😉
How to make No Sew Superhero Mitts:
Supplies needed:
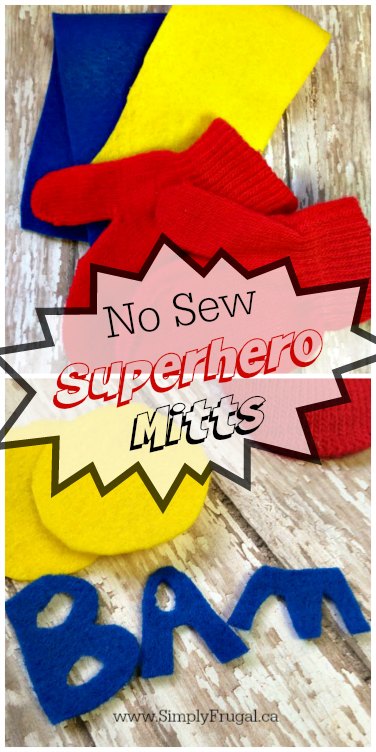
Child’s mittens in red ($1 at most retail stores)
Colored felt in yellow and blue
Scissors
Fabric glue
Directions:
Begin by laying the mittens flat. Press them as flat as possible and lay them out in the direction they are worn. This way you can be sure you are applying the design so it rests on the top of the hand.
Cut two yellow circles out of felt. Make sure they are even with each other and cut to fit the size of the mitten. Apply a generous amount of fabric glue and press them to the top of the mitten.
Using your blue felt, cut out the letters to spell BAM. Don’t worry about making them perfect as comic book writing is usually a little wild! For our sample, we simply free-handed the letters.
Apply glue to the letters and press them directly over the yellow circle. Hold in place until dry and secure.
Your no-sew hero mitts are now complete! When washing, turn them inside out and allow them to air dry. This will help protect the embellishment.
Did you know that you can make the most amazing, 2-ingredient, vanilla extract right at home? It’s quite a bit cheaper than store bought and it makes a fantastic, thoughtful gift!
I finally made some homemade vanilla extract!! I had been meaning to make it last year for gifts, but...it never got done. It's sooo easy too! I'm not sure why I waited so long!
All you need is some vodka and good quality vanilla beans. I used cheap vodka and Madagascar vanilla beans. While this only takes minutes to put together, you will need at least 8 weeks for the vanilla beans to work their magic.
If you use a lot of vanilla, learning how to make homemade vanilla extract will save you a bundle in the long run. Homemade vanilla extract also makes for a fantastic gift idea for teachers, neighbors, party hosts, and, well, pretty much anyone!
What you need for homemade vanilla extract:
Vanilla beans - Grade A or grade B. You can find whole vanilla beans at most grocery stores in the spice aisle. However, they are considerably cheaper if you buy them online. These vanilla beans are a great choice.
Vodka - You can buy a cheap bottle for this recipe, 70 - 90 proof.
Vanilla beans may seem expensive, but when just a few of them make a whole cup worth of delicious vanilla, you'll quickly see the cost savings of making homemade. Plus, you can actually reuse the vanilla beans by adding more vodka to the bottle!
How to make homemade vanilla extract:
Using a sharp knife, slit 6 vanilla beans down the middle lengthwise so the beans are exposed. If the length of the vanilla beans don’t fit into your bottle or jar, cut the vanilla beans into smaller pieces. Place beans into bottle or jar.
Pour enough vodka over top to cover the vanilla beans and fill your jar, using a funnel. Shake a few times with the lid on.
Let sit in a cool dark place for as least 8 weeks. The longer it sits, the stronger it gets. Shake once a week.
Also to note:
As you use your vanilla, you can refill with a little vodka each time. Give it a shake after you refill and give it a shake before each use too.
If you are gifting the vanilla extract, remove the beans before you give it away. (But only once it has fully aged.) Reuse those beans in a new bottle.
In recipes, use the same amount of homemade vanilla extract as you would store-bought vanilla.
For those of you that would like to make some Homemade Vanilla extract, I made some super simple labels that you're welcome to download and print for your bottles or jars! (click on the picture to print the PDF)
If you have extra vanilla beans, you might want to try making some vanilla sugar! Vanilla sugar is a great addition to coffee, tea or baking!
This is such a fun activity for kids (and adults)! We played with this Inside out Sensory Slime for a long time too. That’s always a bonus in my books. Something that keeps Sienna entertained for more than a few minutes. 🙂 I even threw a little bit into a zippered plastic bag so that I could have some in my purse for Sienna when I have appointments…etc. Just make sure to keep the bag closed tightly when the slime is not in use!
It’s easy and fun to put together too. It’s possible you have the ingredients on hand already, or else they’re easy to grab.
INGREDIENTS
These ingredients are needed for each batch of slime.
1. In one medium bowl, mix 1 teaspoon borax with 1 cup of water.
2. In another bowl, pour one whole 4 oz bottle of Elmer’s school glue. It’s important to use Elmer’s for the recipe to turn out right. Add food coloring to the glue now, using the guide for each color. Add 1/2 c water and mix well.
3. Pour one mix into the other, it doesn’t matter which way you do it but it looks a little different each way. The picture of the blue slime is what it looks like when the water is poured into the glue. The green slime is what it looks like when the glue mix is poured into the borax mix. Again, it doesn’t matter, it’s just different.
4. Mix with your hands, and then separate the slime from the water using your hands.
5. At this point, the slime isn’t going to look right, but after you squish it around for a few minutes it takes on the right consistency.
The slime takes on the shape of whatever container it’s in, breaks apart easily, and stretches out too! Store in a plastic bag with as much air removed as possible, and take care to not let it sit on any surface that might stain, as well as any carpet or clothing.
If you are looking to warm up your wardrobe this fall, these frugal fall bangles are perfect. Easy to make and inexpensive too, they are fun to make during a girl’s night or when you are just in the mood for a fun DIY. Here is how a trip to the craft store and a few basic crafting supplies can help you get the job done!
SUPPLIES NEEDED:
Assorted bangles (plastic, metal, wood all work well)
Assorted twine, ribbon, yard, or even burlap strips
Scissors
Hot glue, glue gun
DIRECTIONS:
1. Cut a long length of ribbon/twine/burlap of your choice.
2. Add a tiny dab of hot glue to the end. Press it to the inside of the bangle. Hold in place until secure.
3. Start wrapping the piece around the bangle. Pull tightly as you do to avoid wrinkles or bulkiness. Lightly overlap as you wrap.
4. Once the bangle is covered, cut the ribbon/twine/burlap to fit. Add a dab of glue and press to the inside of the bangle. Hold in place until dry.
If you wish, you can cover the entire bangle. Or, like we did with the gold bangle, leave part of it exposed. The contrast in colors and textures is actually quite pleasing!
Gather your supplies and give these easy frugal fall bangles a try. They are simple to make and easy to enjoy!
While summer is winding down, there’s still a bit of time to get a fun easy craft made before back-to-school time! Not only is this Duster Monsters craft perfect for kids, it’s cheap and really easy! Plus, I’m sure there could be a few hours of fun playing with the “puppets”. I found all the supplies for these Duster Monsters at the dollar store. 🙂 My only word of advice is to monitor young kids closely because this craft does use a hot glue gun. Though I suppose you could use white glue instead.
Kids Craft: Duster Monsters
Supplies:
Dollar store dusters
Googly eyes
Colored pompoms
Pipe cleaners
Hot glue/gun
Directions:
Fluff dusters
Glue eyes, pompoms and pipe cleaners to create a face.
Use the handle to operate as puppets.
Since the end of summer typically holds less sunny days, this could be a great rainy day activity!
Have you got a frugal DIY idea that you’d love to share with others? Submit your idea here!
Gemma sent me a link to her wonderful DIY Abstract Artwork she made for her home in 30 minutes!
Artwork is one of those things that can totally MAKE a home. Inject a room with artwork that you love, and all of a sudden it will feel so much more personal and like you. It brings life to a space, you know? The hump that people sometimes face is that it can be expensive. However, if you look around and get creative, there are so many budget-friendly ways to bring interesting artwork into your home (I even have a Pinterest board dedicated to collecting DIY artwork
ideas). I recently needed a piece for above our mint and gold buffet, and had a very specific colour scheme and look in mind (and a zero budget). The solution? Paint my own DIY abstract art!