Nov 19 | Easy DIY, Holiday Crafts, Holidays, Homemade Christmas Gifts

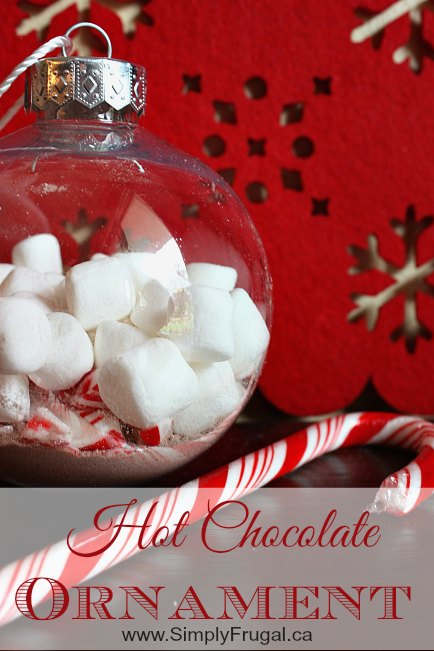
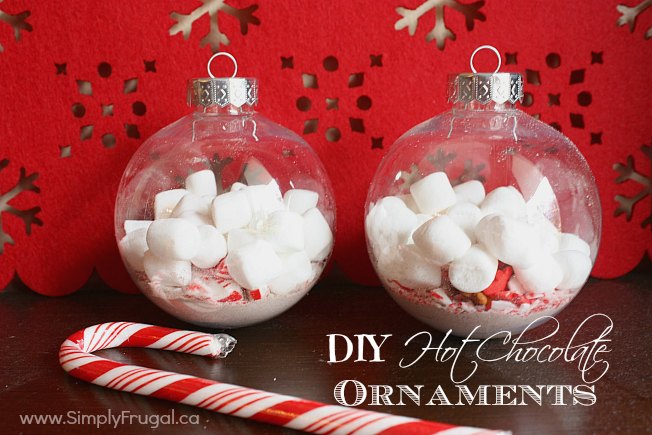
These simple to make Hot Chocolate Ornaments are the perfect addition to any gift! Add one along with a mug and some extra hot chocolate. Or tie one to a gift bag. Or maybe you could add it to the tree at a party for the hostess to find at some point. The options are endless really.
Just as the gifting options are endless with these ornaments, there are also many ways to put these together.
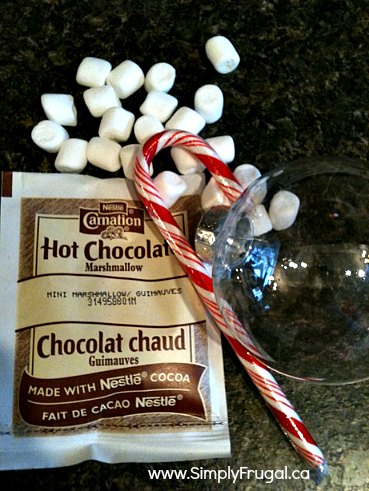
This is what I used to make these particular hot chocolate ornaments:
- A pack of hot chocolate
- mini marshmallows
- candy cane (crushed)
- plastic ornament (a pack of four from Walmart)

Here’s how to make the ornaments:
- Start with a clean ornament, take the top off, then fill each ingredient into the ornament using a funnel.
- Add the hot chocolate mix, then the crushed candy cane, then the mini marshmallows.
- Put the top back on.
- Create a little label with instructions, then add it to the ornament.
- Make sure to deliver these standing upright, unless you want everything to be mixed up!
Here’s are some other items you could add to each ornament:
- sprinkles
- chocolate chips (or white chocolate, mint chips, peanut butter chips)
- different flavoured hot chocolate packs (rolo, mint, etc.)
- mini rolos
- Skor bits
I hope you enjoy making these Hot Chocolate Ornaments!

Nov 16 | Easy DIY, Holiday Crafts, Holidays, Homemade Christmas Gifts

After a hectic day, there is nothing as soothing as a long soak in the bath tub. Adding bath salts not only adds to the relaxing nature of baths by making the water smell delicious but by providing healing and soothing aspects to your skin!
Why not try this simple recipe for homemade bath salts to give away to the bath takers on your gift list! I’m sure they’ll love it!
-
2
cups
Epsom Salts
-
1
cup
Baking Soda
-
2-3
drops Essential Oils
Add the Epsom salts and baking soda to a bowl.
Stir to combine.
Add essential oils.
Let the bath salts dry overnight before adding to your jars.
If you want more than one scent, separate the salts into more than one bowl before adding the oils.
For my particular bath salts, I made one jar lavender scent and the other peppermint. The decorative jars I picked up at a local dollar store. As for the tags, I made them using a couple of paper punches my mom and I have in our craft supplies.

Oct 14 | Easy DIY
If you enjoy wine, chances are you have a handful of wine corks stashed somewhere. There are so many creative uses for wine corks that you can try, so if you aren’t saving them, now is the time to start. Take a look below at 7 creative uses for wine corks that will have you looking at them in a whole new light. Who knew that wine corks could be so fun? Here is how you can get started!
Garden markers
Poke a wine cork onto the end of a dowel rod or even an old fork. Write the name of the planting on the cork with marker. Then, press the rod or fork into the ground. It makes the perfect garden or plant marker so you never get confused again.
While you are in the garden, you can even start seedlings inside of larger wine corks. Just carve out the inside, add some dirt, and add your seedling. This is especially great for succulent starts.
Mini boats
Make a small triangle out of scrap paper. Tape it or glue it to a toothpick. Then, poke the toothpick into the wine cork. Place the cork in water and watch the mini boat float. Kids will love this simple and hands on activity. If you wish, you can even use craft paint to paint your boats.
Place card holders
Make your next dinner party fun with wine cork place card holders. All you need to do is take a knife and make a slit at the end of the cork. Then, slide a card with the guest’s name into the slit. It should stand up nicely, letting each guest know where to sit.
Pin cushion
Decorate your wine cork with some craft paint. Then, poke pins and needles directly into it. The cork will hold them in place nicely, and you don’t need to worry about lost sewing supplies anymore.
Fridge magnets
Hot glue a piece of magnet (found at local craft stores) to the wine cork. Then, just place it on your fridge. It is such a cute way to hold memos and photos in place.
Mini stamps
Take a knife and carve a shape into the end of the wine cork. Press the cork onto a stamp pad and then onto paper. Your design will be imprinted onto the paper. This is a fun craft for kids or even for ladies’ night!
Cork board
Glue dozens of corks side by side and in rows to create a cork board. Add a ribbon to the back for hanging and you have a quick and easy memo station.
Who knew wine corks could be so much fun? Give these creative ways to use wine corks a try and you will never throw them away again.
Oct 7 | Easy DIY

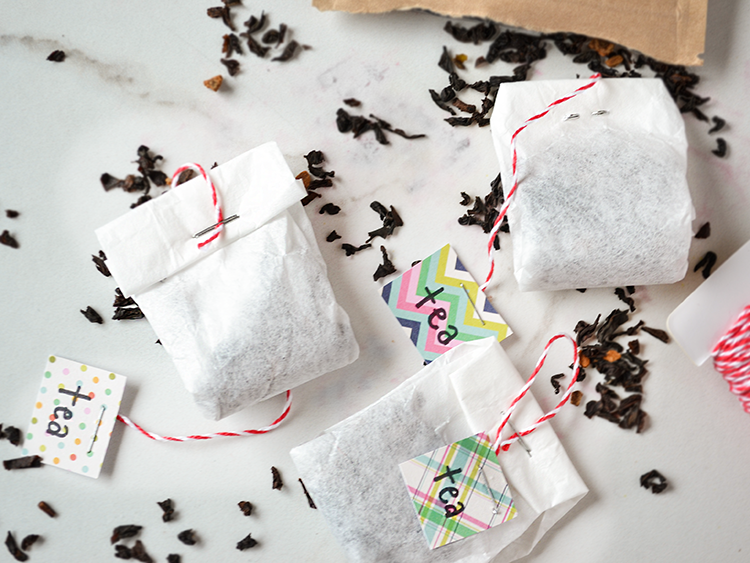
Well, I think this is pretty neat! Create your own DIY tea bags using coffee filters! This is perfect for gift giving and creating your own tea blends!
Thanks, Anita!
Have you got a frugal DIY idea that you’d love to share with others? Submit your idea here!
Oct 6 | Easy DIY
Here’s a cute little Summer project for anyone that is able to do simple sewing. Make your own Flower Hair Clips!
These would make a fabulous gift for any girl on your gift list.
Have you got a frugal DIY idea that you’d love to share with others? Submit your idea here!
Oct 2 | Easy DIY

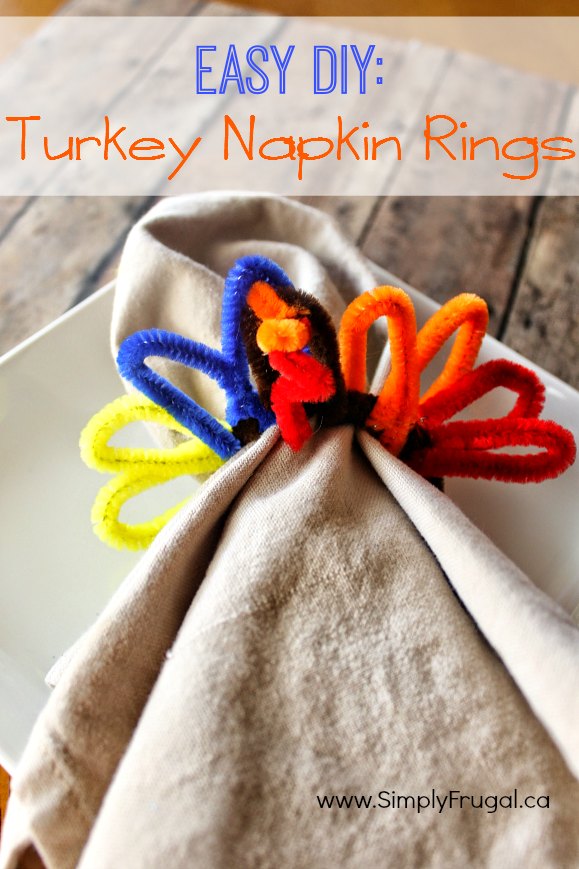
Keep the kids busy with this simple craft and add a sweet touch to your Thanksgiving table with fun turkey napkin rings made out of pipe cleaners! Pipe cleaners (chenille stems) are always a great medium for many craft projects. They keep kids engaged and can be used in a multitude of ways to craft anything their imaginations can hold. Not to mention they are also really inexpensive to purchase and are great for fine motor development. What else can you think of to craft from these pipe cleaners?
Turkey Pipe Cleaner Napkin Rings
SUPPLIES:
For each napkin ring, you will need only 5 pipe cleaners
- 1 each-Brown, red, blue, yellow, orange
- scissors
DIRECTIONS:
Twist brown pipe cleaner so that half of the center is a circle, then bend end into an upside “u” wrap around circle to secure. Wrap remaining end around ring to tuck it out of the way and strengthen the ring.
Cut remaining colored pipe cleaners in half. Take one color bend it in half, wrap it around circle body of turkey, fold each end down to make a feather. Repeat all the way around with each color.
Cut off a ½” piece of remaining red pipe cleaner, and about ¾” of orange, bend red pipe cleaner around the orange and bunch up to form your turkeys waddle, finally bend orange in half towards the brown turkey head to finish the beak.
Slide ring over napkin, voila!