Halloween is such a fun time of the year. Seeing all of the little ones in their cute and scary outfits, passing out candy, decorating and parties!
Halloween can also get pretty expensive, some of those awesome costumes will run you $50 or more! That kind of money seems a little excessive for one day of fun. Getting your decorations, candy and Halloween costumes on a budget is doable and actually pretty easy.
Affordable Halloween Costume Ideas
First of all, here are some creative Halloween costume ideas on a budget that are fun and easy to put together:
Ghost: An old white sheet with cut-out eye holes.
Zombie: Torn-up old clothes, dark makeup, and fake blood (which can be made at home with corn syrup and food coloring).
Mummy: Toilet paper or white bandages.
Tourist: Hawaiian shirt, shorts, a camera, sunglasses, and a fanny pack.
BlackCat: Black clothes, a headband with DIY cat ears (made from cardboard), and drawn-on whiskers using eyeliner.
Superhero: An old bedsheet or towel as a cape, tights, and a t-shirt with a drawn or taped-on emblem.
Vampire: Black clothes, a makeshift cape (old sheet), and dark makeup for the face. DIY fangs from paper.
Hippie: Tie-dye shirt, headband, bell-bottom jeans, and peace sign accessories.
80s Workout Enthusiast: Neon leggings, headband, and an old sweatshirt cut at the shoulders.
Skeleton: Black clothes with white tape or paint to create a skeleton outline. Add some face paint for extra effect.
Pirate: Striped shirt, a bandana, eye patch (which can be DIY with cardboard), and some torn pants.
Witch: A black dress, DIY pointy hat from cardboard, and a broom.
Robot: Cardboard boxes, tin foil, and silver paint.
Lumberjack: Plaid shirt, jeans, beanie, and a cardboard or plastic axe.
Now that you have some simple to put together costume ideas, let's take a look at even more ways to save.
Host a Costume Swap
In mid to late September put together a Halloween costume swap. Invite moms from your community to bring costumes from previous years to the swap. Everyone at the swap gets to look for costumes that fit their children. This is a great way to get a free costume and connect with other moms in your local area. You can advertise your costume swap by work of mouth, flyers or create a Facebook group for people in your area.
Shop Second Hand Stores
Come early October second-hand stores will be flooded with Halloween costumes. Before you look at any high-priced costume shops make sure to check out local thrift shops. You can find basic costumes to very impressive and expensive costumes. The best part is the prices are great!
Shop Late
Halloween stores need to sell all of their merchandise before Halloween. Once Halloween is over these shops close their doors for the year. Try shopping one or two days before Halloween and you will probably see lots of costumes that have been discounted by 50% or more! This could mean some huge savings but the downside is the inventory is usually limited.
Make Your Own
Making your own Halloween costume is possible and can be done without touching a sewing machine. Look around your house and see what you already own and what you can turn into a costume. Have an old cheerleading outfit, football uniform, golf clubs or just a scary mask sitting around. Get creative and let your imagination run wild. Get your children used to making their own costumes and not dressing up in the same costume everyone else is wearing. You can also spend some time searching Pinterest for creative and fun costumes to make at home.
Visit a consignment shop.
Check out local consignment shops for used costumes. Many consignment shops carry children’s costumes during the fall season, so you can often find one at a great price. If you want, you can even take some of your old costumes in for cash. This will help free up some funds for this year’s costumes. Call your local consignment shop and ask if they will be carrying Halloween costumes this season.
Saving in Other Areas
For Halloween candy and decorations there are also ways to save. Make sure to check your local Dollar Store for decorations and candy. Typically, they have a large selection of holiday items. Shopping the day after Halloween can sometimes save you up to 75% on next years decorations!
What are your favourite Halloween costumes on a budget?
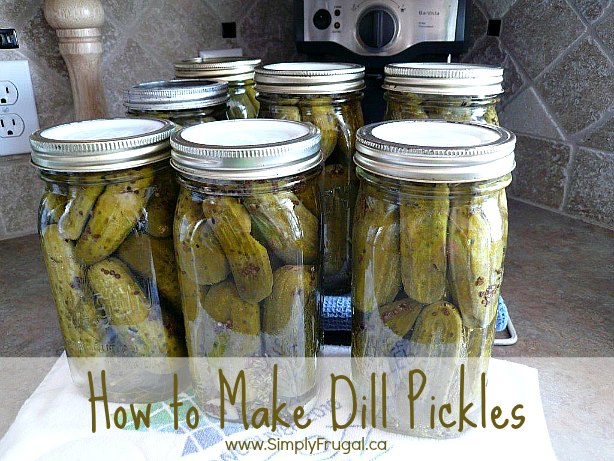
My all-time favourite dill pickles when growing up were my Gramma’s dill pickles. She would have them on the table before we sat down to eat. By the time we were actually seated and ready to eat, they were all gone! So, she would go back to the pickle jar and take some more out so we could devour them some more! Everyone loved Gramma’s dill pickles. I am so happy that she actually had the recipe written down, so I can carry on creating the best dills!
The recipe is simple; however, I have tried to explain all the steps needed to create these wonderful dill pickles.
What you will need:
Equipment:
Water bath canner (or a huge pot to sterilize the jars after filling)
Lid lifter (magnetic or tongs) (to pick the lids out of the boiling water where they were sterilized)
Jar funnel (optional – I don’t use this for dill pickles)
Saucepanorpot to sterilize the lids
Large spoon or ladle or measuring cup, which works great because it has a pouring spout
Quart/Litre wide mouth glass jars
Lids; thin flat round metal lids (made especially for canning) or BPA free reusable canning lids and food safe canning rubber rings
Screw band metal rings
Towel to place sterilized jars on
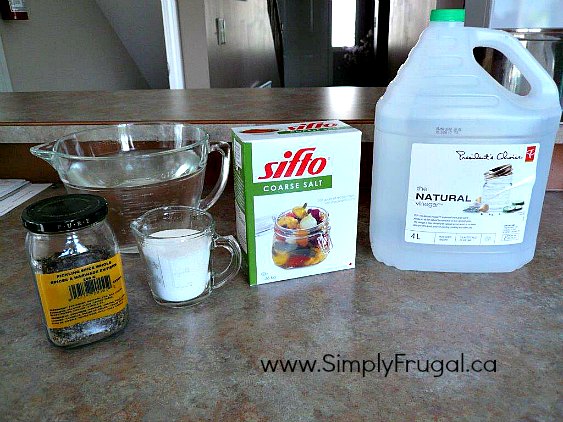
Ingredients:
Approx. 8 lbs. Pickling Cucumbers, fresh and crisp
Garlic
Dill weed
Pickling Brine:
8 tsp. pickling spice
9 1/3 cups water
4 cups white vinegar
9 Tbsp. coarse salt
1/2 cup white sugar
Here are the instructions in picture format (below the pictures are the written instructions):
Here are the ingredients needed to create the pickling brine.
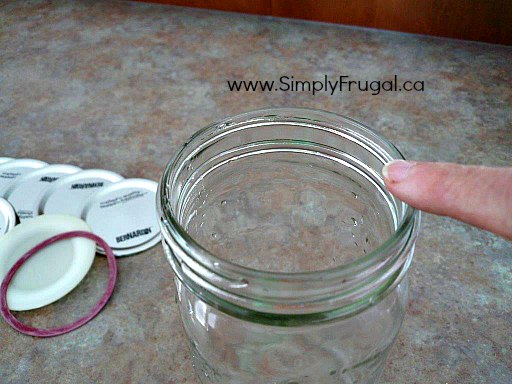
Check each jar for imperfections by running your finger along the rim.
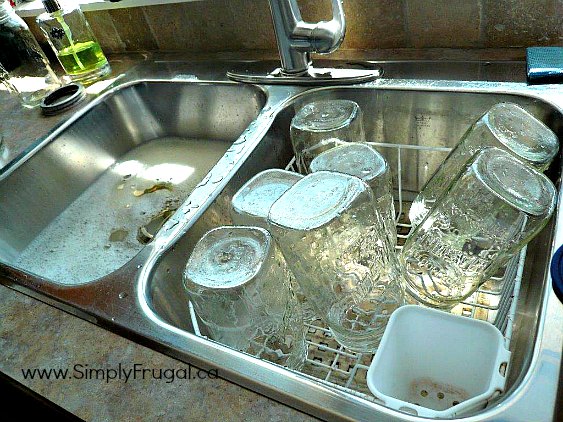
Wash and rinse the jars, lids and screw band metal rings.
Fill the canner about ½ full with water and start to heat it up. Place clean jars filled with water in the canner. Bring water to a boil, and boil for 10 minutes. This sterilizes the jars. Place the lids in a small sauce pan or pot filled with water to cover. Bring the water to a boil for a few minutes, and then lower the temperature, making sure the water stays hot. Combine the pickling brine ingredients and heat until the salt and the sugar is dissolved. Lower the temperature and simmer until finished.
Remove empty jars and place upside down on a clean towel.
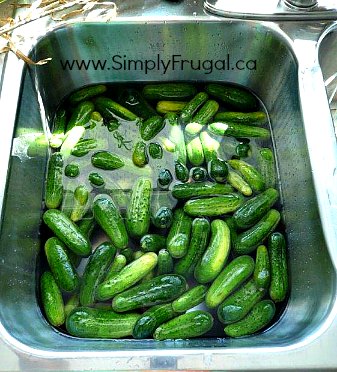
Wash and trim the cucumbers.
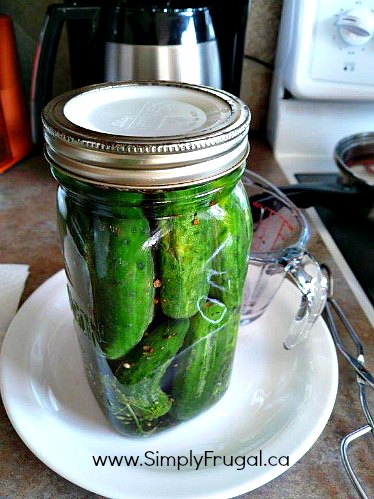
At the bottom of the sterilized jars, add dill and garlic. Pack in the cucumbers as tight as you possibly can. Fill the jars with the heated pickle brine to ½ inch (1 ½ cm.) from the top.
Wipe the top of the jar clean and dry.
Place the sterilized lids on, and then secure the rings until finger tight.
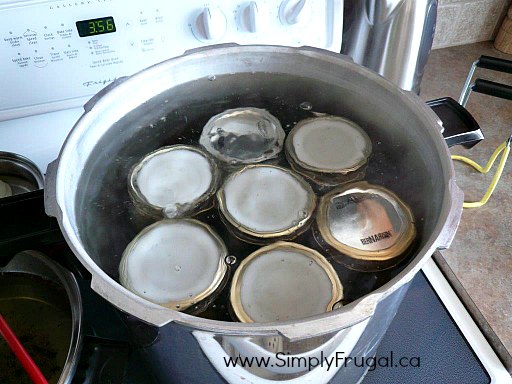
Gently place the jars, using the jar lifter, into the boiling water bath, so they are covered with about 2 inches (5 cm) of water. Bring the water bath canner to a boil, then turn off the heat and let the jars sit in the hot water for 8 – 10 minutes.
Once the timer goes off, using the jar lifter, lift one jar at a time and place gently on the towel (or heat resistant cutting board). Check to see if the outer rings are still secured on, and tighten any that are loose. Make sure the jars sit undisturbed, not touching each other until they are cooled. (Usually overnight) When they are completely cooled, check to see if the lids have sealed. Unscrew the rings and wash and dry them. Wipe clean the jars around the rings.
Before Canning:
Check each jar for imperfections by running your finger along the rim.
Wash and rinse the jars, lids and screw band metal rings.
Fill the canner about ½ full with water and start to heat it up.
Place clean jars filled with water in the canner. Bring water to a boil, and boil for 10 minutes. This sterilizes the jars. Remove empty jars and place upside down on a clean towel.
Place the lids in a small sauce pan or pot filled with water to cover. Bring the water to a boil for a few minutes, and then lower the temperature, making sure the water stays hot.
Combine the pickling brine ingredients and heat until the salt and the sugar is dissolved. Lower the temperature and simmer until finished.
Wash and trim the cucumbers.
The Canning Process:
At the bottom of the sterilized jars, add dill and garlic. Pack in the cucumbers as tight as you possibly can.
Fill the jars with the heated pickle brine to ½ inch (1 ½ cm.) from the top. Wipe the top of the jar clean and dry. Place the sterilized lids on, and then secure the rings until finger tight.
Gently place the jars, using the jar lifter, into the boiling water bath, so they are covered with about 2 inches (5 cm) of water. Bring the water bath canner to a boil, then turn off the heat and let the jars sit in the hot water for 8 – 10 minutes.
Once the timer goes off, using the jar lifter, lift one jar at a time and place gently on the towel (or heat resistant cutting board). Check to see if the outer rings are still secured on, and tighten any that are loose.
Make sure the jars sit undisturbed, not touching each other until they are cooled. (Usually overnight) When they are completely cooled, check to see if the lids have sealed. Unscrew the rings and wash and dry them. Wipe clean the jars around the rings. You can then either screw the rings back on, or leave them off.
Store your canned pickles in a cool dark place.
Note: If the jars have not sealed, place them in the fridge right away and you can start eating them after 24 hours, but they will taste better after soaking in the brine for 2 weeks at least.
These delicious pickles are ready to eat in about 2 weeks.
Finally, stand back, look at those amazing canned pickles, congratulate yourself for doing something domestic and making your own dill pickles and knowing the ingredients you have used!
Just don’t look at the big mess you made until after you had your coffee/tea break! Then you will be able to tackle the tidying and cleaning up!
Hope you enjoy these pickles as much as our family has!
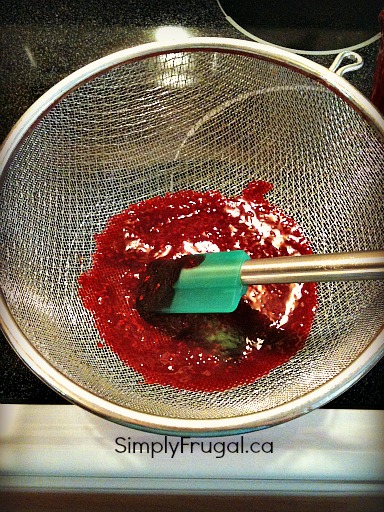
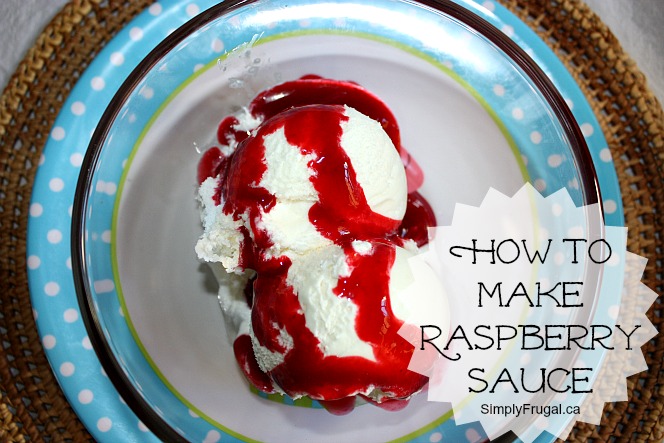
In keeping with the raspberry theme this week, I thought I’d share my all time favourite raspberry sauce! As you can see, it’s perfectly paired with ice cream as well as a great topping for pancakes, cheesecake and other desserts. I think this would also taste great in a smoothie or a milkshake!
Another great thing about this raspberry sauce is that you can use fresh or frozen raspberries. I used some frozen raspberries that I had picked last year.
Follow my picture directions to learn how to make raspberry sauce (recipe will be below):
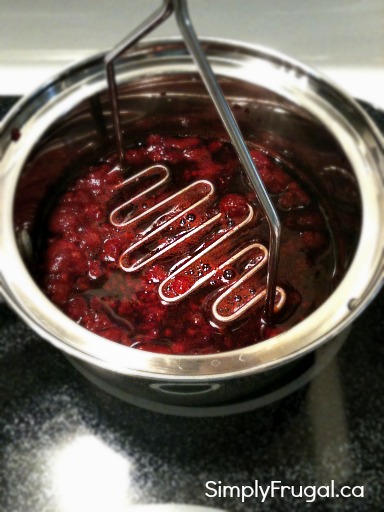
Add 4 cups of raspberries to a medium saucepan with 1/2 cup water. Crush the raspberries with a potato masher.
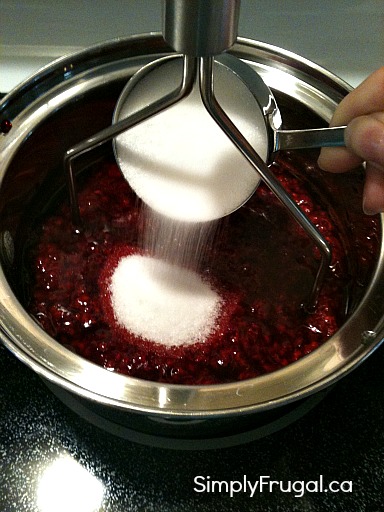
Add 1/2 – 3/4 cup sugar.
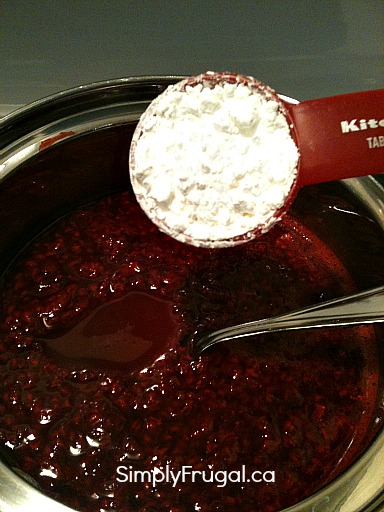
Add 1 Tablespoon of cornstarch. Bring to a boil while stirring constantly. Reduce heat and simmer for 2 minutes.