Any time I decide I’d like to update something in my home, I’ll admit that my first instinct is to go and buy that item brand new. That, my fellow frugalites is not frugal. At least most of the time. I mentioned that it’s my instinct to go and buy something brand new, but I usually convince myself to make do with what I have.
Enter, DIY projects. I love dreaming of projects to do but the thought of spending a lot of time on a project scares me away! However, I do love the satisfaction that I get when I complete a project!
Before my daughter came along and I got busy with the blog, I used to do quite a bit of sewing and other fun crafty things. In fact, a large portion of our wedding was made up of DIY projects. I also gave details about the decorating projects I did (before she was born) in my daughter’s room.
So, all that rambling to say that I always seem to have the desire to do projects but I never seem to make them a priority. 🙁 So, today I have a list of a few DIY projects that I’d like to complete as the weather warms up. Most of them are easy and achievable. 🙂 Here’s my list. I will show you before and afters once I complete them!
Spray paint our living room lamp
Spray paint a little shelf I bought for $5
Paint our walls in the entire house (this will take me a while, since I’ll work on one wall at a time)
Bake and decorate Sienna’s 3rd Birthday cake (Does this count as a DIY project? Since I’m not a great cake maker, this always feels like a big feat)
I’m listing those things because I find once they’re out there publicly, I have to do them! 😉 Hold me accountable, ok? Our weather is warming up nicely so I’ll have pictures for you in the nearish future for some projects!
I happen to own and love a Keurig machine. What I don’t love is how many K-Cups I’m left with for the trash. I’ve started saving them for craft time with my daughter, but those empty K-cups can really add up! So, why not take a look at some new ways to use them? K-cups can actually be quite practical once they are empty; you just need to get a little creative. Take a peek below at 10 ways to reuse K-cups that you can try, long after the coffee is gone!
10 Ways to Reuse K-Cups
1. Organize office supplies.
Put a few K-cups in office drawers to hold paper clips, pins, stamps, and other small office supplies that tend to get lost in the shuffle.
2. Organize small jewelry pieces.
Tuck a K-cup or two in jewelry boxes or drawers to hold small earrings, earring backings, pin backings, and other small jewelry pieces.
3. Make a matching game for kids.
Place a sticker on the inside of each K-Cup. Make sure each sticker has a match found in another cup. Turn the cups over and let kids play Memory. Talk about a game you can make for just pennies!
4. Start seeds.
K-Cups are the perfect size cup to start seeds in. Just poke a quick hole in the bottom for drainage, add soil, and add your seed. It is a frugal way to get gardening!
5. Scoop out dry goods.
Rinse out a K-cup and keep it in your flour, sugar, and other dry goods to use as a scoop. It is a quick way to get what you need without getting hands or spoons dirty.
6. Add a few to sensory tables.
Toss a few K-cups into sand or water for children to enjoy. They will love scooping with them and can practice pouring as well. Who would have thought that K-cups can strengthen fine motor skills?
7. Craft some little doll cups.
Take sharpie markers and decorate the outside of the K-cup. You can then give them to dolls to use for tea parties. They also make great accessories for dolls as you can make them into trash cans, hats, hair accessory holders, and more.
8. Organize craft supplies.
K-cups are perfect for keeping buttons, stickers, pom poms, and other small craft supplies organized and at your fingertips for when you need them.
9. Freeze herbs.
This is a really cool way to reuse K-cups. Just fill them with water and add your favorite chopped herbs. Freeze them. When you need herbs for a recipe, all you need to do is pop out the herb cube and add it. You could even make flavored ice cubes this way, freezing fruit juices in the cup before using.
10. Make a stamp or stencil.
K-cups are great when you need a circle stencil. You can also dip the K-cup in paint and use it as a stamp! You will get the perfect circle every time.
Did you ever think K-cups could be so practical? Give these tips for using K-cups a try and see how creative you can get.
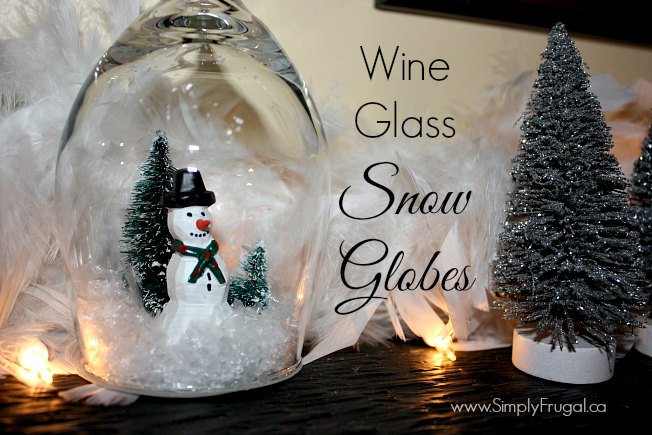
You guys, I made a Christmas craft! I’ve been spending all my time baking these days so I wasn’t sure I’d get this done! And I even love the way it turned out!
This is one of those projects that make me wonder why I left it until the last minute. It was so easy. The hardest part was hunting down the fake snow (which I found at Walmart). I’m sure you could find everything you need at the dollar store, too.
Here’s what you need to make these Wine Glass Snow Globes:
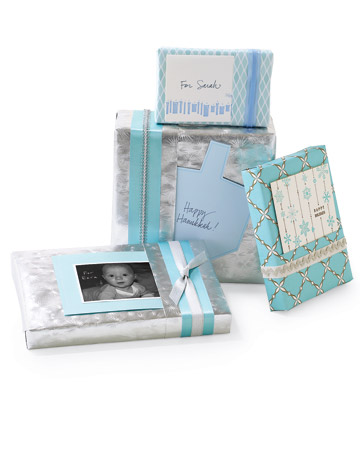
Do your gift cards and greeting cards always get separated from the present? Gift cards will never go astray again thanks to the built-in pocket created by this clever wrapping technique.
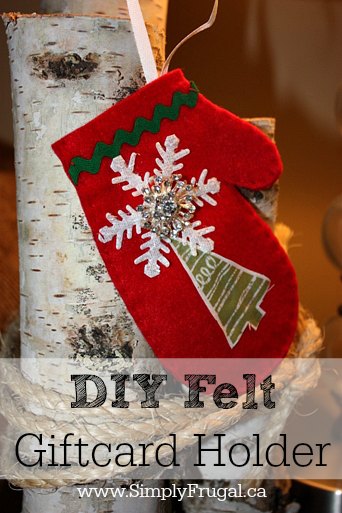
Here’s one of my easy gifts I’ve been working on! I wanted something cute to put gift cards in since I’ll be giving a few gift cards this year. I came up with the felt mitten idea which can be hung on the Christmas tree as well! I had most of the supplies on hand already. Here’s how I did it:
Supplies:
Felt piece (dollar store)
Fabric snowflake (dollar store)
Ric rac
Christmas tree cut from a piece of fabric I had
Sparkly button (from an old hair elastic)
Needle & thread
Ribbon (for the mitten to hang on the tree)
Basically, I just drew a mitten shape on a scrap piece of paper that was big enough to fit a gift card, then traced it onto the felt. Cut it out, then decorated the one side with whatever I could find around the house with fabric glue and thread! After the one side was decorated, I put the two mitten pieces together by hand stitching them together. You could use a sewing machine, but I liked the handmade look of the uneven stitches. That’s pretty much it! A gift card holder and an ornament in one!