Mar 22 | Easy DIY, Frugal Living
Doesn’t it seem as though everyone has an abundance of egg cartons around the home? The typical family can easily go through a dozen eggs in a week, leaving you with an empty carton to recycle. But before you give that old egg carton the heave ho, take a look below at 7 creative uses for egg cartons that you can try! You may never look at egg cartons the same way again.
7 Creative Uses for Egg Cartons

1. Make seed starters.
Poke a hole in the bottom of each compartment, fill with soil, and add a seed. They are the perfect seed starters! If you use cardboard egg cartons, the cups can be planted directly in the ground when ready.
2. Sort office supplies.
Cut away the bottom half of the egg carton and use it to sort office supplies. The little cups are great for storing safety pins, paper clips, push pins and more.
3. Add them to sensory tables.
Cut the compartment into tiny cups and add them to sensory tables for kids to use as cups and pouring devices. They also work great in kiddie pools and sandboxes.
4. Sort your jewelry.
Cut the compartment half and use it to keep jewelry sorted. It is great for holding small pieces (such as earrings) and keeps them from becoming lost or damaged.
5. Make suet balls.
Mix some birdseed and bacon grease into a mixing bowl and spoon into the compartments. Press it in and freeze until solid. Pop the suet balls out and place outside for birds to dine on. They will love them.
6. Craft a sorting game.
Give children a variety of colored chips, marbles, or scraps of paper and allow them to sort the colors into the various compartments. You can also have them sort according to size or shape if you wish.
7. Save them for packaging cushion.
Foam egg cartons are great for storing breakable items such as holiday ornaments. You can also place the entire cartons in between valuables (for example plates, china, and other breakables) when packing.
Bonus: Use them to make egg carton flowers! This is fun for the kids and you! Take a look at all these great ideas I found on Pinterest!
Did you ever think an old egg carton could be so valuable? Give these tips a try for breathing a new life into your empty egg cartons and see how great they can be. Chances are, you won’t need to go any further than your own recycling bin. 🙂
How do you like to reuse your empty egg cartons? Let me know in the comments below!
Aug 16 | Easy DIY

We’re 5 months into living in our new house. Everything is unpacked and it’s feeling more like home every day. However, we’re still missing some personality in most of the rooms. I’ve been waiting to hang pictures and add decor items until after we’ve painted the walls. Well, we’re nearing that point so I’ve been having fun looking for inspiration on Pinterest!
BUT… decorating a home isn’t always easy or cheap. In fact, making a house feel more like home with decor items can be downright expensive! So, I’ve been looking for really simple and budget friendly ways to decorate. There are some crazy creative people out there that have turned everyday dollar store items into near works of art.
From practical to pretty, I’ve rounded up my favourite Dollar Store DIY’s that Will Make Your Home Look Fantastic.
DIY Hurricane Lanterns

From Grosgrain
Seriously, how beautiful are these hurricane lanterns? One of these would look so nice as a table centerpiece or on a shelf.
Metallic Rope Basket

From Lydi Out Loud
Can you believe this basket is made out of a laundry basket, some rope, paint and felt? So pretty and practical!
Industrial Wire Mail Baskets

From A House Full of Sunshine
Here’s a quick and simple transformation that is sure to get your important papers more organized. Find some similar chalkboard signs on Amazon here.
Metallic Flower Pots

From Listotic
Your house plants will be blingin’ on a budget with this simple terra cotta planter makeover.
Patio Table

From Hometalk
This is going to be the very first thing that I am going to make. It will be perfect outside by our front door!
Dollar Store Wreath

From The Crazy Craft Lady
Once again talking about the front door, I think that a DIY wreath like this would look so pretty!
Elephant Book Ends

From Love Grows Wild
Have you got a few books to wrangle? These elephant book ends are so cute and simple to make!
Dollar Store Craft Caddy

From Simply Frugal
This DIY craft caddy isn’t just for craft supplies! Stylishly round up your cutlery, cooking utensils and so much more with this easy DIY.
Succulent Planter

From Craftberry Bush
I’m a big fan of succulents and I happen to think this DIY would look so pretty on a shelf or tucked in a kitchen corner. Or maybe the seldom decorated bathroom?
Check out these dollar store decor ideas and let me know which one is your favourite in the comments below!
May 19 | Easy DIY

I’ll be honest in saying that I’m sort of dreading this summer. My oldest daughter will be finished her two days a week preschool and swimming lessons so she will be home a lot more. As with most five year olds, she has a lot of energy and likes to keep busy. Normally this is okay, but the littlest is still napping quite a bit so during this time, we’re stuck at home. (and boredom usually strikes…)
With that in mind, I had to figure something out. Especially since I wanted to figure out some easy activities I could do with my oldest to make her feel like mommy isn’t just around for the baby’s needs.
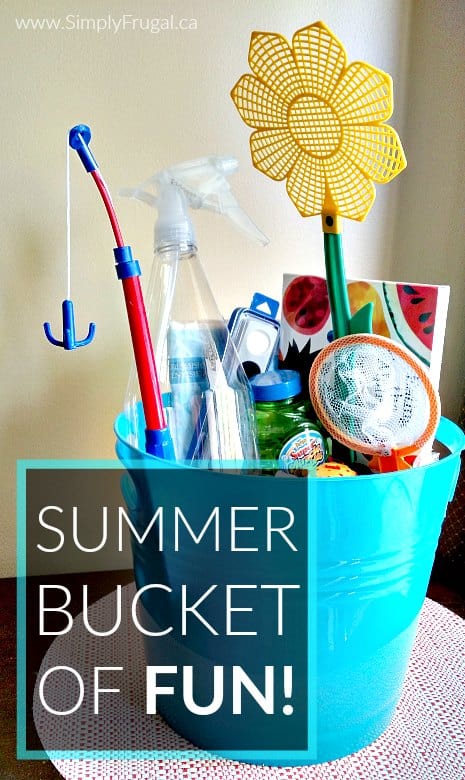
Enter… The Summer Bucket of FUN!
I’m so so excited about it! This summer bucket of fun is loaded with supplies, mostly from the dollar store, that can be used to create an almost endless supply of activities. I think it’s going to be a hit!
The idea is that when Sienna is looking for something to do, she’ll pull something out of the bucket and we’ll get to work doing something fun. Some of the activities she can do on her own as well. I hope that this bucket will create some fun memories for her and remind her that life isn’t all about her little sister. 😉
Here’s what’s included in the bucket:
In order to complete some of the activities, I’ll have to gather some supplies that I most likely have on hand already. In total, I spent about $25 at the dollar store to fill the bucket, so I think each activity will end up being quite frugal too! (Especially since the list below is only a small list of possibilities!)
Here are some of the possible activities that we can do with the supplies from the bucket:
- My Summer Adventures book
- Spray Chalk painting
- Hand print Octopus
- Flip Flop Footprint picture
- Bird Feeders
- Shower curtain drawing
- Rock candy experiment
- Ice cream in a Bag
- Marshmallow and toothpick building
- Nature scavenger hunt
- Make a bouncy ball
- Go to the library
- Paint rocks
- Movie night/day
- Ice block treasure hunt
- Fishing game
- Blow bubbles
- Chalk drawing
- Magazine art
- Melted crayon art
- Fly swatter art
- Decoupage vase
- Popsicle stick basket
You can purchase The Summer Bucket of FUN ebook! The ebook includes a list of all the activities, a supply list and instructions for all the activities in one convenient downloadable book! I’ve made it really affordable at only $5.
BUY THE SUMMER BUCKET OF FUN EBOOK HERE.
Dec 19 | Easy DIY, Holidays

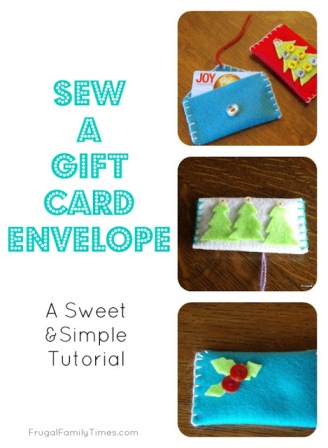
Robin from Frugal Family Times sent along the link to her tutorial explaining how to sew a simple gift card envelope! So cute!
For those of you that give gift cards, how do you like to present them? Any unique wrapping ideas you can share with us?
Dec 16 | Easy DIY

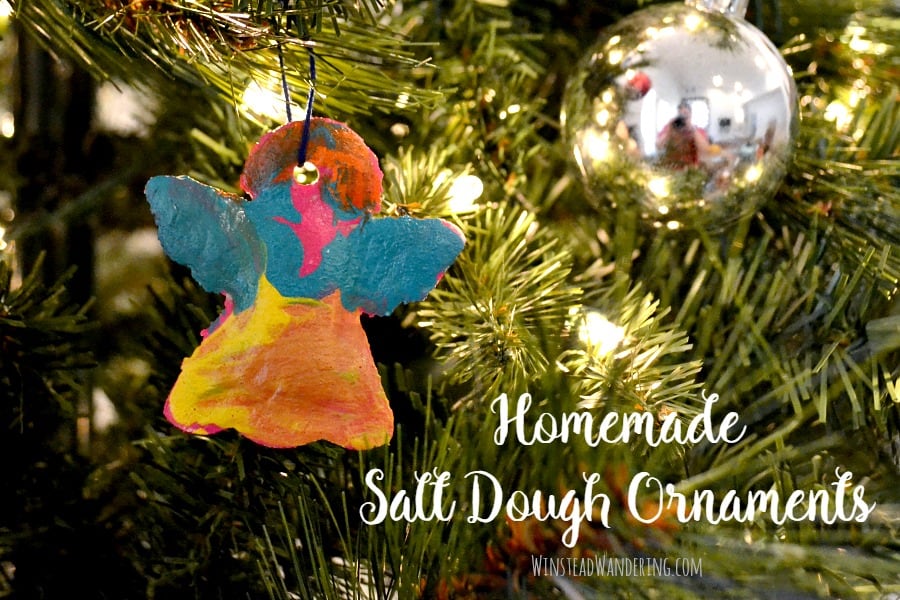
Looking for a frugal Christmas craft to do with the kids? Try making Homemade Salt Dough Ornaments! I think these could even make great gifts for the grandparents. 🙂
Dec 5 | Easy DIY, Holiday Crafts, Holidays, Homemade Christmas Gifts
This is such a simple gift idea that is inexpensive and a great way for kids to use their imaginations rather than grabbing for the electronics. Today I would love to share my Play Dough Gift idea…Candy Cane Play Dough!
You can make the Candy Cane Play Dough and give that as a gift… or you can fill a jar with the dry ingredients and let your recipients make the play dough themselves at home. Either way, I think it’s a fun and unique gift idea for kids.
Here’s how to make Candy Cane Play Dough:
INGREDIENTS
2 cups all purpose flour
1 cup salt
5-6 drops of peppermint essential oil (or 1/2 teaspoon peppermint extract)
1 Tablespoon vegetable oil
3/4 cup cold water
Red washable paint/watercolor
White glitter
DIRECTIONS
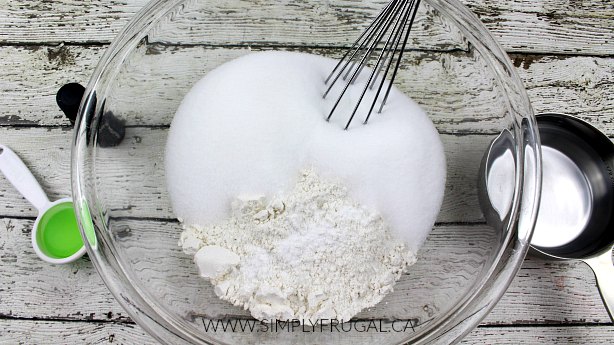
1. In a mixing bowl, whisk together the flour and salt.

2. Add the extract, oil and water and mix until well incorporated.

3. Remove dough from bowl and place on a flat, lightly floured surface. Knead until a soft play dough forms (this takes about 3-4 minutes).
4. Separate the play dough in half. Set aside one half and place the other in a medium mixing bowl.

5. Add the red paint/watercolor to the play dough in the bowl and mix until your desired color is achieved. I added about 2 Tablespoons of paint to get a rich red color.

6. Lay both colors of play dough out on your play surface and sprinkle with glitter. Enjoy making candy canes, peppermint “candies”, etc!
There you have it! A fun and frugal gift idea that kids are sure to enjoy! I’m excited to give it to my daughter, maybe we’ll get to enjoy drinking hot coffee on Christmas morning!