Just in case you have a bit of leftover turkey from the weekend :), I thought I would share this delicious slow cooker turkey chili recipe with you! While it’s meant for ground turkey, I’m pretty confident that leftovers from your turkey dinner will work just as well!
This slow cooker turkey chili is perfect for cold nights when all you want is some comfort food. I’ve tried quite a few chili recipes and I think I’ve found my new favourite! Actually, everyone enjoyed it. We ate it two nights in a row, then I froze the rest to make for a super easy meal one night!
Here is yet another tasty recipe from Lorraine! This time it’s an apple crisp recipe especially for those of you with gluten sensitivities.
The original recipe was taken from a cookbook titled: “Food à la canadienne”. Lorraine made the necessary changes to adapt it to their gluten free needs. This Gluten-free apple crisp is sure to please!
Lorraine sent along her delicious baked beans recipe that she thought you would enjoy eating with your Thanksgiving brunch this weekend!
Her family typically eats these with a green salad and gluten free bread or buns. But, on occasion, they have this bean recipe for breakfast with toast or a bagel for a complete protein and some fruit. This provides a meal that contains many vitamins and minerals and has a good dose of fibre and it is a frugal way of feeding your family!
When you need dinner on the table quickly without spending a fortune, simple recipes like these Chili Rubbed Pork Chops with lime butter are a lifesaver. A flavorful chili rub gives the pork chops plenty of delicious flavour, while the lime butter adds a bright, fresh finish. Best of all, this is an easy meal that feels a little more special without requiring a lot of time or expensive ingredients.
Serve these pork chops with mashed or roasted potatoes and some steamed vegetables for an easy, budget-friendly dinner. I fried these in a pan, but they would also be delicious cooked on the BBQ. Especially during the warmer months!
Combine the cumin, paprika & chili powder in a small bowl. Season the pork chops with salt & pepper and then evenly sprinkle the spice mix over them and rub in to the meat.
Combine the butter, garlic & lime juice in a small bowl. Set aside while you cook the pork chops.
Add the olive oil to a large skillet & heat over medium high heat. Add the pork chops to the skillet and pan sear until cooked through. About 5 minutes on each side. (Optional: add a small amount of the lime butter to each pork chop while they are cooking.)
Transfer the pork chops to a plate, adding the lime butter to each pork chop to melt from the residual heat.
Combine the cumin, paprika and chili powder in a small bowl. Season the pork chops with salt & pepper and then evenly sprinkle the spice mix over them & rub in to the meat.
Combine the butter, roasted garlic and lime juice in a small bowl. Set aside while you cook the pork chops.
Add the olive oil to a large skillet and heat over medium high heat. Add the pork chops to the skillet and pan sear until cooked through; about 5 minutes on each side. {Optional} add a small amount of the lime butter to each pork chop while they are cooking.
Transfer the pork chops to a plate, adding the lime butter to each pork chop to melt from the heat.
Serve immediately.
These Chili Rubbed Pork Chops with Lime Butter are proof that a quick and affordable dinner doesn't have to be boring. They're easy enough for a busy weeknight, but tasty enough to make you feel like you've put a little extra effort into dinner. Add some potatoes and vegetables, and you've got a simple, satisfying meal the whole family can enjoy.
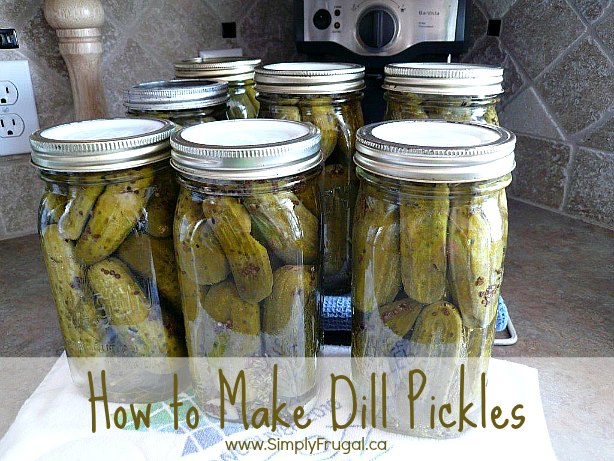
My all-time favourite dill pickles when growing up were my Gramma’s dill pickles. She would have them on the table before we sat down to eat. By the time we were actually seated and ready to eat, they were all gone! So, she would go back to the pickle jar and take some more out so we could devour them some more! Everyone loved Gramma’s dill pickles. I am so happy that she actually had the recipe written down, so I can carry on creating the best dills!
The recipe is simple; however, I have tried to explain all the steps needed to create these wonderful dill pickles.
What you will need:
Equipment:
Water bath canner (or a huge pot to sterilize the jars after filling)
Lid lifter (magnetic or tongs) (to pick the lids out of the boiling water where they were sterilized)
Jar funnel (optional – I don’t use this for dill pickles)
Saucepanorpot to sterilize the lids
Large spoon or ladle or measuring cup, which works great because it has a pouring spout
Quart/Litre wide mouth glass jars
Lids; thin flat round metal lids (made especially for canning) or BPA free reusable canning lids and food safe canning rubber rings
Screw band metal rings
Towel to place sterilized jars on
Ingredients:
Approx. 8 lbs. Pickling Cucumbers, fresh and crisp
Garlic
Dill weed
Pickling Brine:
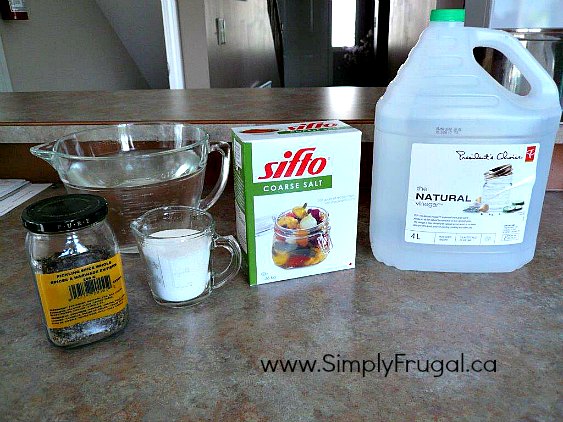
8 tsp. pickling spice
9 1/3 cups water
4 cups white vinegar
9 Tbsp. coarse salt
1/2 cup white sugar
Here are the instructions in picture format (below the pictures are the written instructions):
Here are the ingredients needed to create the pickling brine.
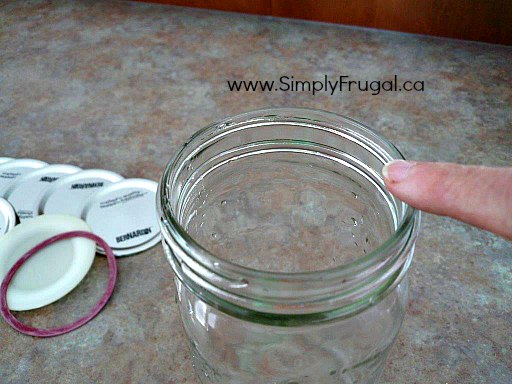
Check each jar for imperfections by running your finger along the rim.
Wash and rinse the jars, lids and screw band metal rings.
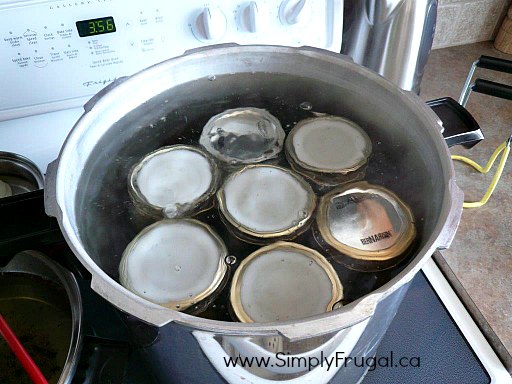
Fill the canner about ½ full with water and start to heat it up. Place clean jars filled with water in the canner. Bring water to a boil, and boil for 10 minutes. This sterilizes the jars. Place the lids in a small sauce pan or pot filled with water to cover. Bring the water to a boil for a few minutes, and then lower the temperature, making sure the water stays hot. Combine the pickling brine ingredients and heat until the salt and the sugar is dissolved. Lower the temperature and simmer until finished.
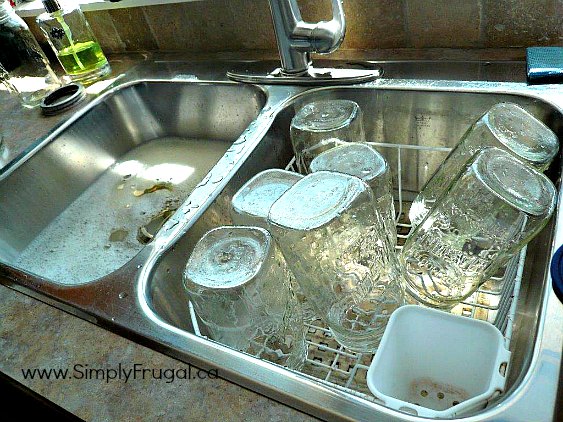
Remove empty jars and place upside down on a clean towel.
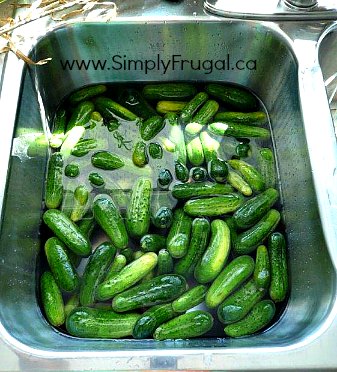
Wash and trim the cucumbers.
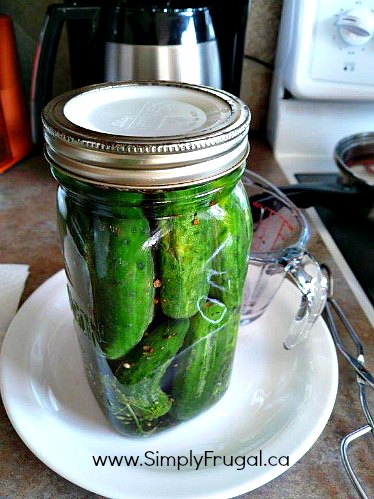
At the bottom of the sterilized jars, add dill and garlic. Pack in the cucumbers as tight as you possibly can. Fill the jars with the heated pickle brine to ½ inch (1 ½ cm.) from the top.
Wipe the top of the jar clean and dry.
Place the sterilized lids on, and then secure the rings until finger tight.
Gently place the jars, using the jar lifter, into the boiling water bath, so they are covered with about 2 inches (5 cm) of water. Bring the water bath canner to a boil, then turn off the heat and let the jars sit in the hot water for 8 – 10 minutes.
Once the timer goes off, using the jar lifter, lift one jar at a time and place gently on the towel (or heat resistant cutting board). Check to see if the outer rings are still secured on, and tighten any that are loose. Make sure the jars sit undisturbed, not touching each other until they are cooled. (Usually overnight) When they are completely cooled, check to see if the lids have sealed. Unscrew the rings and wash and dry them. Wipe clean the jars around the rings.
Before Canning:
Check each jar for imperfections by running your finger along the rim.
Wash and rinse the jars, lids and screw band metal rings.
Fill the canner about ½ full with water and start to heat it up.
Place clean jars filled with water in the canner. Bring water to a boil, and boil for 10 minutes. This sterilizes the jars. Remove empty jars and place upside down on a clean towel.
Place the lids in a small sauce pan or pot filled with water to cover. Bring the water to a boil for a few minutes, and then lower the temperature, making sure the water stays hot.
Combine the pickling brine ingredients and heat until the salt and the sugar is dissolved. Lower the temperature and simmer until finished.
Wash and trim the cucumbers.
The Canning Process:
At the bottom of the sterilized jars, add dill and garlic. Pack in the cucumbers as tight as you possibly can.
Fill the jars with the heated pickle brine to ½ inch (1 ½ cm.) from the top. Wipe the top of the jar clean and dry. Place the sterilized lids on, and then secure the rings until finger tight.
Gently place the jars, using the jar lifter, into the boiling water bath, so they are covered with about 2 inches (5 cm) of water. Bring the water bath canner to a boil, then turn off the heat and let the jars sit in the hot water for 8 – 10 minutes.
Once the timer goes off, using the jar lifter, lift one jar at a time and place gently on the towel (or heat resistant cutting board). Check to see if the outer rings are still secured on, and tighten any that are loose.
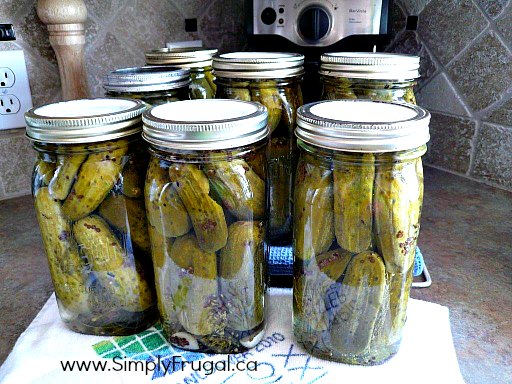
Make sure the jars sit undisturbed, not touching each other until they are cooled. (Usually overnight) When they are completely cooled, check to see if the lids have sealed. Unscrew the rings and wash and dry them. Wipe clean the jars around the rings. You can then either screw the rings back on, or leave them off.
Store your canned pickles in a cool dark place.
Note: If the jars have not sealed, place them in the fridge right away and you can start eating them after 24 hours, but they will taste better after soaking in the brine for 2 weeks at least.
These delicious pickles are ready to eat in about 2 weeks.
Finally, stand back, look at those amazing canned pickles, congratulate yourself for doing something domestic and making your own dill pickles and knowing the ingredients you have used!
Just don’t look at the big mess you made until after you had your coffee/tea break! Then you will be able to tackle the tidying and cleaning up!
Hope you enjoy these pickles as much as our family has!