This was such a big hit in past years, that I took the time to update it with this year's dates! Hope you enjoy 🙂
Are you living in the Okanagan or planning a visit there this summer? Since the Okanagan is the place I’m lucky enough to call home, I wanted to put together a guide packed with fun and affordable things to do all summer long in the land of sunshine. My goal is to make this the ultimate frugal Okanagan summer activity guide! If you know of a great event, hidden gem, or must-visit spot, let me know and I’d love to add it to the list.
Whether you’re planning a weekend escape or you’re lucky enough to call this region home, I hope this Okanagan Summer Activity Guide helps you make the most of every moment. From lake days to orchard visits to local markets to scenic hikes, there’s something here for everyone to enjoy all summer long. Save this Okanagan summer activity guide for later and start ticking off your favourite experiences as you go. Summer in the Okanagan always goes by faster than we think.
Looking for deals?
Grouponhas a ton of local discounted restaurants, spas, things to do and more! Check it out for great savings on the things you want to do in the Okanagan.
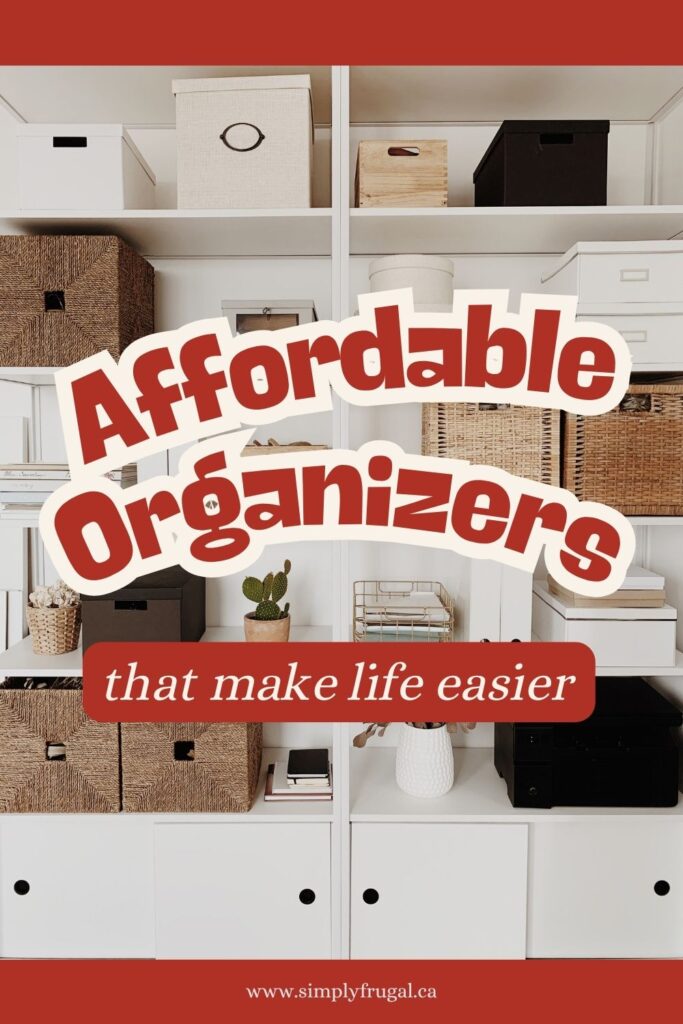
Trying to organize your home without spending a fortune? You're not alone. Keeping your space tidy and clutter-free doesn't have to mean investing in expensive storage systems or custom organization solutions. In fact, some of the best organizing products are surprisingly affordable.
In a world where clutter seems to multiply overnight, having the right tools can make a huge difference. Whether you're organizing a small apartment, a busy family home, or simply looking for ways to make everyday life a little easier, affordable organizers can help you maximize your space while staying within budget.
From kitchen cabinets and bathroom counters to closets and entryways, budget-friendly organization products offer practical solutions for every room in your home. The best part? You don't have to spend a lot to get organized.
Below, you'll find 12 affordable organizers available on Amazon for $25 or less. These clever storage solutions can help reduce clutter, simplify your daily routine, and make your home feel more functional, all without breaking the bank.
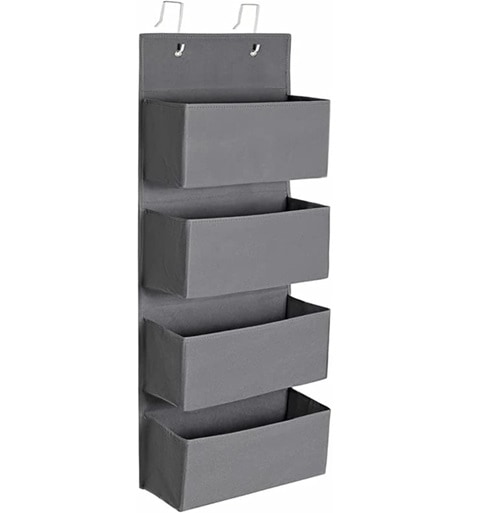
I think one of these over the door organizers would be perfect for those kids who love knick knacks! Or for holding baby supplies. The option are endless, really. See it on Amazon.
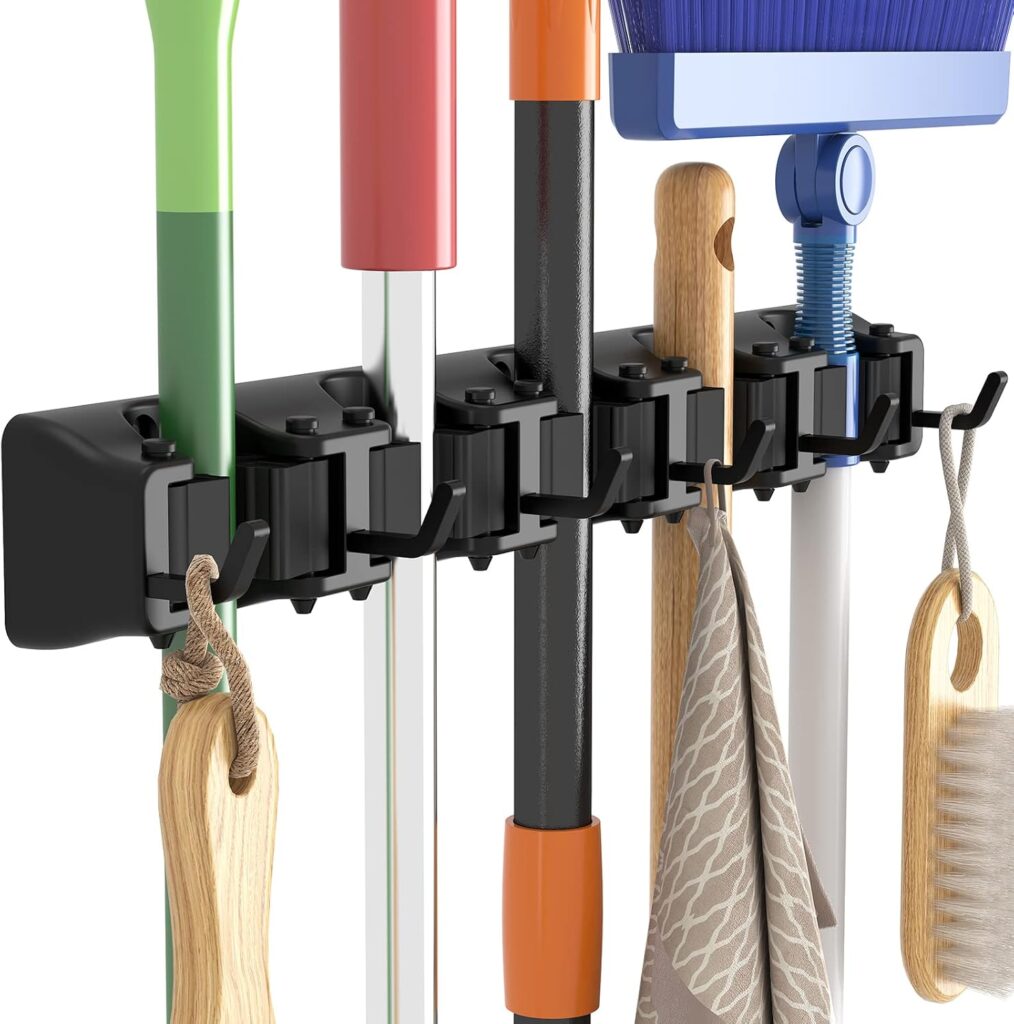
We have something like this in our garage to wrangle the mop and brooms and I love it! This one from Amazon looks even better than what we have. I like that it has small hooks for hanging other small things! See it on Amazon.
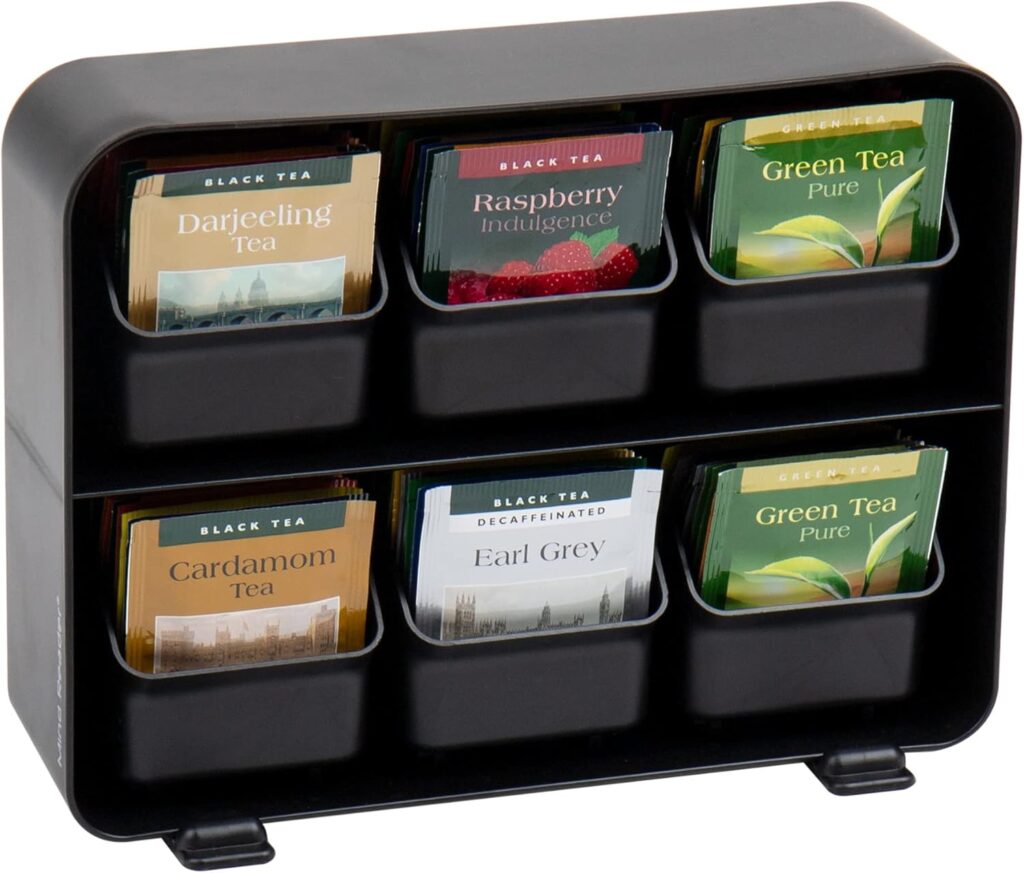
If you have tea drinkers in your home, this tea bag organizer is going to be so nice to have! Say goodbye to stacking boxes that you have to individually move to get to the flavour you really want! See it on Amazon.
If you are short on space in your closets, these pant hangers could free up a lot of space for you! There are ones especially for skirts too. See it on Amazon.
This is advertised as a shoe organizer, but I think this you could store so many different things in one of these! May hair care, toys, gift wrapping supplies, office supplies and so much more! See it on Amazon.
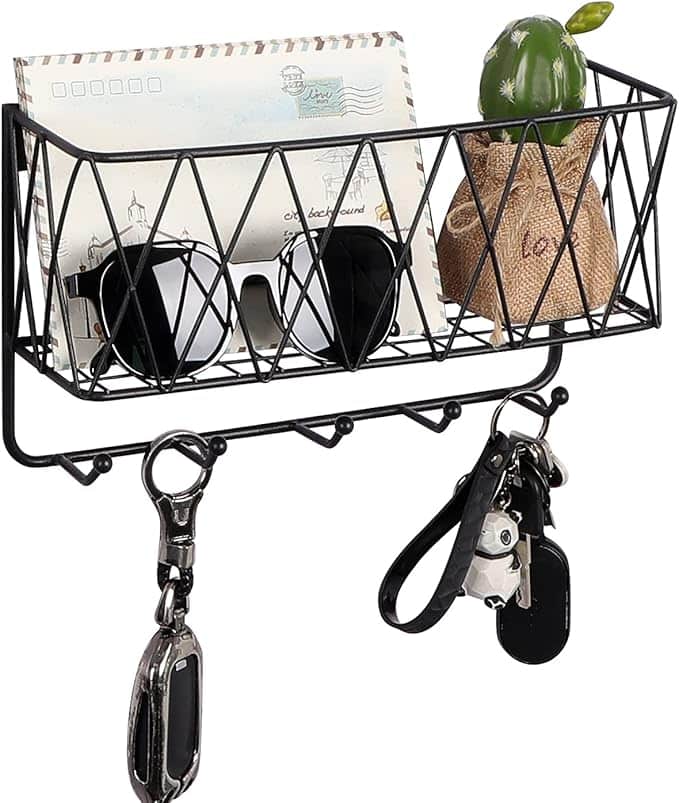
This organizer would make a great addition to any entryway or kitchen. Use the hooks to keep track of car keys, spare keys, and other small items, and use the main compartment to keep track of your mail. See it on Amazon.
I have these all over our house! I've got them in our bathroom drawers, kitchen, the girls' craft desk... they are so good! These are interlocking and I find they slide around less than ones that aren't interlocking. See it on Amazon.
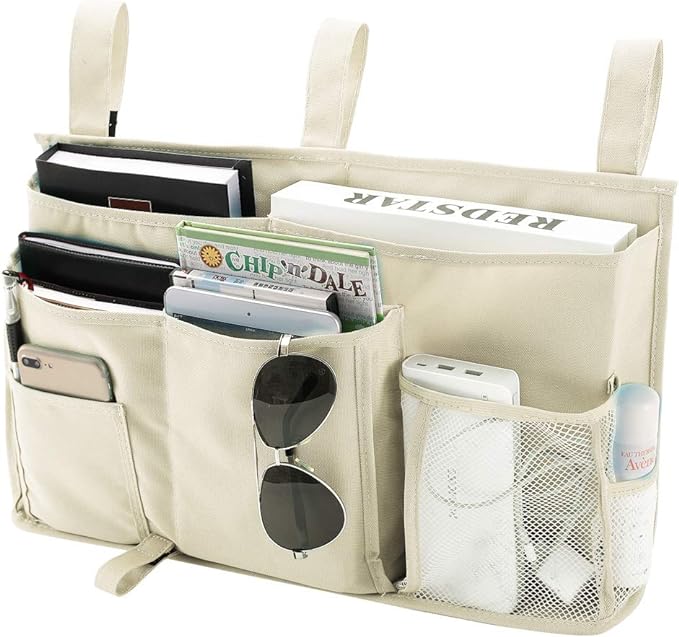
This is the first time I have seen one of these, but instantly I knew it could be very useful! My youngest has a bunk bed in her room and I like that she could have a place to put her water bottle, books and knick knacks. See it on Amazon.
I have a couple of these in our fridge. One holds yogurt cups and the other holds apples/oranges. I love that these ones have removable dividers, making them great for organizing snacks in the pantry. See it on Amazon.
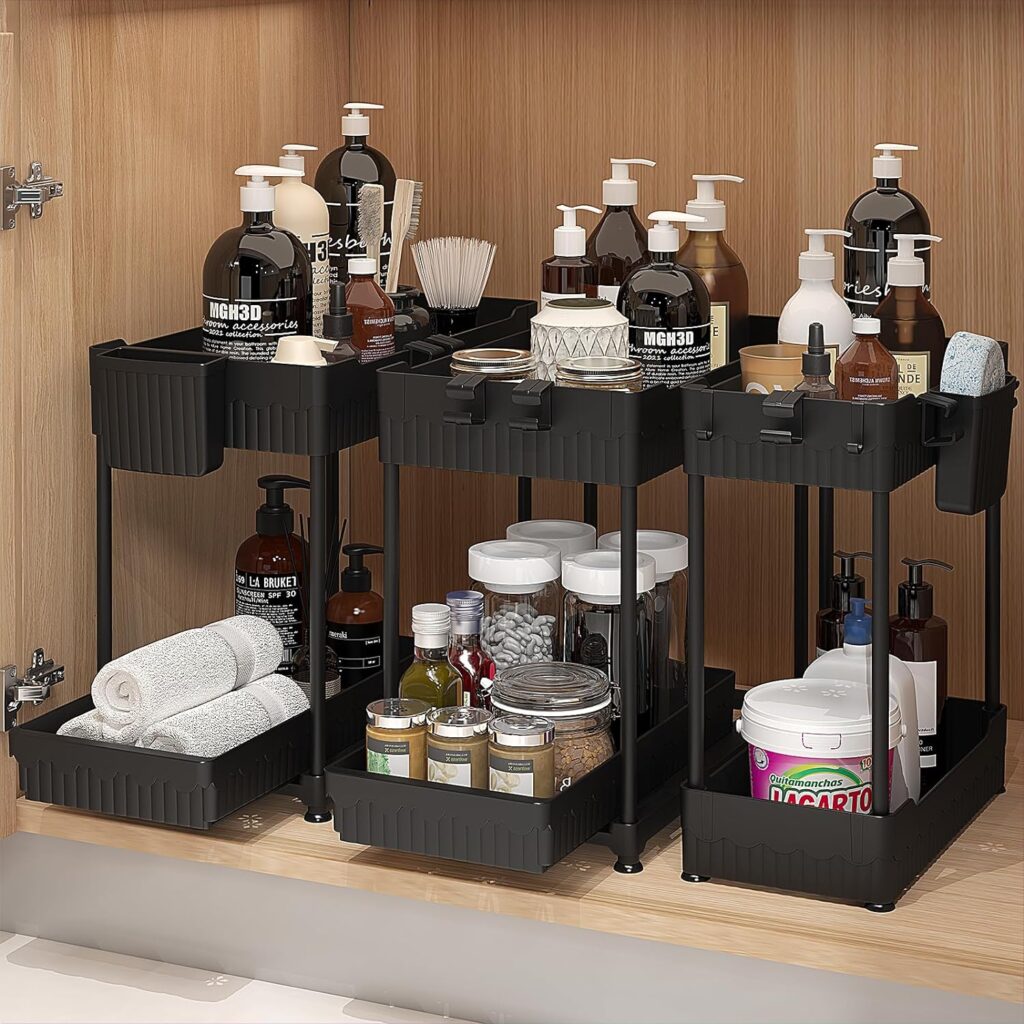
These 2 tier under sink organizers are brilliant! I have one under our kitchen sink and one in each of the bathrooms! Highly recommend! This is a two pack on sale! See it on Amazon.
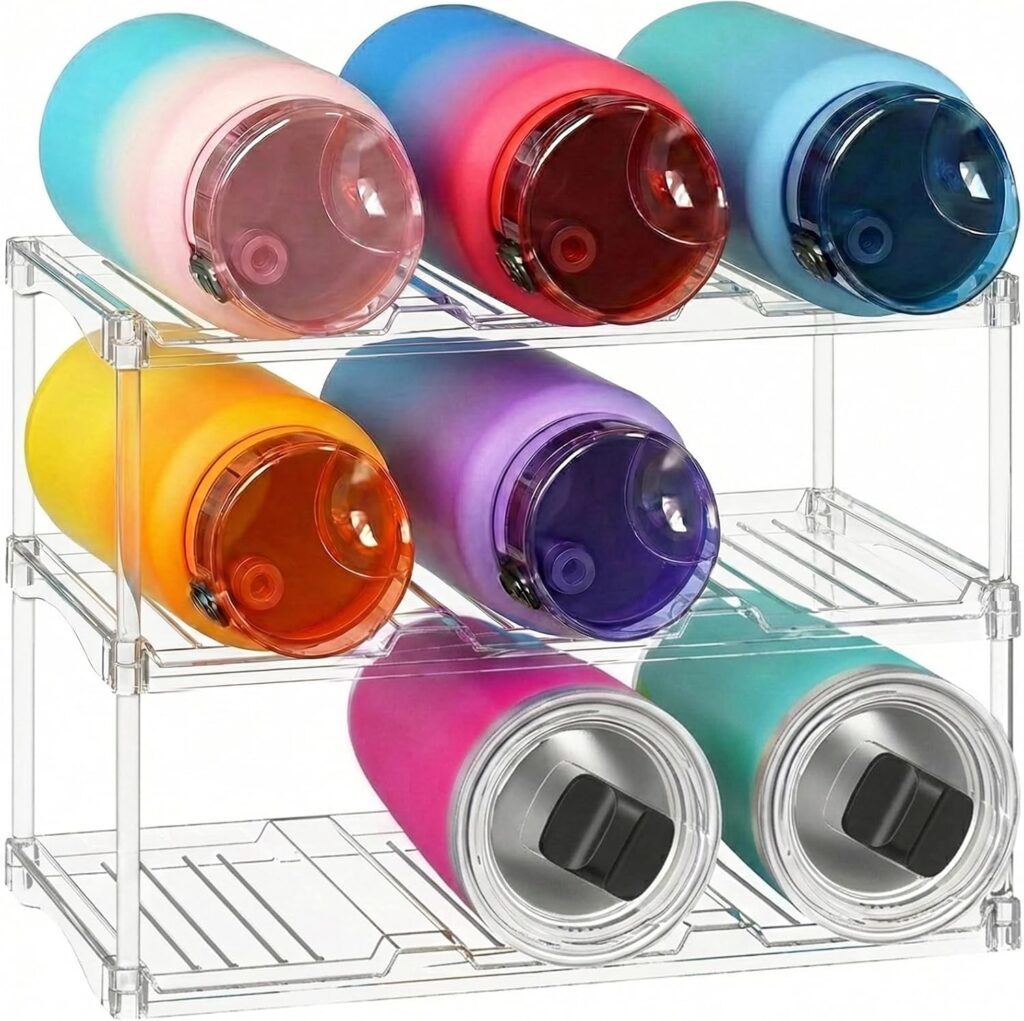
How amazing would these be for easy access of all the water bottles and travel mugs? No need to take everything out just to get the bottle you're wanting. See it on Amazon.
Getting organized doesn't have to come with a big price tag. With the right affordable organizers, you can create a more functional, clutter-free home while sticking to your budget. Whether you're tackling overflowing closets, messy kitchen cabinets, or crowded countertops, these budget-friendly storage solutions can help you make the most of your space. Start with one or two organizers that solve your biggest pain points, and you'll be surprised at how much easier daily life can become when everything has a place.
Want to see more of my affordable organization picks from Amazon? Visit my Amazon storefront to see more than 50 recommendations! (Not every item is under $25 though.)
With Amazon Music, you can now can get one Audible book per month as part of your monthly Amazon Music subscription. Unlimited subscribers can now enjoy one audiobook per month, including the largest catalogue of audiobooks from Audible, top podcasts and millions of songs ad-free.
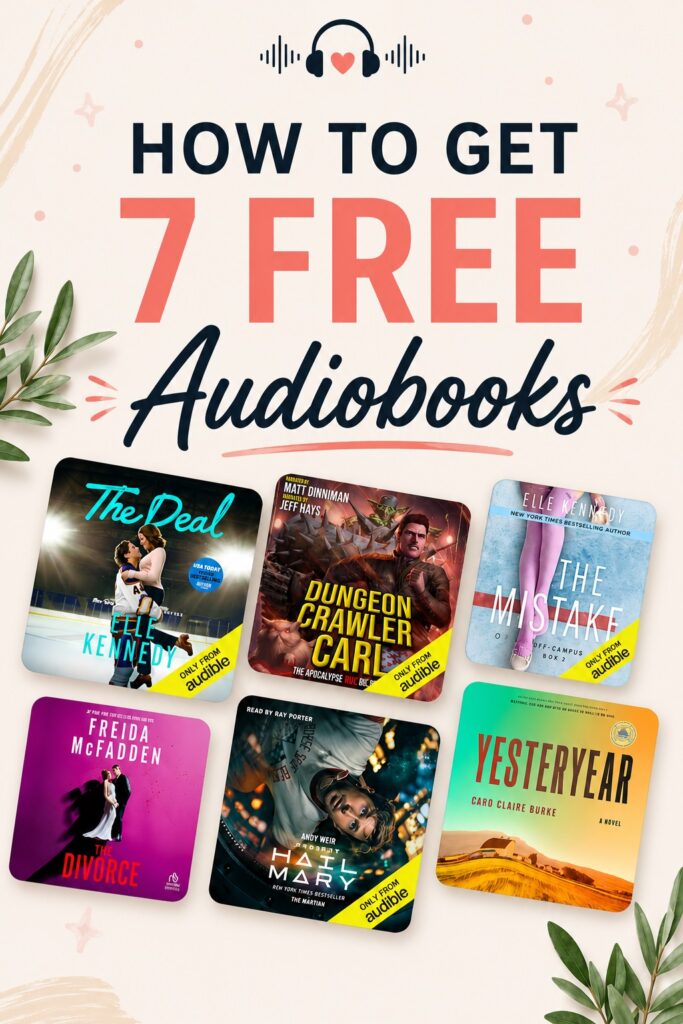
Get 7 Free Audiobooks
Yes, you read that right: 7 audiobooks for FREE!
Here’s the deal:
Right now, you can sign up for a4-month free trial of Amazon Music, which includes one free audiobook each month (you get to pick!). That’s 4 audiobooks to enjoy.
Then, if you're new to Audible or recently canceled, you can grab a 3-month free trial of Audible when you sign up by July 15. That gives you 3 credits to use on any audiobooks you want. You keep them forever, even if you cancel.
That’s 7 audiobooks totally free. No strings, no spending. Just be sure to cancel your memberships before the trials are over, unless you intend on continuing your memberships.
Here’s How to Stretch It Out for 7 Months of Free Listening:
June to September: Use Amazon Music to stream one audiobook a month (these don’t stay in your library, so listen before the month ends).
June to August: Use your Audible credits to grab one book each month and download or pre-order them.
October to December: Listen to the Audible books you downloaded earlier.
That’s 7 FREE audiobooks spread across 7 months. Smart, frugal, and totally doable.
Summer is the perfect time to make memories, enjoy the sunshine, and spend quality time with family and friends. But having fun doesn't have to come with a big price tag. Whether you're looking to keep the kids entertained during school break, plan budget-friendly family adventures, or simply make the most of the warmer weather, there are plenty of affordable ways to enjoy the season. From outdoor adventures and creative activities to local events and staycation ideas, these 45 free and cheap summer activities will help you make the most of summer while keeping your spending in check.
1. Bowl for FREE — Kids can bowl 2 games for FREE every day throughout the Summer. Visit KidsBowlFree.com to see which bowling alleys are participating.
2. Get a FREE Slurpee — July 11 is always FREE Slurpee Day at 7-Eleven. Take your family out for a free tasty treat that will help cool you off during the Summer heat!
3. Make Slime — Both my daughters and I have so much fun creating and playing with this Inside Out Sensory Slime. It's just so fun to see how it works.
4. Make Homemade Iced Tea — Try brewing a batch of my favourite sun tea. You'll have fun watching the water change colour and even more fun adding your favourite flavourings like lemons, mint or even raspberries.
5. Visit a Park — Why not visit a nearby provincial or national park that you've never visited before? You could explore the trails or just do some day camping by bringing along the hot dogs and marshmallows.
6. Visit the Beach — Living in the Okanagan, we have a ton of beautiful beaches at our fingertips. We like to grab a book or magazine and head to one to relax while our daughters play in the sand or on the playground.
7. Go Fruit Picking — One word. Cherries! We love to get out as soon as our favourite fruits are in season. U-Picks are a great way to spend an afternoon with friends or family and are always much cheaper than the grocery stores!
8. Plan a Picnic — Picnics are one of our favourite things to do. We've got a system down to make things easy: It's always bunwiches with deli meat, cheese and pickles. I always throw in some fruit and veggies too. As a treat, I pack some cold pop and a bag of chips. Simple!
9. Fly a Kite — Well, I haven't flown a kite since I was a kid, but it still sounds like a fun idea! Don’t own one? This one has great reviews on Amazon.
10. Pitch a Tent in the backyard — Give the kids a fun experience by pitching a tent in your own backyard. Build a campfire, or use a propane fire ring like we do (because of campfire bans) to roast marshmallows.
11. Make Art with Sidewalk Chalk — Sidewalk chalk is something I always have on hand so Sienna can go out to create some masterpieces on the sidewalk or the basketball court we have at our townhouse. This is something she likes to do on her own so I can get a little work done. 😉
12. Plant Flowers — Now, you have to be careful with this one as buying "only a few" plants can really add up! (Trust me, I know!) Rather than planting an entire garden, you could concentrate on filling up a planter to keep costs down. While you're at it, why not create this Milk Jug Watering Can so the kids can help water.
13. Plant an Herb Garden — Another fun planting project is to plant an herb garden. Fresh herbs are so great to have on hand to make meals delicious. Growing your own herbs can also save you a bundle at the grocery store.
14. Plan a Scavenger Hunt — Want to get the kids outside? They can spend their summer outdoors with a fun scavenger hunt! Buggy and Buddy has 30 free printable options - you're sure to find something appealing!
15. Run Through the Sprinklers — Cool off in the backyard with sprinklers or even the garden hose. Even water balloons would be a blast! You can pick up water balloons at the dollar store or even one of these neat Fast Fill kits from Amazon.
16. Blow Bubbles — Bubbles are always a hit around here! When I see them for the first time in the spring, I'll pick up a few of those bubble wands that cost only $1. You could even try whipping up your own bubble solution for the kids to play with in the yard or at the beach.
17. Have a Garage Sale — Gather up all your unwanted items and host a garage sale one weekend to make some extra cash. Let the kids join in on the fun by setting up a lemonade stand for customers. Here are some garage sale tipsfrom Simply Frugal readers that you may enjoy!
18. Visit a local Festival or Event – Our city hosts regular free music events, movies in the park and even summer festivals that are fun for the whole family. These events are free for everyone to enjoy. Check your newspapers and city website to see what's being offered this year near you!
19. Visit the Library — The library is a great place to visit over the summer months. I believe most libraries offer reading challenges that are sure to encourage reading even while school is out. Check out this post for more ideas on how the library can save you money.
20. Head to the Farmer’s Market – Support your local farmers, and check out a couple of the markets in your area throughout the Summer. You really can’t beat the quality of the produce and the neat homemade items. Here are 5 reasons to buy local produce.
21. Go Swim in the Pool — Since most of us don't have a swimming pool, head out to one in your community to cool off. Some may require a small entrance fee, but can be loads of fun for the kids.
22. Stop By a Splash Park — Another fun option for the especially hot summer days is to stop at a local splash park. We like to meet friends there since my daughter has a bit more confidence when she's not surrounded by strangers trying to get her wet. 😉
23. Play on a Sports Team — Love to play sports? Why not gather a group of friends and put together a beach volleyball team? Or maybe ultimate frisbee? If you'd rather, you could sign up your group of friends for a weekend tournament instead.
24. Go to the Movie Theatre - Currently, Cineplex movie theatres are offering a discount on movies on Tuesdays. Take a look here for more details.
25. Snag a Daily Deal — Keep an eye out on Grouponand WagJag for deals and local activities for huge savings. You might be surprised at everything that’s offered in your own city!
26. Go Hiking— Our family loves to go for hikes, they're not quite as long now that we have kids, but it's still an enjoyable activity! Visit a local bookstore for trail maps or check AllTrails for hiking trails near you.
27. Attend a Home Depot Workshop — The Home Depot offers these great FREE workshops where kids can build a different project each month. Check this page for the schedule.
28. Watch Fireworks — Canada Day is known to be a day where fireworks will be involved. Why not find a special viewing point to enjoy this year's show?
29. Take a Craft Class — Michael’s Canada offers classes for adults and kids featuring all sorts of different projects. I have noticed that every once in a while they offer a substantial discount on classes so keep your eyes open for that.
30. Volunteer — Why not take some time to give of yourself this Summer? Volunteer at a local food pantry, woman's shelter, or soup kitchen. Ask around, I'm sure the opportunities are plentiful!
31. Find the Best Ice Cream — Go on an ice cream date once a week in an attempt to discover the best ice cream in your city. Places like Marble Slab have coupons often and locally owned shops may have daily specials for you to save.
32. Take an Evening Walk — An evening walk in the summer is just so, so nice. The temperature is somewhat cooler. Plus, there's just something so nice about the evening light.
33. Try Geocaching — Geocachingis an outdoor activity of searching for and finding a hidden object by means of GPS coordinates posted on a website. We thought this sounded so much fun, so we borrowed my parent's GPS to give it a try!
34. Do a Puzzle — Puzzles are a hit in our household. Both my husband and I enjoyed doing puzzles growing up and now our oldest daughter likes them too!
35. Learn a New Skill — Summer is a great time to learn something new, whether it be gardening, knitting, or discovering your artistic talent. Read 52 Things to Learn for Free to get started.
36. Start a New TV Series — Why not use Netflix to start a new TV series during the Summer, and catch up on all the seasons just in time for the Fall premieres. What shows would you recommend to someone looking for suggestions?
37. Do a Science Experiment — Help your kids learn about our fascinating world by trying their hands at a fun science experiment? KidsActivitiesBlog.com has links to a ton of fun projects!
39. Make Homemade Playdough — This is my current favourite no-cook recipe for playdough. My kids used to play for a long time making me "food" to eat. You probably have all the ingredients on hand already!
40. Go for a Bike Ride — Rather than walking, why not put those wheels to good use! Go for a ride around the neighborhood or ride along a nice path your city may have. You could make a day of it if you pack lunches and lots of water.
41. Make a Sock Puppet - This adorable monster sock puppet is anything but scary. Plus, it uses dollar store items to make for a cheap summer activity!
42. Sort Through Clothes — Maybe I'm weird, but I actually get a hankering to do more organizing projects in the summer. (Not just in January.) I find Summer is a great time to clean out my closet and donate what I don’t wear anymore.
43. Paint Your Nails - Summer time means I must have my toe nails painted in pretty colors all the time! I don't normally put nail polish on my finger nails, but my toe nails are fair game for anything bright and fun. Why not have a simple spa time by giving yourself a pedicure?
44. Color a Picture - Coloring isn’t just for kids anymore! Print off coloring pages for adults, and pull out the kid’s coloring books for a fun family time. Play some music for hours of good relaxing fun!
45. Have a Nap - Finally, why not have a nap? No better spot than outside in a nice shady area!
I also whipped up this printable Summer Activity sheet that you can print off and hang somewhere convenient so you're always full of ideas.
Summer doesn't have to be boring for anyone when you're armed with these summer activity ideas! Leave your fun and cheap summer activities in the comments below!
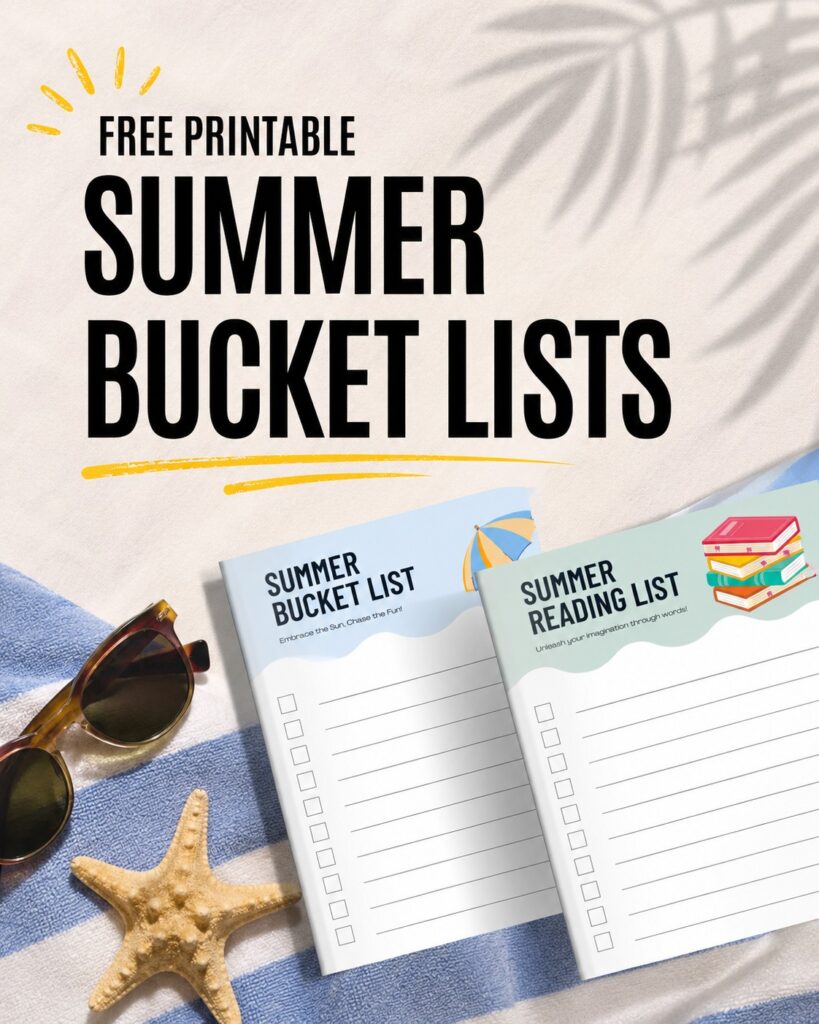
Free Printable Summer Bucket Lists for Kids and Families
Summer is the perfect time to slow down, make memories, and enjoy all the simple pleasures the season has to offer. Whether you're planning family adventures, looking for screen-free activities, or encouraging your kids to read more, these free printable Summer Bucket Lists are here to help.
This printable set includes a Summer Bucket List and a Summer Reading List, making it easy to keep track of all the fun things you want to do before summer comes to an end. From beach days and backyard campouts to library visits and reading challenges, these lists help turn summer goals into lasting memories.
Simply print the pages, hang them on the fridge, and start checking off activities as you complete them. Kids will love creating their own summer plans, and parents will appreciate having an easy way to encourage outdoor play, family time, and reading.
Download your free Summer Bucket Lists today and start making this your best summer yet!
I have also curated a whole bunch of summer things in my Amazon storefront. Find beach essentials, outdoor games, activity books & craft kits, summer reads and more.
What do you have planned for your summer? What's on your reading list? Let us know in the comments!
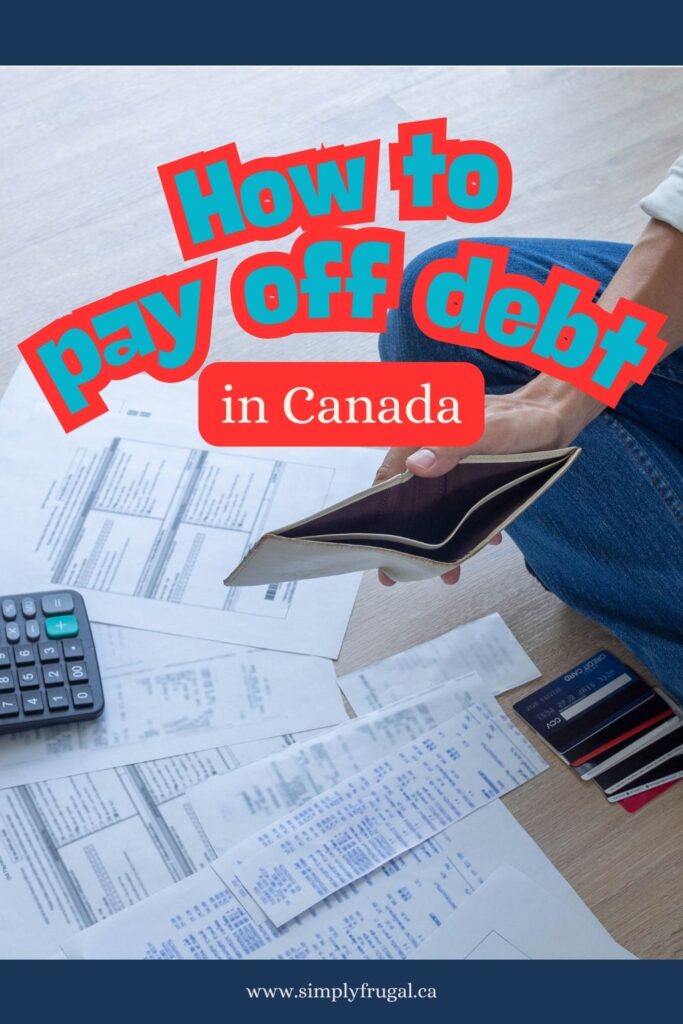
How to Pay Off Debt in Canada: 15 Strategies That Actually Work
If you're wondering how to pay off debt in Canada, you're not alone. Rising living costs, high interest rates, and unexpected expenses have left many Canadians carrying credit card balances, personal loans, lines of credit, and other forms of debt.
The good news is that becoming debt-free is possible. While there isn't a magic solution, there are proven debt repayment strategies that can help you take control of your finances and make steady progress toward your goals.
Whether you're looking for ways to pay off debt fast or simply want a realistic debt payoff plan, these strategies can help.
1. Create a Budget and Stick to It
The first step in any debt repayment plan is understanding where your money is going.
Track your income and expenses for a month and identify areas where you can reduce spending. Even small cuts can free up money that can be applied toward debt payments.
A budget gives every dollar a purpose and helps you avoid relying on credit cards to cover monthly expenses.
2. Stop Adding New Debt
This may seem obvious, but it's one of the most important steps.
If you're actively trying to pay off debt, avoid adding new balances whenever possible. Focus on using cash, debit, or money you already have available rather than financing new purchases.
Paying off debt becomes much harder when balances continue to grow.
3. Live Below Your Means
One of the most effective Canadian debt tips is learning to live on less than you earn.
Living below your means creates extra money that can be used for debt payments, savings, and future financial goals.
Avoid lifestyle inflation and focus on spending intentionally rather than trying to keep up with others.
4. Avoid Unnecessary Upgrades
Many Canadians fall into the trap of upgrading their lifestyle every time their income increases.
Before upgrading your vehicle, phone, wardrobe, furniture, or home, ask yourself whether the purchase is truly necessary. Delaying major upgrades can free up thousands of dollars that can be used toward your debt payoff plan.
5. Use the Debt Snowball Method
The debt snowball method involves paying off your smallest debt first while making minimum payments on all other debts.
Once the smallest balance is paid off, roll that payment into the next debt.
Many people find this strategy motivating because they experience quick wins that help build momentum.
6. Consider the Debt Avalanche Method
The debt avalanche method focuses on paying off debts with the highest interest rates first. This approach can save money on interest over time and may help you pay off debt faster.
Choose the method that keeps you motivated and consistent.
7. Never Pay Full Price
One of the easiest ways to free up extra money is to reduce everyday spending.
The money you save can go directly toward your debt repayment goals.
8. Increase Your Income
While reducing expenses helps, increasing your income can dramatically speed up your progress.
Consider:
Freelance work
Selling unused items
Pet sitting
Childcare
Delivery services
Seasonal employment
Online side hustles
Every extra dollar earned can help you become debt-free sooner.
9. Put Windfalls Toward Debt
When extra money arrives, resist the temptation to spend it.
Consider applying these funds toward debt:
Tax refunds
GST/HST credits
Bonuses
Work incentives
Cash gifts
Inheritance funds
Large lump-sum payments can significantly reduce your debt balance.
10. Automate Your Payments
Automatic payments help ensure you never miss a due date.
Obviously, missing payments can lead to additional fees, increased interest charges, and damage to your credit score. Automation makes it easier to stay consistent with your debt repayment plan.
11. Lower Your Monthly Bills
Review your recurring expenses and look for opportunities to reduce them.
You may be able to save money on:
Internet service
Cell phone plans
Insurance policies
Streaming subscriptions
Banking fees
Simply saving $50 to $100 per month can make a meaningful difference when applied toward debt.
12. Build a Small Emergency Fund
Many people wonder whether they should save money or pay off debt first. Ideally, do both.
Having even $500 to $1,000 set aside for emergencies can help prevent new debt when unexpected expenses occur. Without an emergency fund, a single car repair or appliance breakdown can undo months of progress.
13. Sell Things You No Longer Use
Most households have hundreds or even thousands of dollars worth of unused items.
Consider selling:
Electronics
Furniture
Sports equipment
Children's toys
Clothing
Collectibles
Put the proceeds directly toward your debt instead of spending them elsewhere.
14. Use Raises Wisely
Receiving a raise is exciting, but it's also an opportunity to accelerate your debt payoff journey.
Instead of increasing your spending, direct some or all of the additional income toward your debt.
Many people pay off debt years sooner simply by avoiding lifestyle inflation.
15. Celebrate Progress Without Spending
Paying off debt is a major accomplishment. As you reach milestones, find low-cost ways to celebrate your success.
Take a hike, enjoy a movie night at home, visit a local park, or spend time with family and friends.
Recognizing your progress can help you stay motivated while continuing to work toward becoming debt-free.
Final Thoughts on How to Pay Off Debt in Canada
Learning how to pay off debt in Canada doesn't require drastic measures or a perfect financial situation. Small, consistent actions add up over time.
Whether you choose the debt snowball method, debt avalanche method, or another debt repayment strategy, the most important step is getting started. Create a budget, reduce unnecessary spending, increase your income when possible, and stay committed to your debt payoff plan.
Every dollar you put toward debt today brings you one step closer to financial freedom, lower stress, and a more secure future.
What strategies have helped you pay off debt? Share your best debt repayment tips in the comments below!
Keeping kids entertained doesn't have to cost a fortune. Whether you're looking for ways to fill a summer afternoon, survive a rainy day, or create lasting family memories on a budget, there are plenty of free things for kids to do in Canada.
We all know that exploring nature trails, visiting parks, spending time at the beach, and attending community events are great free activities for families. But today, I want to share six other fun and free activities for kids in Canada that you may not have thought of. If you're looking for affordable ways to keep your children active, engaged, and entertained, these ideas will help you create memorable family experiences all while staying on budget.
Bowling
Do your kids/grandkids love bowling? The Kids Bowl Free program is back this year! This fun program allows your children to enjoy two free games of bowling at participating bowling centres every day, all summer long! There are a lot of participating bowling centres too.
Did you know that The Home Depot offers free monthly Kids Workshops? These are such a neat and fun experience. Kids are given a kit that holds everything they need to build a wooden toy. They build it there with parent or grandparent help. The Home Depot also provides paint for the kids to paint their creation if they want. Highly recommend!
More recently, Rona has started offering free kids workshops as well! Our family hasn't tried these yet, but I bet they're a blast. They aren't monthly, but maybe about every two months.
This is so neat and I feel like it would be amazing to take advantage of for a unique way to travel! Children and youth aged 17 and under can travel for free in Economy class on VIA Rail when accompanied by an adult. Offer valid on Escape and Economy fares on all VIA Rail routes across Canada.
As part of the Canada Strong Pass, kids 17 and under, from June 19 to September 7, 2026, get free admission to national museums as well as select provincial and territorial museums and galleries.
Which of these free activities for kids are you excited to try first? Did I miss anything? Leave a comment letting me know and I'll add it to the list!
How to Be Frugal: Simple Tips to Save Money and Live Well
Learning how to be frugal is one of the best ways to reduce financial stress and feel more in control of your money. Frugal living doesn’t mean depriving yourself or never spending money. It simply means being intentional with your spending and making smarter financial choices.
At its core, frugality is about living well within your means. When you spend less than you earn, you create room in your budget for savings, emergencies, and future goals. Knowing how to be frugal can help you feel more prepared when unexpected expenses pop up and can give you peace of mind during difficult financial seasons.
Years ago, frugal living was simply a normal way of life. Families cooked from scratch, reused what they had, grew gardens, and found creative ways to stretch their budgets. Today, with rising grocery prices, inflation, and increasing living costs, more people are searching for practical ways to save money and learn how to be frugal in everyday life.
The good news is that it’s never too late to start.
You don’t need to completely change your life overnight. Small habits and simple lifestyle changes can make a huge difference over time. Learning how to be frugal is all about making progress little by little and finding ways to live comfortably while spending less.
If you’re wondering how to be frugal, here are some practical tips to help you get started:
1. Never Spend More Than You Earn
One of the most important frugal habits is learning to live below your means. Track your spending, create a simple budget, and avoid relying on credit cards for everyday expenses whenever possible.
Eating out and ordering takeout can drain your budget quickly. Cooking simple meals at home is one of the easiest ways to save money. Start with easy, affordable recipes and build a list of go-to family favourites.
3. Grow Your Own Food
Even a small garden can help reduce grocery costs. Herbs, lettuce, tomatoes, and cucumbers are beginner-friendly options that can save money throughout the growing season.
4. Use the Library
Libraries offer free books, audiobooks, movies, magazines, and more. Using your local library is a simple and effective way to be frugal while still enjoying entertainment and learning opportunities.
5. Cut Unnecessary Subscriptions
Review your monthly expenses and cancel subscriptions you rarely use. Streaming services, apps, and memberships can quietly eat away at your budget each month.
6. Prioritize Your Spending
Spend money on the things that matter most to you and cut back on the things that don’t. Being frugal doesn’t mean never spending money. It means spending intentionally.
7. Compare Prices Before Buying
Take a few extra minutes to compare prices online and in stores before making purchases. Watching for sales and using cashback apps can help you save even more.
8. Keep a Price Book
A price book is a simple way to track the regular prices of items you buy often. This helps you recognize a genuine sale and know when it’s the best time to stock up.
9. Reuse and Repurpose What You Have
Before buying something new, see if you can reuse, repair, or repurpose something you already own. Frugal living often means making the most of what you already have.
10. Make Things From Scratch
Homemade meals, snacks, coffee drinks, and cleaning products are often far cheaper than store-bought versions. Learning basic DIY skills can save a lot of money over time.
11. Use Coupons and Cashback Apps
Coupons still work, especially when paired with sales. Cashback apps and rewards programs are another easy way to reduce your grocery and household expenses.
12. Buy Less Overall
One of the simplest answers to how to be frugal is to buy less. Use what you already have before purchasing more clothing, beauty products, decor, or household items.
Learning how to be frugal is a journey, not an overnight transformation. Every small change you make can help improve your financial situation and reduce stress over time. Frugal living is ultimately about being resourceful, intentional, and confident with your money so you can build a more stable and peaceful life.
Container Gardening for Beginners: How to Start Container Gardening
Not everyone has access to a large backyard or plantable land, which is why container gardening for beginners is such a great option. Growing fruits, vegetables, and herbs in pots allows you to enjoy fresh, healthy produce all summer long. Even if you only have a patio, balcony, or small outdoor space!
For where I’m currently at in life, container gardening has been the perfect solution. It’s much more manageable than a traditional garden because there’s very little weeding involved and no need to till up the ground. Really, the biggest maintenance task is simply keeping everything watered regularly!
Not only is container gardening convenient, but it can also help save money, which is especially important with grocery prices constantly increasing. Even growing a few vegetables at home can help stretch your food budget during the summer months.
While I’m definitely not an expert, I’ve picked up a few helpful tips along the way that can make container gardening for beginners feel a lot less overwhelming.
The first year I tried container gardening, I got a little too ambitious. Instead of starting with just a few plants, I bought nearly every variety labeled for small spaces. At first I was excited, but as the summer went on, it became harder to keep up with everything and many of my plants ended up neglected.
Since then, I’ve learned that one of the best container gardening tips is to start small. Think honestly about how much time and energy you’ll have to care for your plants throughout the season. Starting with just a few containers is a great way to build confidence and enjoy the process without feeling overwhelmed.
Buy your seeds and plants
One of the great things about container gardening for beginners is that it’s become incredibly popular, which means there are now a lot of seed and plant varieties specifically designed for compact spaces.
I’ve found special “Urban Garden Collection” seeds that are meant for pots and small gardens, and there are plenty of compact vegetable varieties available at garden centres as well. Even Amazon Canada carries seeds now, making it easier than ever to get started.
If you’re unsure what grows best in pots, vegetables like lettuce, herbs, radishes, peppers, tomatoes, peas, and beans are all popular choices for container gardens. For a more in depth look at the types of plants that do best in containers, see my post The Best Vegetables for Container Gardening.
Get the right pots
Starting a container garden doesn’t have to be expensive. In fact, many of my containers were free! I used large black 5-gallon buckets that trees and shrubs originally came in. Garden centres and greenhouses often sell used containers cheaply, and you can also check places like Facebook Marketplace for affordable options.
Grow bags are another excellent option for beginner gardeners because they’re lightweight, inexpensive, and easy to store during the off-season.
When choosing containers, make sure they’re large enough for the plants you want to grow. Larger vegetables like tomatoes, peppers, potatoes, peas, and beans need deeper pots with lots of room for roots. Smaller plants like lettuce, herbs, onions, and radishes can grow well in shallower containers.
Find the right light
Sunlight is one of the most important factors in successful container gardening. Most vegetables need several hours of direct sunlight each day in order to thrive.
I keep most of my containers on our back patio where they receive lots of afternoon sun. However, I place my lettuce containers in a cooler area that only gets morning sun because lettuce tends to struggle in extreme heat.
Always check your seed packets or plant labels to see how much sunlight each plant prefers.
Use good potting soil
One of the biggest mistakes beginners make is using regular garden soil in containers. For healthy plants, it’s important to use a good quality potting mix instead. Potting soil is specially designed to provide proper drainage and airflow, which helps prevent root rot and other problems.
If you’re filling large containers, the cost of soil can add up quickly. To save money and reduce the weight of heavy pots, try filling the bottom portion with lightweight materials like crushed pop cans, empty milk jugs, packing peanuts, or old plastic nursery pots before adding soil on top.
Plant, Water, Wait
Now comes the fun part. Planting! Follow the directions on your seed packets or plant labels for spacing and planting depth. Once everything is planted, water your containers thoroughly.
For tiny seeds like lettuce, using a spray bottle or gentle watering can help prevent seeds from washing away.
After that, all that’s left to do is keep watering regularly, enjoy watching your plants grow, and wait for harvest time!
I hope these simple tips for container gardening for beginners help you feel more confident about starting your own garden this year! Have you ever tried growing vegetables in containers? What would you love to plant first?